Discover essential tips for selecting and installing drywall anchors, avoid common mistakes, and enhance your DIY projects with expert techniques and guidance.Are you ready to take your DIY home projects to the next level? Understanding the ins and outs of drywall anchors can significantly enhance your home improvement skills and bolster the durability of your installations. Whether you’re hanging shelves, mounting artwork, or securing heavy fixtures, the right anchors are crucial for a successful and safe result. This article will guide you through the essentials of drywall anchors—from choosing the right type for your specific application to avoiding common pitfalls that can derail your DIY ambitions. With practical tips and a step-by-step installation guide, you’ll be well-equipped to tackle your home projects with confidence. Say goodbye to guesswork and hello to professional-quality results!
Understanding Drywall Anchors for Your DIY Home Projects
When undertaking any DIY home project, it’s crucial to have a solid understanding of drywall anchors, as they are key to ensuring that your fixtures are securely mounted to your walls. Drywall itself is not strong enough to hold weight, which is where the use of anchors comes into play. These small-but-mighty tools allow you to hang everything from shelves to heavy artwork without damaging your walls.
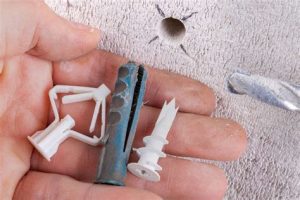
There are several types of drywall anchors available, each designed for specific applications. The most common types include:
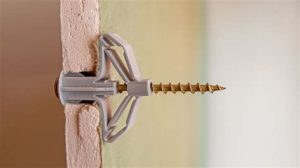
- Expansion anchors: These are designed to expand behind the wall to provide a strong hold. They are ideal for light to moderate loads.
- Molly bolts: Ideal for medium to heavy loads, these anchors consist of a sleeve that expands when a screw is tightened, providing stability.
- Screw-In anchors: These require no pre-drilling and easily screw into the drywall. They are best suited for lighter objects.
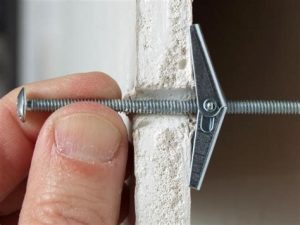
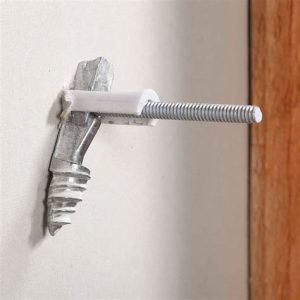
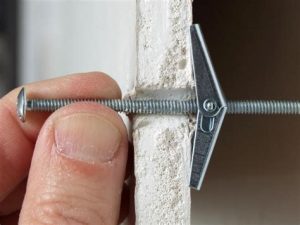
- Toggle bolts: Perfect for heavier items, toggle bolts feature a spring-loaded wing that opens behind the drywall, providing a very secure hold.
Understanding the properties and loading capacities of each anchor type is essential for your DIY home success. Selecting the appropriate drywall anchor for your specific project not only makes installation easier but also enhances the overall safety and stability of your installations. Keep in mind the weight of the items you plan to hang, and always refer to the manufacturer’s specifications for guidance.
In your DIY home projects, proper installation techniques of anchors and awareness of their limitations will lead you to achieve a professional-looking finish with peace of mind that your fixtures are secure. Investing time to understand drywall anchors can save you from potential mishaps down the line.
Choosing the Right Drywall Anchors for Specific Applications
When it comes to DIY home projects, choosing the correct drywall anchor is crucial for ensuring the stability and safety of your installations. Different applications demand specific types of anchors, and understanding these will help you select the right one for the job.
Types of Drywall Anchors
Here’s a quick overview of some common drywall anchors and their best applications:
| Anchor Type | Weight Capacity | Best For |
|---|---|---|
| Plastic Expansion Anchors | 10-25 lbs | Light fixtures, picture frames |
| Metal Hollow Wall Anchors | 25-50 lbs | Shelves, mirrors |
| Toggle Bolts | 50 lbs or more | Heavy items like cabinetry or large mirrors |
| Self-Drilling Anchors | 20-100 lbs | Various applications with moderate weight |
| Concrete Screws | Dependent on wall type | Application in masonry walls |
Factors to Consider
To choose the right drywall anchor, consider the following factors:
- Weight of the Item: Determine how heavy the item you intend to hang is, and select an anchor that can support that weight.
- Wall Type: Ensure that the anchor type you choose is compatible with your wall material and thickness.
- Installation Environment: Consider whether the installation will be in a dry or wet area, as this can affect the performance of certain anchors.
- Removal and Adjustments: Some anchors allow for easy removal and reinstallation, which can be beneficial for items that require adjustments.
By understanding the specific needs of your DIY home projects, you can make informed decisions on the appropriate drywall anchors. This will not only ensure your installations are secure but will also enhance the overall look and functionality of your space.
Step-by-Step Guide to Installing Drywall Anchors Effectively
Installing drywall anchors is essential for ensuring that your DIY home projects are secure and durable. Below is a straightforward step-by-step guide to help you install drywall anchors effectively:
Step 1: Gather Your Tools and Materials
Before you start, make sure you have the following tools and materials:
- Drywall anchors (choose based on the weight of the item to be hung)
- Drill and drill bits
- Screwdriver
- Tape measure
- Pencil or marker
- Level (if necessary)
Step 2: Mark the Desired Location
Use a pencil or marker to mark the spot where you want to install the anchor. Ensure that it’s at the right height and level, especially if you are installing multiple anchors.
Step 3: Drill the Pilot Hole
Using the appropriate drill bit, drill a pilot hole at the marked location. The size of the hole should correspond to the size of the drywall anchor you are using. If you’re uncertain about the size, check the packaging for guidance.
Step 4: Insert the Drywall Anchor
Carefully push the drywall anchor into the pilot hole. Depending on the type of anchor, you may need to tap it slightly with a hammer to ensure it’s flush with the wall. Some anchors require you to screw them in, so check the instructions provided with your anchors.
Step 5: Secure the Fastener
Once the drywall anchor is properly installed, align the item you wish to hang, and use a screwdriver or drill to drive the screw into the anchor. Make sure it is tight but be careful not to overtighten, as this can damage the drywall.
Step 6: Test the Installation
After installing the item, gently pull or push to test its stability. This ensures the anchors are holding correctly and that your DIY home projects are secure.
By following these steps, you can successfully install drywall anchors effectively for your DIY home projects. Remember to choose the right type of anchor for the weight of the item you’re hanging to avoid unnecessary damage to your walls or the items you wish to display.
Common DIY Home Mistakes to Avoid with Drywall Anchors
When tackling DIY home projects, anchors play a crucial role in ensuring that fixtures remain secure. However, there are common mistakes that DIYers often make when using drywall anchors that can compromise their projects. Here are some pitfalls to avoid:
1. Not Checking Wall Material
Many DIY enthusiasts assume that all walls are created equal. However, the type of wall and its material can greatly affect how well drywall anchors perform. Always confirm whether your walls are drywall, plaster, or something else before proceeding with your project.
2. Overloading Anchors
Every anchor has a weight limit, and exceeding this limit can lead to failure. Make sure to check the specifications of your drywall anchors and account for the weight of the items you’ll be hanging.
3. Choosing the Wrong Type of Anchor
Not all drywall anchors are suitable for every application. Selecting the wrong type can lead to inadequate support. For heavy items, consider toggle bolts or molly bolts, while lighter items may only require plastic expansion anchors.
4. Incorrect Installation Depth
Anchors must be driven into the wall to the correct depth to provide proper support. If they are not flush with the wall or buried too deep, they may not hold up over time. Always follow the manufacturer’s instructions for installation.
5. Ignoring Stud Location
Where possible, try to install anchors directly into the wall studs, which provide the strongest support. If you have access to a stud finder, use it to identify stud locations and enhance the structure of your installation.
6. Not Pre-drilling Holes
Some anchors require pre-drilled holes, while others do not. Failing to pre-drill can result in damaged drywall and ineffective anchor installation. Consult the directions for your specific anchors to ensure proper installation.
7. Reusing Old Anchors
While it may seem environmentally friendly, reusing old anchors often poses a risk. Anchors that have been previously removed may not perform adequately. Always use new anchors for safety and security.
8. Neglecting to Secure Anchors Properly
Make sure your anchors are properly secured before hanging any items. This includes tightening screws and ensuring that anchors are flush with the wall. A secure anchor system is key to maintaining the safety of your DIY home projects.
9. Underestimating the Importance of Tool Selection
Using the wrong tools to install anchors can lead to improper installation. Ensure you have the appropriate drill bits, screwdrivers, and any other necessary tools for your specific anchor type.
10. Forgetting to Maintain Your Installations
After installation, it’s important to check periodically for stability. A visual inspection every few months can help catch any potential problems before they become serious, ensuring your DIY home projects remain safe and functional.
By avoiding these common mistakes, you can enhance the quality and safety of your DIY home projects while making sure that your drywall anchors perform their best.
Enhancing Your DIY Home with Proper Anchor Techniques
When it comes to maximizing the effectiveness of your DIY home projects, employing proper anchor techniques can make a significant difference. Utilizing the right techniques not only ensures stability but also enhances the overall aesthetic of your space. Here are some tips to enhance your DIY home with the correct use of drywall anchors:
1. Assess the Weight and Type of the Object
Before selecting your drywall anchor, it’s crucial to evaluate the weight and type of the object you plan to hang. For heavier items, such as shelves or mirrors, choose stronger anchors like toggle bolts or metal anchors. This consideration will help prevent sagging or damage to your walls.
2. Use Multiple Anchors for Heavier Items
For items that exceed the weight capacity of a single anchor, distribute the weight by using multiple anchors. This not only provides better support but also protects your drywall from cracking or pulling away from the wall over time.
3. Don’t Over-tighten Your Screws
One common mistake when installing anchors is over-tightening screws, which can strip the anchor or damage your wall. Use just enough torque to secure the item firmly without compromising the integrity of the anchor or surrounding drywall.
4. Regularly Check and Maintain
After installation, periodically check the status of your anchors, especially for items that experience frequent use or stress. Tighten loose screws or replace anchors if signs of wear are visible. Regular maintenance can prolong the life of your installations and preserve the beauty of your DIY home.
5. Coordinate Anchor Color with Wall Design
If possible, match the color of the anchors or screws with your wall paint or decor. This attention to detail can help create a seamless look, elevating the sophistication of your DIY projects. Paint over screws if needed to blend with the wall.
By adhering to these proper anchor techniques, you can not only ensure the safety and stability of your installations but also enhance the aesthetic charm of your DIY home projects. Properly securing your decorations and fixtures empowers you to design your space with confidence.
Frequently Asked Questions
What are drywall anchors and why are they used?
Drywall anchors are devices installed in drywall to provide support for heavy items mounted on walls. They help distribute the load, preventing the screws from pulling out.
What types of drywall anchors are commonly available?
Common types include toggle bolts, molly bolts, plastic anchors, and screw-in anchors, each designed for different weight capacities and applications.
How do I choose the right drywall anchor for my project?
Select a drywall anchor based on the weight of the item you want to hang and the type of wall you have. For heavier items, toggle bolts or molly bolts are recommended.
Can I use drywall anchors for items hung in plaster walls?
Yes, drywall anchors can be used in plaster walls, but take care to choose the appropriate type, as plaster is denser than drywall and may require heavier-duty anchors.
What tools do I need to install drywall anchors?
You’ll typically need a drill, a screwdriver, a hammer (for certain types of anchors), and a level to ensure your item is hung straight.
How deep should I drill to install a drywall anchor?
The depth varies depending on the type of anchor. Always refer to the manufacturer’s instructions for specific guidance, but generally, you’ll want to drill approximately halfway into the wall.
Are drywall anchors reusable?
Most drywall anchors are not reusable once installed. It’s best to remove the anchor carefully and replace it with a new one when taking down a mounted item.
