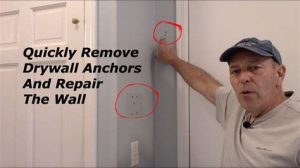
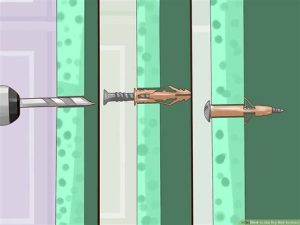
Learn how to remove drywall anchors effectively with our step-by-step guide, tool selection tips, and repair advice for a flawless finish!Are you tired of unsightly holes left behind after removing drywall anchors? Whether you’re redecorating or moving to a new space, knowing how to effectively and cleanly remove these anchors can save you time and stress. In this comprehensive guide, we’ll explore various types of drywall anchors and the best tools to help you with the removal process. Our step-by-step instructions will make the task straightforward, while our expert tips on repairing the drywall will ensure a flawless finish. Say goodbye to those pesky holes and hello to a beautifully smooth wall. Dive in as we guide you through the ins and outs of removing drywall anchors without leaving a trace!
Understanding Different Types Of Drywall Anchors
Drywall anchors come in various types, each designed for specific applications and load capacities. Understanding these types is essential for effective removal without damaging the surrounding drywall. Here’s an overview of the most common types:
1. Plastic Expansion Anchors
These are the simplest type of anchors, made from flexible plastic. When a screw is inserted, the anchor expands, gripping the drywall for a secure hold. They are best used for lightweight applications, like hanging pictures.
2. Metal Expansion Anchors
Similar to plastic anchors, but made of metal, these are stronger and ideal for heavier items. They expand against the drywall as the screw is tightened, providing a more robust hold. Removing these may require additional care to prevent damaging the wall.
3. Toggle Bolts
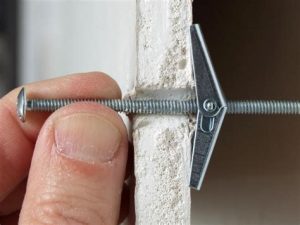
Toggle bolts consist of a bolt and a pair of wings that fold and then expand behind the drywall. This type can support significant weight, making it suitable for shelves and large pictures. Removing toggle bolts can be tricky, as the wings may be difficult to maneuver behind the drywall.
4. Self-Drilling Anchors
Self-drilling anchors are designed to create their own hole in the drywall. These often have a sharp tip that allows for easy installation without pre-drilling. They are useful for medium-weight items and can be removed with a simple twist.
5. Molly Bolts
Molly bolts are metal anchors that expand behind the wall for a secure grip. The anchor is inserted into a pre-drilled hole, and when tightened, the back of the anchor opens up. This feature makes them durable but can complicate removal.
Each type of drywall anchor has its specific benefits and challenges when it comes to removal. Familiarizing yourself with these different types will help you prepare for the removal process and mitigate the potential for damage to your walls, ultimately assisting you with the next steps outlined in the article.
How To Select The Right Tools For Removal
When it comes to removing drywall anchors, having the right tools is essential for an effective and clean job. Below is a list of the necessary tools you may need, depending on the type of drywall anchor you’re dealing with:
- Screwdriver: A basic tool for unscrewing the anchor from the wall. A drill may also be useful for tougher anchors.
- Pliers: These are especially helpful for pulling out plastic or toggle anchors that may not unscrew easily.
- Utility Knife: Ideal for cutting through the drywall around the anchor to minimize damage.
- Stud Finder: Useful for identifying the right location to assess damage before removal and ensuring that you avoid hitting any electrical wires or plumbing.
- Putty Knife: Great for smoothing out any rough edges left behind from the anchor removal.
- Patch Kit: Useful for repairing any holes left by the anchors. Look for a kit that includes spackle, sandpaper, and a putty knife.
Selecting the right tools will not only facilitate the removal process but also ensure that your drywall remains intact as much as possible. Depending on your comfort level and the type of anchors you’re dealing with, you may need just a few basic tools or a more comprehensive set. Always proceed with caution and ensure that you have the right equipment before starting.
Step-By-Step Guide To Remove Drywall Anchors
Removing drywall anchors can seem daunting, but with the right approach, it becomes a manageable task. Follow this step-by-step guide on how to effectively remove drywall anchors without leaving a trace.
Step 1: Gather Your Tools
Before starting, ensure you have all the necessary tools at hand. You will typically need:
- Screwdriver (flathead or Phillips depending on the anchor type)
- Pliers (for difficult-to-remove anchors)
- Utility knife
- Putty knife
- Sandpaper or a sanding block
- Drywall patch (if needed)
- Joint compound for repairs
Step 2: Identify the Anchor Type
Depending on the type of anchor used (toggle bolts, plastic anchors, molly bolts, etc.), the removal method will vary slightly. Determine the type to choose the best technique.
Step 3: Unscrew the Anchor
Using a screwdriver, carefully unscrew any visible part of the anchor. For screw-type anchors, this usually involves turning the screw counterclockwise until it comes out of the wall. If the screw is not completely removable, it could be a toggle bolt that requires a different approach.
Step 4: Remove the Anchor Body
If the anchor is designed to collapse (like a molly bolt), gently pull on the anchor’s body with pliers while twisting. If the anchor doesn’t budge, you may need to push it into the wall cavity using a screwdriver or similar tool.
Step 5: Patch Up the Holes
Once you have removed the anchor, you will be left with holes in the drywall. Use your putty knife to apply joint compound into the holes, smoothing it out to blend with the surrounding wall.
Step 6: Sand and Paint
After the joint compound has dried, lightly sand the area until it is smooth and even with the rest of the wall. Finally, touch up with paint to fully conceal the repair, ensuring your wall looks as good as new.
By following these steps, you will successfully learn how to remove drywall anchors without leaving a trace, ensuring your walls remain clean and visually appealing.
Tips To Repair Drywall After Anchor Removal
After successfully removing drywall anchors, you may find that the holes left behind need some attention. Here are some effective tips to help you repair the drywall and achieve a seamless finish.
1. Clean the Area
Start by cleaning the area around the holes. Remove any dust or debris to ensure proper adhesion of the repair materials.
2. Choose the Right Filler
Select a high-quality drywall compound or spackle that’s appropriate for the size of the holes. For small holes (like those from finishing nails), lightweight spackle will suffice. For larger holes, you might need a setting-type compound that can handle more substantial repairs.
3. Apply the Filler
Using a putty knife, apply the filler into the hole. Ensure you overfill slightly to account for shrinkage as it dries. Smooth it out as best as you can to minimize sanding later.
4. Let it Dry
Allow the filler to dry completely according to the manufacturer’s instructions. This is essential for a strong bond and a smooth surface.
5. Sand it Smooth
Once dry, use fine-grit sandpaper to carefully sand the patched area until it’s flush with the surrounding wall. Try to avoid damaging the nearby drywall.
6. Prime and Paint
After sanding, prime the repaired area to seal it, especially if you used a compound that isn’t pre-mixed. Once the primer dries, repaint the area to match the existing wall color, blending it in seamlessly.
7. Final Inspection
Step back and inspect your repair work. If necessary, repeat the sanding and painting process to achieve a flawless finish.
By following these tips on how to repair drywall after anchor removal, you can restore your wall to its original state and avoid any noticeable traces of the former anchors.
Final Touches: Ensuring A Flawless Finish
After successfully removing drywall anchors and repairing any damage, ensuring a flawless finish is crucial for maintaining an attractive wall appearance. The final touches can make a significant difference in the overall look of your wall. Here are key steps and tips to achieve a seamless repair:
1. Sanding Smooth
Once the patched area is completely dry, use a fine-grit sandpaper to gently sand the surface. This will help to smooth out any bumps or imperfections left from the patching compound. Sanding can drastically improve the final appearance of the repaired area.
2. Primer Application
Before painting, apply a coat of primer over the patched area. This step is essential as it helps seal the patch, ensuring that the paint adheres properly and the colors match seamlessly with the surrounding wall. Choose a primer suitable for drywall and allow it to dry completely.
3. Choosing The Right Paint
Select a paint that matches the existing wall color. If possible, use the same brand and finish to ensure consistency. Applying a test patch on a less visible area can help confirm that the color matches. Once satisfied, proceed to paint over the primer.
4. Painting Techniques
Use a small brush or roller to apply paint over the primed area carefully. Feather the edges by blending the new paint with the surrounding paint to avoid noticeable lines. Apply two coats if necessary, allowing sufficient drying time between each coat for optimal coverage.
5. Final Inspection
After the paint has dried, step back and inspect your work from different angles and lighting conditions. This will help you identify any areas that may need touch-ups or further blending to achieve a flawless finish.
By following these final touches, you can ensure that your wall looks as good as new, even after removing drywall anchors. With a careful approach, the repair will be virtually invisible, keeping your space looking polished and well-maintained.
Frequently Asked Questions
What are drywall anchors and why are they used?
Drywall anchors are hardware devices used to secure objects to drywall surfaces. They provide a stronger hold for screws than drywall alone, making them ideal for hanging heavy items.
What types of drywall anchors are most commonly used?
The most common types of drywall anchors include plastic expansion anchors, metal toggle anchors, and molly bolts. Each type has different weight capacities and installation methods.
What tools do I need to remove drywall anchors?
To remove drywall anchors, you typically need a pair of pliers, a screwdriver, and possibly a utility knife or drywall saw if the anchor is difficult to extract.
How can I tell if a drywall anchor is removable?
Most plastic and metal anchors can be pulled out, but toggle anchors are often more complicated to remove. Look for any exposed parts of the anchor that can be gripped for removal.
What are the steps to safely remove a drywall anchor?
To safely remove a drywall anchor, first, unscrew the screw from the anchor, then use pliers to gently pull the anchor out. If it doesn’t come out easily, consider cutting around it or using a utility knife.
Will removing a drywall anchor leave a hole?
Yes, removing a drywall anchor will usually leave a small hole in the drywall. However, if done carefully, especially with plastic anchors, the damage can be minimal.
How can I repair the wall after removing a drywall anchor?
After removing a drywall anchor, fill the hole with joint compound or spackling paste. Once it dries, sand it down to make it smooth, then touch up the area with paint for a clean finish.
