Learn about drywall anchors, their types, essential tools for removal, a step-by-step guide, common mistakes to avoid, and tips from DIY enthusiasts.Are you tired of dealing with pesky drywall anchors that refuse to budge? Whether you’re renovating your space or simply patching up old holes, removing drywall anchors can be a real challenge without the right approach. Our guide, Real-Life Experiences: Removing Drywall Anchors Successfully, is here to equip you with essential insights and practical tips to make this task a breeze. From understanding the different types of drywall anchors to identifying the essential tools needed for a successful removal, we cover it all. We’ll walk you through a step-by-step process, highlight common mistakes to avoid, and share valuable tips from DIY enthusiasts. By the end of this article, you’ll have the confidence and knowledge to tackle drywall anchors like a pro, transforming your DIY projects into seamless successes. Let’s get started!
Understanding Drywall Anchors: Input and Types
Drywall anchors are essential components used to secure items to drywall, especially when dealing with heavy or bulky objects. They come in various types, each designed for specific applications and weight capacities. Understanding these anchors will give you insight into the best practices for removal and replacement.
Types of Drywall Anchors
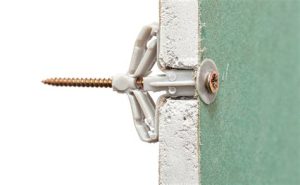
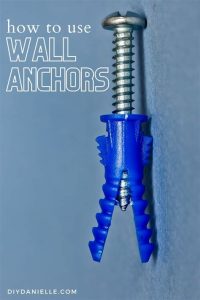
- Expansion Anchors: These are the most common type of drywall anchor. As the screw is tightened, the anchor expands behind the drywall, creating a tight grip. They’re ideal for lightweight items.
- Molly Bolts: A hybrid option that provides a more robust solution. Molly bolts have a sleeve that expands as the screw is tightened, providing added support for medium-weight items.
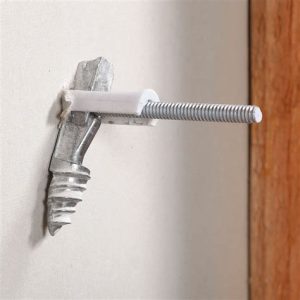
- Self-Drilling Anchors: Designed for quick installation, these anchors can screw directly into the drywall without a pre-drilled hole. They’re great for lightweight to medium loads.
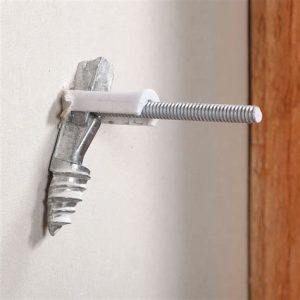
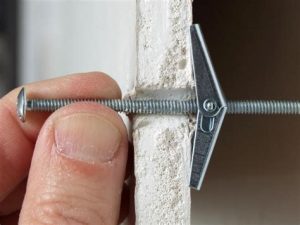
- Toggle Bolts: These anchors consist of a bolt and a toggle that opens once inside the wall. They are ideal for heavy items and can distribute weight more evenly across the wall.
Choosing the Right Anchor
When selecting a drywall anchor, consider the weight of the item you intend to hang and the conditions of your wall. For example, if you’re hanging shelves loaded with books, opt for toggle bolts or molly bolts for added strength. Understanding the different types of drywall anchors informs your process of removal, ensuring you maintain the integrity of your walls while transitioning your decor.
In your journey of removing drywall anchors, knowing the type of anchor will help you decide on the necessary tools and techniques. This understanding can prevent damaging the surrounding drywall, facilitating a smoother overall experience, as reflected in many real-life experiences shared by DIY enthusiasts.
Essential Tools for Removing Drywall Anchors
When it comes to removing drywall anchors, having the right tools is crucial for a smooth and successful removal process. Below is a list of essential tools that you will need to efficiently tackle the task:
1. Screwdriver
A screwdriver is often the primary tool required to remove screws that hold the drywall anchors in place. Depending on the type of screw, you may need a Phillips or flat-head screwdriver.
2. Pliers
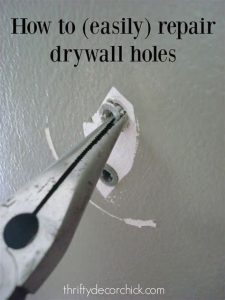
Pliers can be useful for gripping the anchor, especially if it is a toggle anchor or a screw-type anchor that needs to be pulled out of the wall. Needle-nose pliers can provide added precision and control.
3. Utility Knife
If the drywall anchor’s hole is stubborn, a utility knife can help you cut around the area, ensuring that you remove any debris or damaged drywall surrounding the anchor.
4. Wall Repair Kit
After removing the drywall anchor, it’s likely that you will need to repair the wall. A wall repair kit, which usually includes spackling compound, a putty knife, and sanding paper, can help you patch any holes left behind.
5. Drill
In some cases, using a drill can facilitate the removal of stubborn anchors. A suitable drill bit can help to carefully extract screws or even the anchors themselves if they are stripped or damaged.
6. Vacuum Cleaner
A vacuum cleaner can help to clean up any dust or debris created during the removal process, ensuring your work area remains tidy. It’s especially helpful after using a utility knife or drill.
Being equipped with these essential tools will streamline your experience and allow for a more controlled removal of drywall anchors. As gathered from the real-life experiences shared by DIY enthusiasts, having the right tools at hand can make all the difference in achieving a successful outcome.
Step-By-Step Process for Successful Removal
Successfully removing drywall anchors requires careful execution to avoid damage to the surrounding wall. Here’s a step-by-step guide to help you navigate the process smoothly:
Step 1: Assess the Anchor Type
Before you begin, determine whether you have a screw-type, toggle bolt, or molly bolt anchor. Each type requires a slightly different removal technique, so understanding the type you’re dealing with is crucial for a successful removal.
Step 2: Gather Your Tools
Ensure you have all the necessary tools ready: a screwdriver (or drill), pliers, a utility knife, and a putty knife. Having these tools on hand will streamline the removal process.
Step 3: Remove the Screw
If you’re dealing with a screw-type anchor, simply unscrew it from the wall using your screwdriver. For toggle bolts, use a drill to remove the entire bolt. Be cautious to avoid causing more damage to the drywall.
Step 4: Pull Out the Anchor
For screw anchors, once the screw is removed, gently pull the anchor straight out. If you’re working with a molly bolt, this may require using pliers to grasp the anchor and pull it free. If the anchor resists, do not force it; instead, proceed to the next step.
Step 5: Address Any Remaining Pieces
If parts of the anchor remain embedded in the wall, use a utility knife to carefully cut away the surrounding drywall. Ensure you don’t damage the wall further.
Step 6: Repair the Wall
After successfully removing the anchor and any debris, it’s time to repair the hole. Use a putty knife to fill in the gap with joint compound, smoothing it over to match the surrounding wall. Allow it to dry completely, then sand it down for a seamless finish.
Step 7: Touch Up the Paint
Once the repair is dry and smooth, you may need to apply touch-up paint to blend the area with the rest of the wall. Ensure you utilize paint that matches the existing color for a uniform look.
By following these steps, you can remove drywall anchors effectively while minimizing damage to your walls. Many DIY enthusiasts have shared their real-life experiences with this process, emphasizing the importance of patience and proper technique for the best outcomes.
Common Mistakes to Avoid During Removal
Removing drywall anchors can seem straightforward, but there are several common mistakes that many DIY enthusiasts encounter that can lead to frustration or even damage. By being aware of these pitfalls, you can ensure a smoother removal process and maintain the integrity of your walls. Here are some crucial mistakes to avoid:
- Forgetting to Identify the Anchor Type: Different types of drywall anchors require different removal techniques. Not knowing the type of anchor you are dealing with can lead to improper removal, potentially damaging the wall.
- Using Incorrect Tools: Using the wrong tools can lead to unintended damage. Always ensure you have the right tools for the type of anchor being removed—whether it’s pliers, a screwdriver, or a drill.
- Applying Excessive Force: Applying too much force can lead to bigger holes and a more extensive repair job later. Take your time and apply gentle pressure when removing anchors.
- Neglecting to Repair Wall Damage: Once the anchors are removed, it’s crucial to patch any holes properly. Failing to do so will leave your walls looking unsightly and may affect future wall treatments.
- Ignoring Safety Precautions: Always wear safety goggles and gloves when working with tools and anchors. This protects you from flying debris and sharp edges.
- Rushing the Process: Take your time when removing anchors. Rushing can lead to mistakes that may cause damage. Ensure you understand each step of the process before proceeding.
By avoiding these common mistakes, you can achieve a successful and clean removal of drywall anchors, minimizing stress and ensuring your walls remain intact for any future projects.
Real-Life Experiences: Tips from DIY Enthusiasts
When tackling the task of removing drywall anchors, many DIY enthusiasts have faced a variety of experiences that have shaped their approaches. Here are some practical tips that have emerged from real-life scenarios:
Choose the Right Moment
Timing can be crucial. Many experienced DIYers recommend planning the removal of drywall anchors when you have ample time and are not rushed. This helps in avoiding mistakes and ensuring a smoother process.
Work with the Right Environment
Ensure your workspace is well-lit. Proper visibility can make a significant difference in the accuracy of your removal. Enthusiasts suggest using a portable light or headlamp to eliminate shadows and enhance focus.
Stay Calm and Patient
One of the most common pieces of advice shared by seasoned DIY enthusiasts is to remain calm and patient throughout the process. Rushing can lead to mistakes or damage to the surrounding drywall, making the task more complicated.
Get Comfortable with Your Tools
Many experienced individuals suggest familiarizing yourself with your tools beforehand. Whether it’s a screwdriver, pliers, or a drill, knowing how each tool behaves can greatly assist in making the removal process seamless.
Ask for Help if Needed
Don’t hesitate to seek assistance if you’re unsure. Many DIYers have found that having an extra pair of hands can not only make the job easier but also safer.
Post-Removal Repairs
After removing the anchors, it’s common for novices to neglect the repair of the holes left behind. DIY enthusiasts recommend keeping some spackle or joint compound on hand to fill in any holes, ensuring a professional-looking finish.
By reflecting on these real-life experiences and implementing these tips, you’ll be better equipped to handle the removal of drywall anchors effectively and with confidence.
Frequently Asked Questions
What are drywall anchors and why are they used?
Drywall anchors are fasteners used to support weight on drywall surfaces. They provide a stable base for screws when mounting objects like shelves, pictures, or heavy appliances, preventing the screws from pulling out.
What tools do I need to remove drywall anchors?
To remove drywall anchors, you typically need a flathead screwdriver, a pair of pliers, and a utility knife. For some types of anchors, a drill may also be useful.
What are the different types of drywall anchors?
The most common types of drywall anchors include toggle bolts, plastic expansion anchors, molly bolts, and self-drilling anchors. Each type has its own method of installation and removal.
How do I know if the drywall anchor is removable?
Most drywall anchors can be removed, but some, like toggle bolts, may require more effort. Check the anchor type; if it protrudes from the wall, it is usually removable.
What is the best method for removing plastic expansion anchors?
For plastic expansion anchors, often you can simply pull them out using pliers. Alternatively, you can use a flathead screwdriver to pry them out gently.
Can removing drywall anchors damage my wall?
Removing drywall anchors can leave small holes in the wall, but they are generally minor. You can easily repair these with spackle or joint compound.
What should I do after removing a drywall anchor?
Once the anchor is removed, fill the hole with spackle or joint compound for a smooth finish. After it dries, you can sand it down and paint over it to match the surrounding wall.
