
Your television suddenly needs to come down from the Omni wall mount—whether for wall repairs, cable management, or relocating your entertainment setup. Knowing exactly how to remove TV from Omni wall mount safely prevents screen damage, avoids injury, and saves valuable time during the process. Modern flat-panel TVs combine significant weight with fragile construction, making proper removal technique essential regardless of whether you’re working with a fixed, tilting, or full-motion Omni mount. This guide walks you through every critical step to successfully detach your television while protecting your investment.
The removal process typically takes 15-30 minutes depending on your mount type and cable complexity, but rushing leads to costly mistakes. Larger TVs (65+ inches) often weigh 50-85 pounds, requiring careful handling and proper technique. Before attempting removal, understand that Omni wall mounts secure your TV through specific locking mechanisms that vary by design—using the wrong approach could damage your equipment or create safety hazards. With the right preparation and knowledge, you’ll complete the job efficiently and safely.
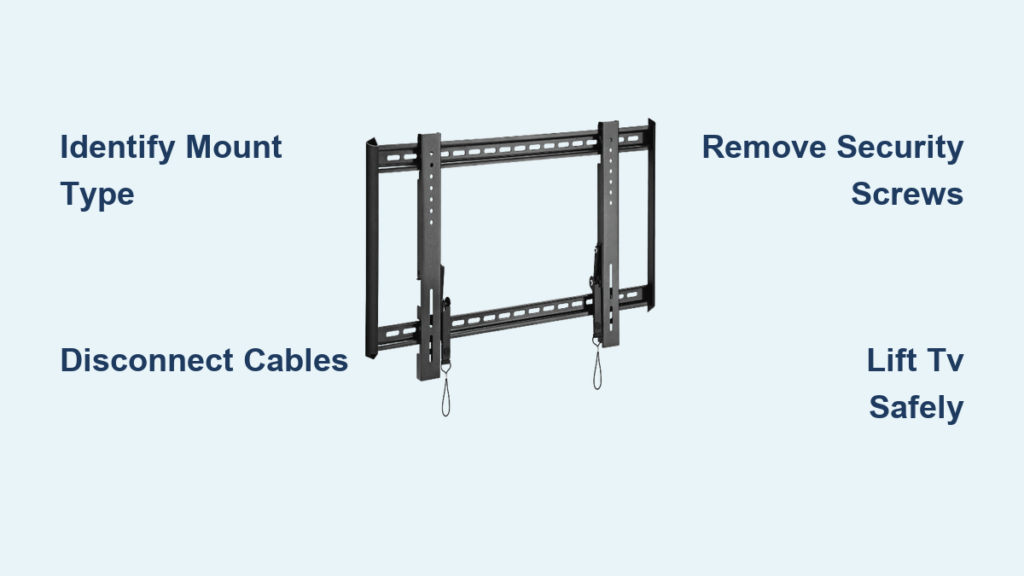
Identify Your Omni Mount Type Before Starting

Knowing which Omni mount you have determines your exact removal procedure—using the wrong method risks damaging your television or mount. Fixed Omni mounts hold your TV flush against the wall with zero adjustment, secured by two to four downward-facing security screws at the bottom connection point. Tilting mounts add vertical angle adjustment but use the same basic screw-locking mechanism as fixed mounts, with slight differences in mounting plate geometry to accommodate the pivot points.
Full-motion Omni mounts feature an extendable arm that swivels side-to-side and tilts vertically, requiring additional positioning steps before removal. These mounts often use vertical screws, horizontal pins, or pull-release mechanisms that disengage without tools. Examine your mount carefully: if your TV moves outward from the wall and swivels horizontally, you have a full-motion system requiring different handling than fixed or tilting mounts.
Critical warning: Never assume your mount type—incorrect identification leads to stripped screws or damaged components. Look for manufacturer labels on the mount assembly or check your original installation documentation to confirm your specific Omni mount model before proceeding.
Essential Tools for Safe TV Removal From Wall Mount
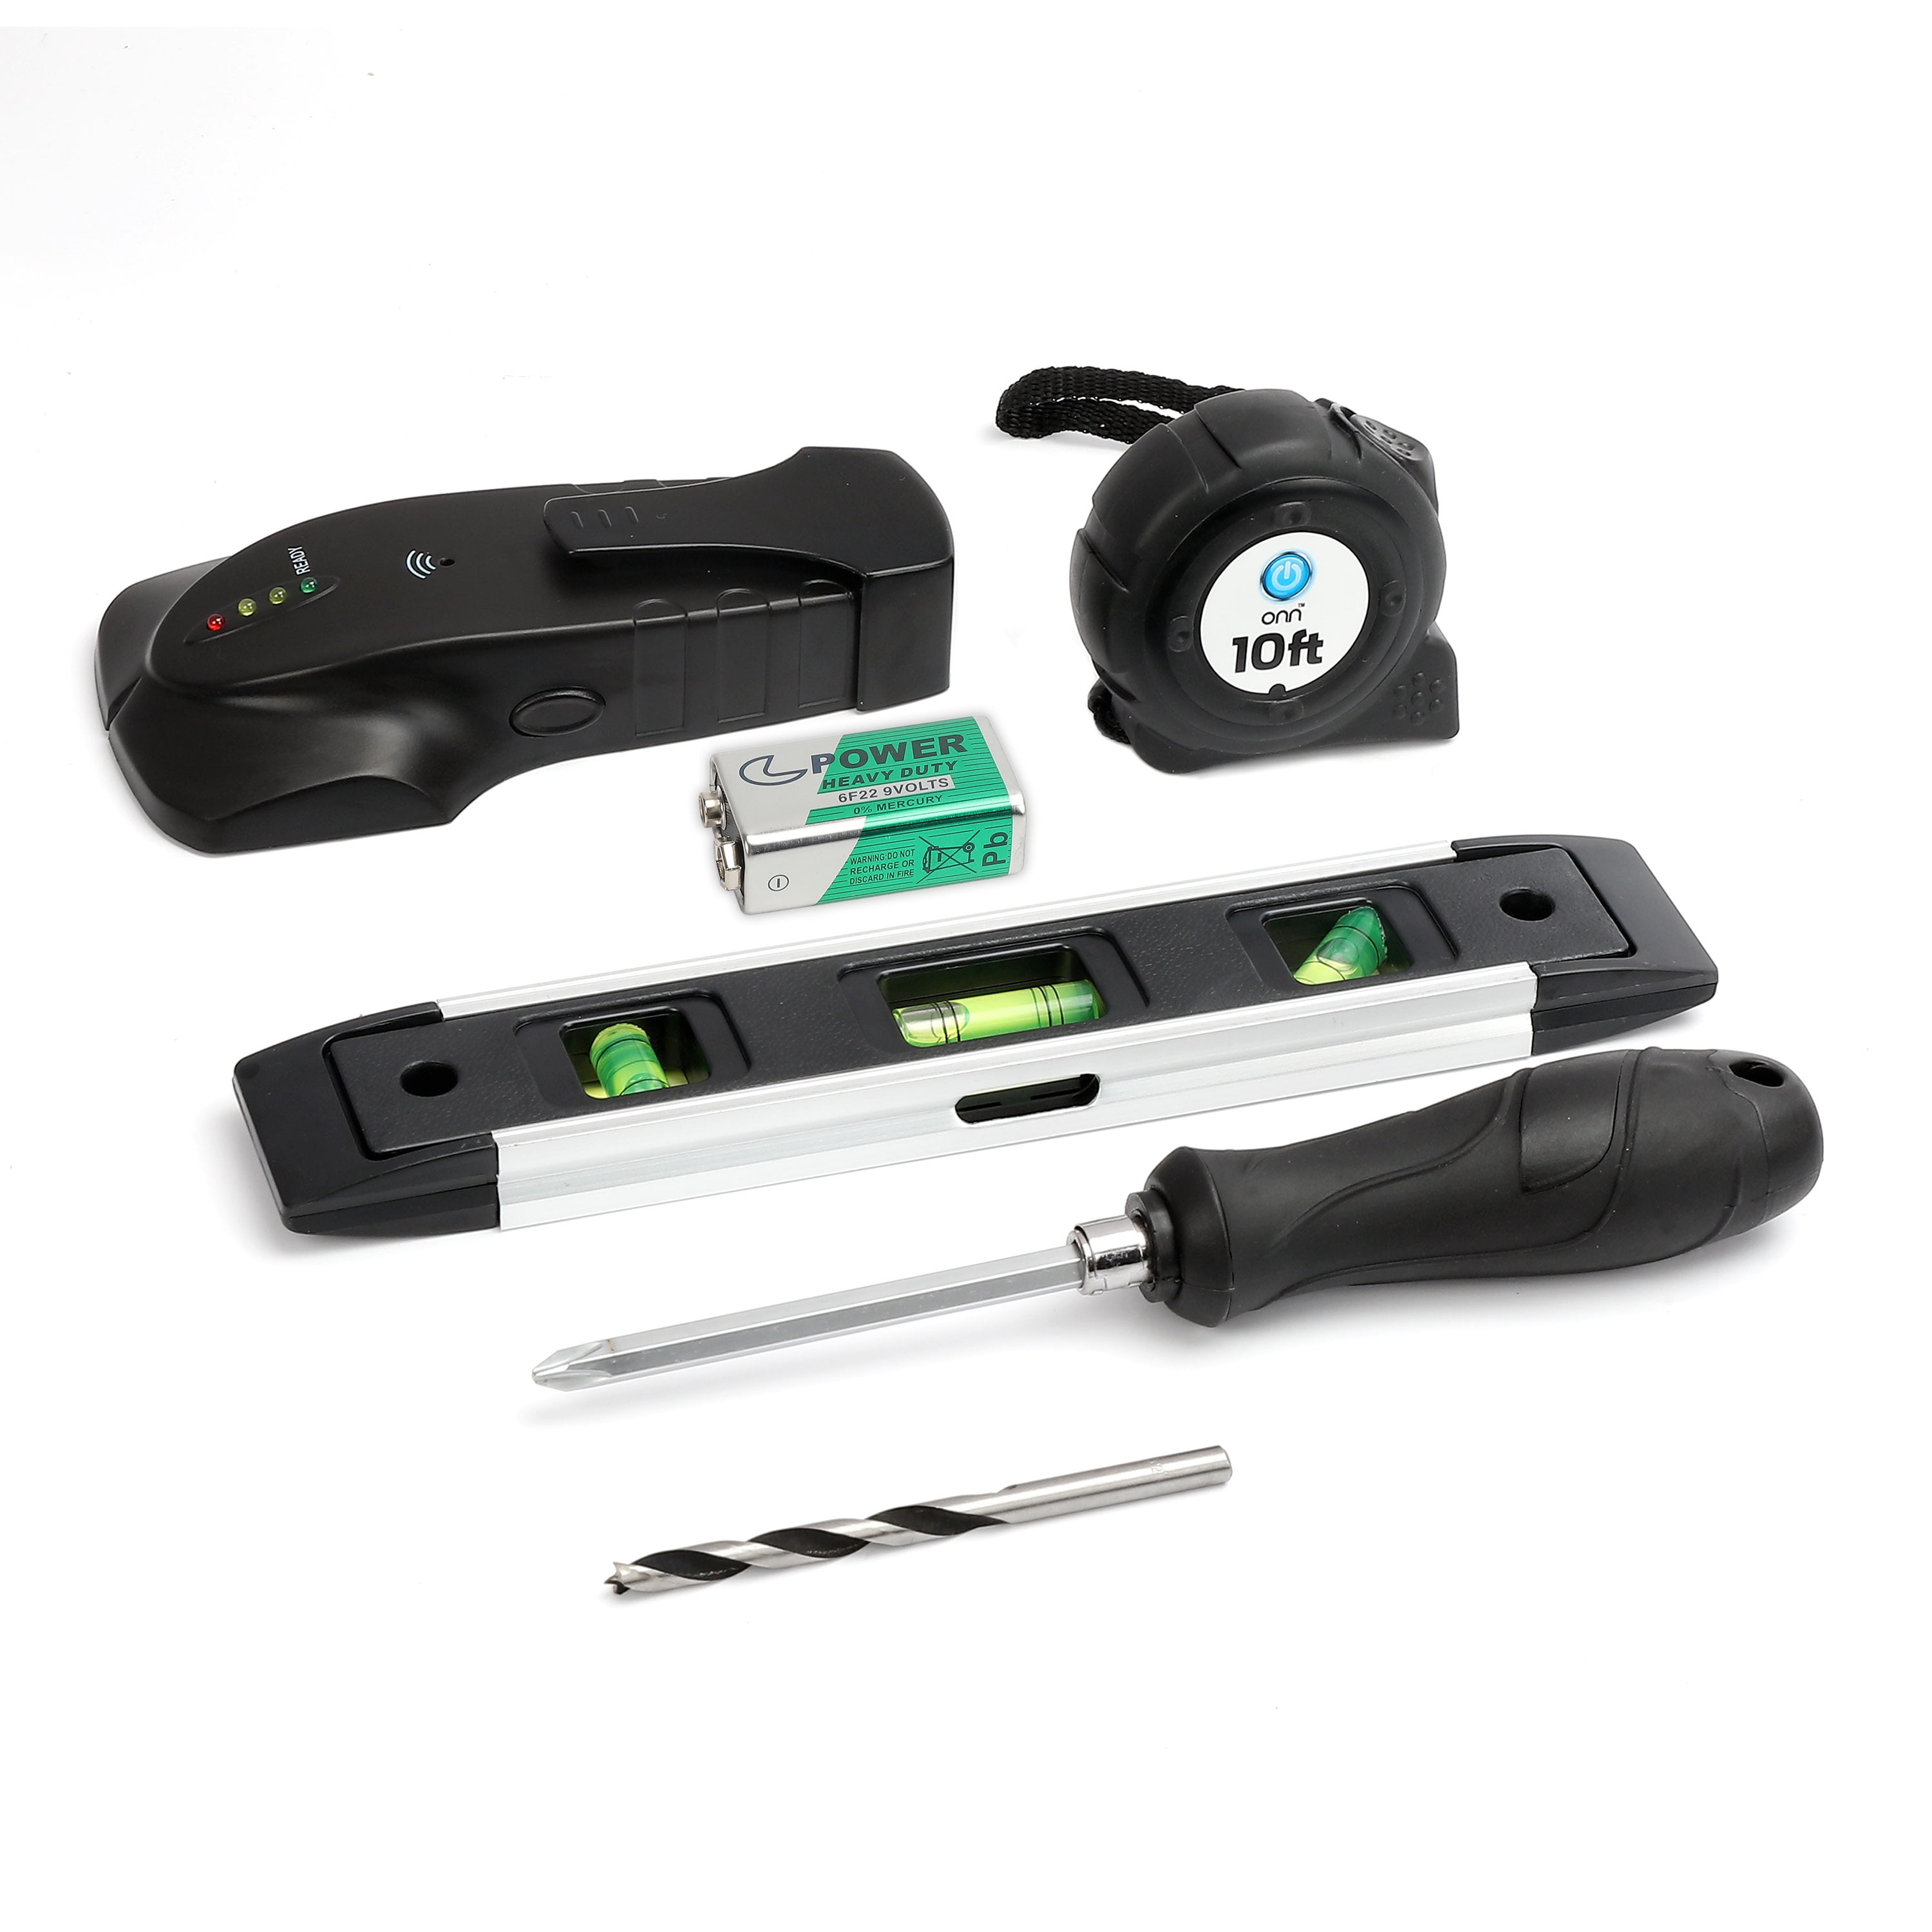
Gathering the right tools before starting prevents frustrating interruptions and ensures smooth removal. A long-handled Phillips screwdriver provides the reach needed to access recessed security screws while delivering adequate torque—standard screwdrivers often prove too short, especially on larger TVs mounted at typical heights. Include both metric and standard Allen wrenches in your toolkit, as many Omni mounts use hex-head fasteners for security components and TV attachment points.
A bright flashlight illuminates the shadowed area where security fasteners connect the TV to the wall plate—this is non-negotiable for identifying all locking mechanisms. Additional must-have items include:
- Ziplock bags or hardware organizers for storing removed fasteners
- Labels and marker for identifying component locations
- Soft towels or moving blankets to protect your TV surface
- Cable ties for organized wire management
Attempting removal without proper tools risks stripped screws, dropped TVs, or damaged components. The 5 minutes spent gathering these essentials prevents hours of repair work or replacement costs down the line.
Create a Safe Workspace for TV Dismounting
Establishing a proper landing zone for your TV after removal protects both your screen and floor surfaces from damage. Clear a flat, stable area directly beneath your mounted TV and cover it with soft materials—multiple towels or moving blankets work best. This surface must support your TV’s full weight without tipping, so avoid furniture with rounded edges or unstable surfaces.
Position yourself and your assistant on either side of the TV with clear pathways to the landing zone. Ensure at least 3 feet of clearance around the entire workspace to prevent tripping over cables or obstacles during the transfer. If your TV is mounted above furniture like a fireplace mantel, clear that surface completely and verify it provides stable, level support.
Time-saving tip: Place your tool kit and storage containers within easy reach but away from your immediate work area—this prevents accidental knocks that could send tools falling onto your TV screen during the critical removal phase.
Properly Disconnect All Cables Before Removal
Disconnecting cables properly prevents wire damage and eliminates interference during the lifting process. Start by unplugging the power cord from both the TV and wall outlet, then systematically detach all video connections including HDMI, DisplayPort, and component cables. Don’t forget audio connections like optical cables, RCA inputs, and speaker wires that could create tension when lifting.
Label each cable using masking tape and a marker before disconnecting—write “HDMI 1 to Cable Box” rather than just “HDMI 1” for maximum clarity during reinstallation. Alternatively, take detailed photos showing cable routing and connection points as a visual reference. Bundle disconnected cables with Velcro straps (never twist ties) and store them in a labeled container near your mounting hardware.
Critical mistake to avoid: Never attempt removal with any cables still attached—this creates dangerous tension that can damage input ports, pull the TV off balance, or cause you to drop the television while trying to manage wires during the lift.
Locate and Remove Security Fasteners Correctly
With cables disconnected and your assistant positioned, use your flashlight to examine the mounting interface and identify all security fasteners. Fixed and tilting Omni mounts typically feature two downward-facing screw heads at the bottom connection point—these are your primary locking mechanisms. Full-motion mounts may have vertical screws, horizontal pins, or pull-release tabs depending on the manufacturer.
Confirm the fastener type before attempting removal—Phillips heads require a standard Phillips driver, while square or star-shaped heads need specialized tools. Match your tool precisely to prevent stripping. With your assistant supporting the TV, engage the tool with the first fastener and turn counter-clockwise to remove completely. Place each fastener in your labeled storage container immediately to prevent loss.
Pro tip: Check for hidden fasteners—some Omni mounts incorporate secondary locking mechanisms behind small access panels or beneath rubber covers. Run your fingers along the mounting interface to feel for any additional securing points you might have missed.
Lift Your TV From the Mounting Plate Safely
Once all security fasteners are removed, grip the TV firmly on both sides with both hands, supporting the edges without covering ventilation ports. Your assistant should mirror this position on the opposite side. Apply steady upward pressure, lifting the TV straight up at least 3-4 inches to ensure the mounting hooks completely clear the wall plate ridge.
Maintain vertical alignment during the lift—tilting or angling can cause the hooks to catch on the mounting plate. Move the TV smoothly toward your prepared landing zone, lowering it gently onto the protected surface. Keep your feet shoulder-width apart and lift with your legs, not your back, to avoid strain injuries.
Time estimate: This critical lifting phase should take no more than 30 seconds when properly coordinated—any longer indicates improper technique or insufficient preparation that increases drop risk.
Special Removal Steps for Full-Motion Omni Mounts
Full-motion mounts require additional positioning before security fasteners become accessible. First, grasp the TV on both sides and carefully pull it forward from the wall, then swing it to the side to expose the mounting connection point. This articulation reveals the security mechanisms that remain hidden when the TV sits flush against the wall.
With the mount fully extended, locate the security mechanisms—these may include vertical screws, horizontal pins, or pull-release tabs. Remove all fasteners according to their specific design, storing each component carefully. Once disengaged, lift the TV straight upward to unhook the mounting plate from the armature connection point.
Expert note: Full-motion mounts often have cable management channels that require special attention—verify all cables are fully disconnected before attempting removal, as residual connections can create dangerous tension on the armature during separation.
Troubleshoot Common TV Removal Problems
Stripped security screws resist standard removal techniques but have practical solutions. Apply penetrating oil to the screw head and wait 5 minutes before attempting removal again. For severely stripped heads, place a rubber band between your screwdriver and the fastener to improve grip, or use a dedicated screw extractor tool designed for damaged fasteners.
Hooks that refuse to release despite fastener removal often indicate debris buildup or slight misalignment. Gently wiggle the TV from side to side while applying upward lift pressure—this motion typically dislodges minor obstructions. If resistance persists, recheck for secondary locking components you may have missed during initial inspection.
When to call a professional: If your TV exceeds 75 inches or weighs more than 85 pounds, consider hiring a certified installer. The cost of professional assistance ($50-$150) remains minor compared to potential repair costs from dropped TVs ($300+ for screen replacements).
Inspect Mount and TV After Successful Removal
Take advantage of this access opportunity to inspect both components thoroughly. Examine the wall-mounted plate for damage, checking screw holes for enlargement from previous installations and verifying all articulation points move freely. Clean dust from ventilation slots on the TV’s rear panel using compressed air—this maintenance extends component lifespan by preventing overheating.
Check cable connections and input ports for debris or damage, addressing any issues before reinstallation. If you’ll be reinstalling the TV immediately, verify all mounting hardware remains in good condition with no stripped threads or bent components that could compromise security.
Maintenance bonus: This inspection phase takes only 5-10 minutes but identifies potential problems before they develop into safety hazards or performance issues after reinstallation.
Reinstall Your TV Securely After Maintenance
When reinstalling, align the TV’s mounting plate hooks precisely with the wall plate or armature connection point. Lift straight up and over to engage the hooks, ensuring they’re fully seated before releasing support. Reinstall all security fasteners in their original positions, tightening until snug but avoiding over-tightening that can strip screw holes.
Test your installation by gently attempting to lift the TV downward—it should remain completely secure. For full-motion mounts, verify all articulation features function properly before connecting cables. Power on the TV and check all input sources to confirm proper cable connections.
Final verification: Complete one full cycle of all mount functions (tilting, swiveling, extending) before considering the job finished—this confirms your reinstallation maintains all original functionality without restrictions.

