
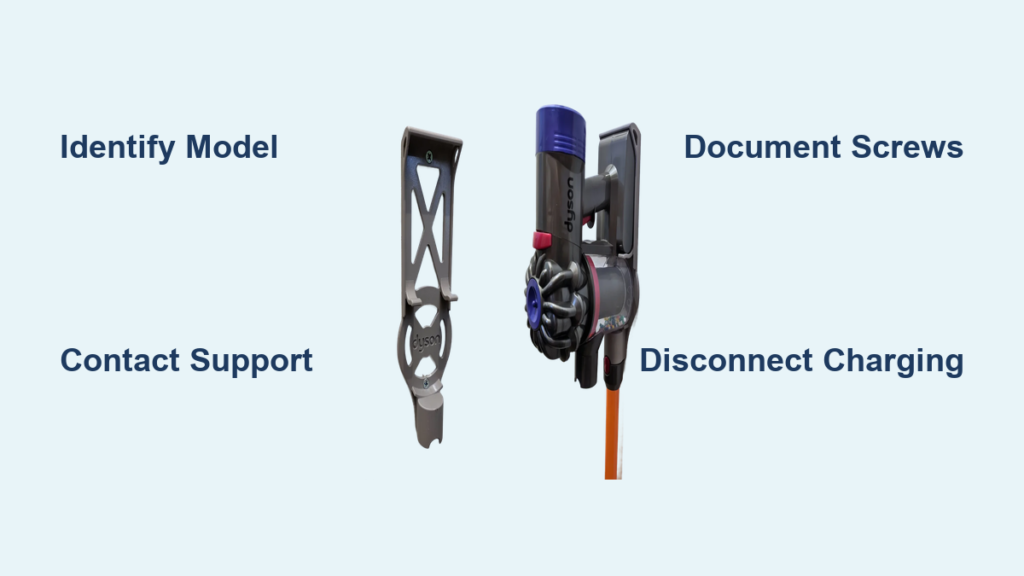
Removing your Dyson wall mount requires careful planning and the right approach to avoid wall damage or equipment issues. Unlike standard mounting systems, Dyson wall mounts vary significantly across models, making generic instructions potentially problematic. The research shows Dyson doesn’t publish universal disassembly guides—you must identify your specific model first to get accurate removal instructions. This guide reveals the proper preparation steps, support channels, and documentation practices that make wall mount removal safe and successful, even when official disassembly procedures aren’t publicly available.
Before touching any tools, locate your Dyson machine’s serial number—this three-digit prefix (like “123” in “123-AU-A12345”) is your key to model-specific support. Without this identifier, you’ll struggle to get precise disassembly guidance from Dyson’s technical team. Many users waste hours attempting removal only to strip screws or damage wall surfaces because they skipped this critical step. By following this process, you’ll gather everything needed for a smooth removal while protecting your warranty coverage.
Identify Your Dyson Model Using Serial Number First
Where to Find Your Machine’s Critical Identifier
Your Dyson’s serial number label appears directly on the machine, typically near the charging port or on the base. Look for a format like “AB1-AU-A123456” where the first three characters before “-AU-” serve as your model code. This identifier determines which wall mount system your vacuum uses—some incorporate charging contacts requiring electrical disconnection, while others feature simple mechanical brackets. Attempting removal without confirming your model risks damaging integrated electronics or compromising reinstallation security.
Why Generic Instructions Fail for Dyson Wall Mounts
Dyson’s wall mount designs vary substantially between cordless vacuum generations. V6 models use different mounting hardware than V10 or V15 series units, with some featuring tamper-resistant screws or hidden release mechanisms. The research confirms no universal disassembly procedure exists across their product line—what works for one model could damage another. This explains why many online tutorials lead to stripped screws or broken components. Always verify your specific model before proceeding to avoid costly mistakes that void warranty coverage.
Contact Dyson Support Before Touching Any Tools
Phone Support: Fastest Path to Model-Specific Guidance
Call Dyson directly at 1800 239 766 during business hours (Monday-Friday 8am-6pm, Saturday 8am-5pm AEST) with your serial number ready. Support specialists can walk you through your exact mount’s disassembly sequence—whether it requires pressing hidden release tabs, disconnecting charging wires, or removing specific fasteners in correct order. Many users report resolving removal questions in under 10 minutes when they provide clear photos of their mount alongside the serial number. This direct guidance prevents the most common DIY disasters like sheared screw heads or damaged wall anchors.
Live Chat and Messenger Alternatives for Written Instructions
If phone calls aren’t your preference, use Dyson’s live chat feature visible on their website when support agents are available. Facebook Messenger at m.me/DysonAustralia provides another text-based option for non-urgent inquiries. These channels deliver step-by-step written instructions you can follow at your own pace—particularly helpful when dealing with multi-step disassembly sequences. Request photos or diagrams during your chat session; technicians often share visual aids showing exact screw locations and release mechanisms for your specific model.
Prepare Your Workspace Like a Professional Technician

Essential Tools for Safe Wall Mount Removal
Gather these five critical items before starting: Phillips and flathead screwdrivers (sizes 0-2), a flashlight for inspecting tight spaces, painter’s tape for marking screw positions, a soft cloth to protect your vacuum, and a magnetic parts tray. The research indicates most Dyson mounts use standard fasteners, but some newer models incorporate security screws requiring specialized bits. If your initial tools don’t fit, stop immediately and contact Dyson support—they’ll specify any special drivers needed without risking damage to tamper-proof hardware.
Document Your Mount Configuration Thoroughly
Take six critical photos before disassembly: the entire mount from front, close-ups of both sides, the connection point where vacuum attaches, any visible screws or release mechanisms, the wall surface around the mount, and the serial number location. Number screws as you remove them using painter’s tape labels—Dyson mounts often use multiple screw lengths that must return to original positions during reinstallation. This documentation serves two purposes: it creates a visual reference for reassembly and provides evidence if warranty questions arise from the removal process.
Avoid These Three Costly Disassembly Mistakes
Mistake #1: Forcing Release Mechanisms Without Confirmation
Many Dyson mounts feature hidden release tabs that must be pressed in specific sequences before removal. Users commonly damage mounts by yanking the vacuum downward without checking for these mechanisms. Always verify release procedures through Dyson support first—some models require pressing upward while others need side pressure. If you hear cracking sounds during removal, stop immediately; this indicates plastic components are breaking from improper technique.
Mistake #2: Using Incorrect Screw Removal Sequence
Dyson mounts often secure with multiple screws where order matters—removing the bottom screw first can cause the entire assembly to shift unexpectedly. Support technicians report frequent cases where users strip mounting holes by applying uneven pressure. When in doubt, remove screws in a star pattern (opposite corners sequentially) and keep slight upward pressure on the mount to prevent sudden drops. If a screw resists turning, apply penetrating oil and wait 10 minutes rather than forcing it.
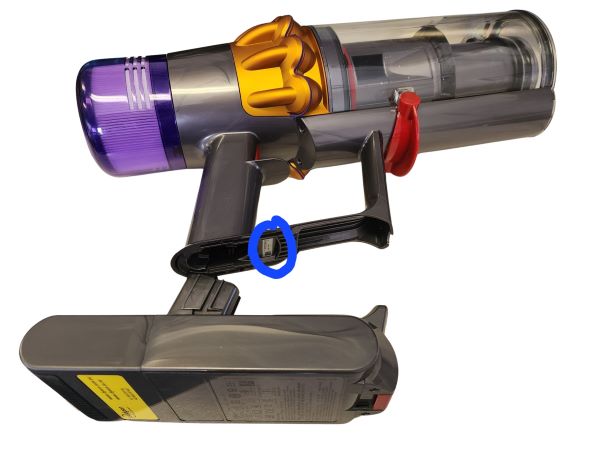
Mistake #3: Ignoring Charging Contact Disconnection
Models with integrated charging (most V8 and newer units) require electrical disconnection before full removal. Attempting to pull the mount away while contacts remain engaged damages both the mount and vacuum’s charging system. Support documentation shows these connections typically involve a small plastic clip securing the wiring harness—visible only after removing the first 1-2 screws. Never cut or pull wires; always follow Dyson’s specific disconnection procedure for your model.
Post-Removal Best Practices for Future Reinstallation
Organize Components for Hassle-Free Reassembly
Store removed parts in a labeled system: use small ziplock bags marked “top screws,” “bottom screws,” and “mounting plate.” Include your reference photos in the bag with larger components—this prevents confusion months later when reinstalling. For wall anchors, keep them attached to their respective holes using masking tape labeled with screw size. This organization method saves 30+ minutes during reinstallation and eliminates the frustration of mismatched hardware.
Repair Wall Surfaces Immediately After Removal
Fill mounting holes within 24 hours using spackle matched to your wall type—standard for drywall, epoxy for concrete, or wood filler for timber surfaces. Sand smooth once dry and apply matching paint before patching becomes noticeable. Delaying repairs allows wall material to dry unevenly, making touch-ups more visible later. If anchors pulled through drywall, install new toggle bolts in fresh locations rather than reusing damaged holes when reinstalling.
When Professional Help Saves Time and Money
Contact Dyson support immediately if you encounter these three red flags: stripped screw heads preventing removal, visible electrical wiring connected to the mount, or mounting hardware that breaks during disassembly. Many users compound initial problems by attempting makeshift solutions—like drilling out broken screws—that cause extensive wall damage requiring professional repair. Dyson’s technicians can often guide you through extraction techniques that preserve wall integrity, or connect you with local service providers who specialize in their mounting systems.
For complex installations or valuable wall surfaces (like tiled bathrooms or heritage plaster walls), professional removal costs $75-$150 but prevents $300+ in potential repair bills. The support team can verify whether your specific mount qualifies for their authorized service network—some newer models have proprietary mounting systems requiring specialized tools not available to consumers.
Final Note: Successfully removing your Dyson wall mount hinges on model identification and official support engagement—not generic online tutorials. By documenting your setup, contacting Dyson with your serial number, and preparing properly, you’ll avoid the most common removal disasters that lead to damaged equipment and costly wall repairs. Always prioritize safety over speed—when in doubt, stop and call 1800 239 766 for real-time guidance from technicians who know your specific mount’s disassembly sequence. Proper preparation transforms what seems like a complicated task into a smooth 20-minute procedure with no collateral damage.

