
Mounting plywood on a wall creates durable, versatile surfaces for workshops, accent walls, and storage solutions. Whether you’re transforming your garage into a functional workspace or adding character to your living room, properly installed plywood delivers lasting results. Many DIYers struggle with warped panels, visible seams, or insecure mounting that leads to costly repairs down the line. This guide eliminates those frustrations with field-tested techniques that ensure your plywood stays perfectly flat and securely attached for years. You’ll discover the exact tools, materials, and methods professionals use to achieve clean, professional installations every time.
Select the Perfect Plywood for Your Wall Project
Choosing appropriate plywood makes or breaks your wall installation. The wrong selection leads to warping, visible defects, or structural failure under load.
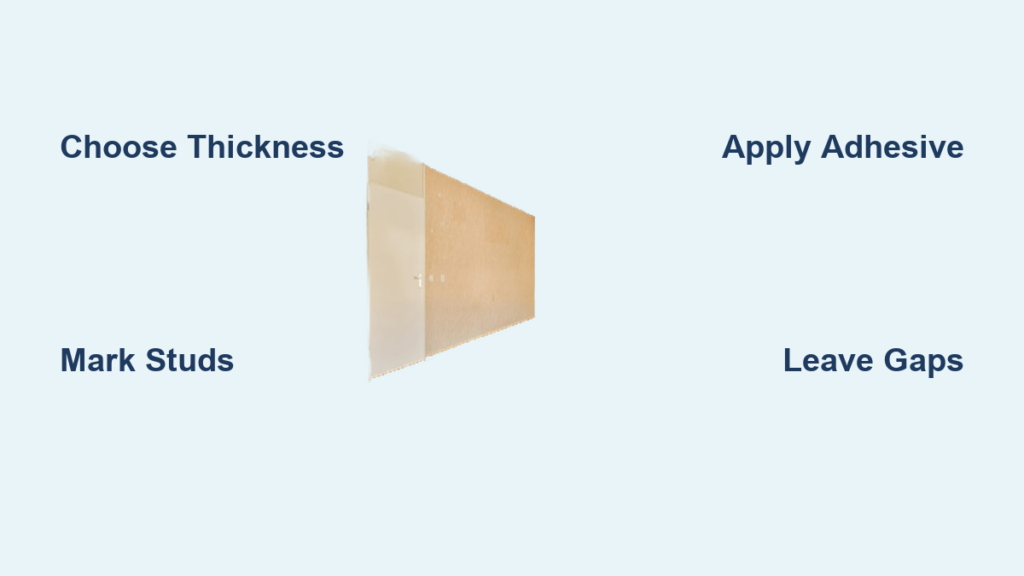
Determine Optimal Plywood Thickness
Thin 1/4-inch plywood works for lightweight decorative applications like photo displays or lightweight storage. For most wall installations requiring durability, 1/2-inch plywood provides the ideal balance of strength and workability. Heavy-duty applications such as workshop surfaces or mounting heavy equipment demand 3/4-inch plywood that resists flexing and supports substantial weight. Measure your intended use case carefully—installing thin plywood for heavy tools creates immediate problems.
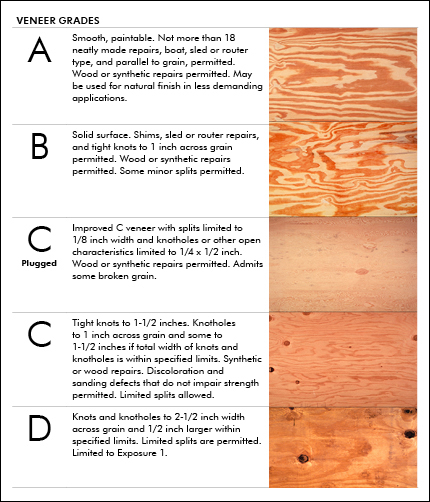
Match Plywood Grade to Your Application
A-grade plywood features smooth, knot-free surfaces perfect for visible installations where appearance matters. This premium grade accepts paint and finish beautifully with minimal preparation. B-grade plywood contains minor repairs and small knots that remain hidden beneath paint but save significant costs for large installations. Avoid C or D grades for visible wall applications—they feature prominent defects that compromise aesthetics even after finishing. For workshop walls where appearance matters less, these economical grades deliver adequate performance.
Choose Material Type Based on Environment
Interior plywood works well for dry indoor spaces like living rooms and bedrooms. When mounting plywood in moisture-prone areas such as basements, bathrooms, or garages, exterior-rated plywood prevents swelling and delamination. Hardwood plywood like birch or maple creates stunning feature walls with beautiful grain patterns that require only clear finishing. For budget-conscious projects, softwood plywood such as pine offers affordability and easy workability while still delivering solid performance.
Gather Essential Tools Before Starting Your Installation
Preparation prevents frustration when mounting plywood on walls. Having the right tools ready avoids mid-project delays and ensures professional results.
Secure the Right Mounting Hardware
Construction adhesive creates seamless bonds that distribute weight evenly across the entire wall surface. For removable installations or heavy panels, French cleats provide adjustable, secure mounting that supports substantial weight. When using mechanical fasteners, select corrosion-resistant screws rated for your wall type—drywall anchors for hollow walls or direct-to-stud screws for maximum holding power. Never rely solely on nails for wall-mounted plywood; they pull out under stress more easily than screws.
Verify You Have Proper Measuring Equipment
A 25-foot tape measure ensures accurate wall dimension capture, while a 4-foot level guarantees your plywood sits perfectly straight. Laser levels project crisp reference lines across large walls, eliminating guesswork during alignment. Mark cut lines with a carpenter’s pencil for visibility, and use a chalk line to create straight guidelines for multi-panel installations. Skipping proper measuring tools leads to crooked installations and wasted materials.
Prepare Cutting and Fastening Tools
A circular saw with a fine-tooth blade makes clean plywood cuts with minimal tear-out. Apply painter’s tape along cut lines to prevent splintering on the visible face. A cordless drill with variable speed control drives screws without stripping heads or damaging plywood surfaces. Use a brad point drill bit for precise pilot holes that prevent splitting. Clamp the plywood securely before cutting or drilling to maintain control and ensure safety.
Prepare Your Wall Surface for Flawless Installation
Proper wall preparation creates the foundation for secure plywood attachment and prevents future problems like gaps or uneven surfaces.
Clean and Repair Wall Imperfections
Remove all dust, grease, and debris from the wall surface using a degreaser and clean cloth. Fill holes, cracks, and dents with joint compound, sanding smooth when dry. Address moisture issues in basements or bathrooms before installation—untreated moisture causes plywood to swell and detach. Check for electrical boxes and plumbing that require special accommodation during installation.
Create a Level Mounting Surface
Identify wall irregularities by running a straightedge across the surface. Apply additional joint compound to low spots and sand high areas for uniform contact. For severely uneven walls, install furring strips to create a level plane that ensures full plywood contact. This step prevents gaps that compromise adhesive bonds and create visible waviness in finished installations.
Prime Porous Surfaces for Better Adhesion
Apply primer to bare drywall, concrete, or other porous surfaces before mounting plywood. Primer seals the surface, improves adhesive bonding, and prevents uneven absorption that weakens glue bonds. Allow primer to dry completely according to manufacturer specifications—typically 2-4 hours—before applying adhesive or mounting panels.
Execute Precision Layout Planning for Professional Results
Thoughtful layout planning minimizes cuts, maximizes material efficiency, and creates installations that look professionally done.
Map Stud Locations Accurately
Use a stud finder to locate wall studs every 16 or 24 inches, marking their edges clearly with pencil. Verify stud locations by tapping—the solid sound confirms wood behind drywall. Mark stud centers with a vertical line for precise fastener placement. When studs don’t align with panel edges, plan for appropriate wall anchors in those sections.
Create Reference Lines for Perfect Alignment
Snap a chalk line horizontally across your installation area to establish your starting point. Use a level to draw vertical reference lines at each end of the wall. These lines guide panel placement and ensure straight installation. For multi-panel installations, mark seam locations clearly to maintain consistent spacing throughout.
Account for Plywood Expansion and Contraction
Leave 1/8-inch gaps between panels to accommodate humidity-induced expansion. Similarly, maintain 1/8-inch gaps at ceiling and floor connections. These small spaces, later covered by trim or caulk, prevent buckling and warping when environmental conditions change. Ignoring expansion gaps causes panels to push against each other, creating visible bulges.
Apply Professional-Grade Mounting Techniques
The mounting method you choose determines both installation difficulty and long-term performance. Select the right technique for your specific application.
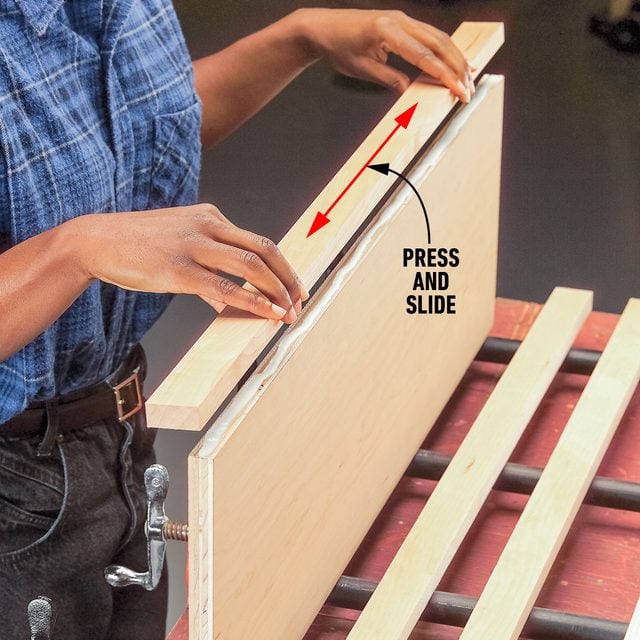
Use Adhesive for Seamless Permanent Installations
Apply construction adhesive in a zig-zag pattern across the plywood back, maintaining 6-inch spacing between adhesive lines. Press the panel firmly against the wall, using a roller to eliminate air pockets. Support the panel with temporary braces until the adhesive cures completely—typically 24-72 hours. Adhesive mounting creates invisible bonds ideal for feature walls where fasteners would compromise aesthetics.
Install Mechanical Fasteners for Maximum Security
Pre-drill pilot holes through the plywood, countersinking slightly below the surface. Drive 1-1/4 inch drywall screws into wall studs every 8-12 inches along panel edges and 12-16 inches in the field. For hollow wall sections between studs, use toggle bolts or snap toggles rated for your plywood’s weight. Mechanical fasteners provide the strongest attachment for heavy-duty applications like workshop walls.
Implement Cleat Systems for Heavy or Removable Panels
Cut matching 45-degree cleats from 1×4 lumber—one for the wall and one for the plywood back. Secure the wall cleat to studs with 2-1/2 inch screws, ensuring it’s perfectly level. Attach the mating cleat to the plywood panel, then hang the panel by engaging the two cleats. This system supports heavy panels while allowing easy removal—perfect for workshop walls requiring periodic reconfiguration.
Finish Edges and Seams Like a Professional
Attention to detail transforms functional installations into polished, professional-looking projects that impress visitors and stand the test of time.
Treat Seams Between Panels Professionally
Fill gaps between panels with wood filler matching your plywood’s color for painted installations. Sand smooth when dry for invisible seams. For natural wood finishes, use flexible wood filler that accommodates movement without cracking. Apply seam tape before wallpaper or fabric applications to create smooth transition areas that prevent visible ridges.
Finish Exposed Edges Properly
Apply iron-on edge banding to raw plywood edges for a factory-finished appearance on visible installations. For painted projects, install wood trim or molding that complements your decor style. Round over edges slightly with sandpaper to prevent splinters and create a softer visual appearance. In utility spaces, apply multiple coats of paint or sealer to exposed edges for protection against moisture and damage.
Apply Protective Topcoats for Longevity
Seal natural plywood with two coats of water-resistant polyurethane for kitchen or bathroom installations. Paint workshop walls with durable enamel that withstands tool contact and cleaning. Apply floor-grade finish to garage installations for maximum resistance to chemicals and abrasion. Allow all finishes to cure completely—typically 72 hours—before placing items against the mounted plywood.
Maintain Your Plywood Wall Installation for Longevity
Proper maintenance preserves your installation’s appearance and structural integrity, extending its service life significantly.
Conduct Regular Cleaning and Inspections
Dust mounted plywood weekly with a microfiber cloth to prevent buildup in surface pores. Clean marks immediately with mild soap solution, avoiding excessive moisture that could penetrate edges. Check fastener security quarterly, tightening any that have worked loose over time. Address minor damage promptly before it spreads to surrounding areas.
Control Environmental Factors That Affect Plywood
Maintain indoor humidity between 35-55% to minimize wood movement and prevent warping. Use dehumidifiers in basements or humid climates to protect plywood installations. Avoid direct water exposure in utility spaces through proper sealing and moisture management practices. Reapply protective finishes every 2-3 years in high-traffic areas to maintain appearance and protection.
Make Repairs Before Small Issues Become Major Problems
Address scratches and dents immediately with matching wood filler and touch-up paint. Replace severely damaged sections before moisture penetrates deeper into the panel. Keep records of your installation details to facilitate future repairs or modifications. When in doubt about repair techniques, consult a professional rather than risking further damage.
Mounting plywood on a wall creates functional, attractive surfaces that serve countless purposes throughout your home. By selecting appropriate materials, preparing surfaces properly, choosing reliable mounting methods, and finishing with attention to detail, you achieve professional results that last. Whether you’re creating a workshop organization system or a stunning feature wall, these proven techniques ensure your plywood installation performs beautifully for years to come. Start your project today with confidence, knowing you have the exact knowledge needed for success.

