
A wall-mounted shower seat transforms your bathroom into a more accessible, comfortable space. Whether you’re aging in place, recovering from an injury, or simply want a convenient seating option, installing a wall-mounted shower seat is a practical upgrade that adds both functionality and value to your home. This comprehensive guide walks you through every step of the installation process, from initial planning to final safety verification, ensuring you achieve a secure, code-compliant result.
Before you begin, understand that a properly installed shower seat must support significant weight—typically 250 to 500 pounds depending on the model—and must anchor securely into wall studs or solid backing. Rushing through this project or skipping critical steps can result in a dangerous failure. Take your time, gather the right materials, and follow each procedure carefully.
Identify Load-Bearing Wall Structure for Secure Mounting

The foundation of a safe wall-mounted shower seat installation begins with understanding your wall’s structural capacity. Your shower seat must anchor directly into wall studs or a properly installed backing board—never rely solely on drywall anchors. Standard residential walls typically have studs spaced 16 inches apart, running vertically from floor to ceiling. These wooden or metal framing members provide the necessary support for heavy loads in wet environments.
Use an electronic stud finder with deep-scan capability to locate studs behind tile or fiberglass walls. Test each stud location by drilling a small pilot hole to confirm its width and position—typically 1.5 inches wide for standard wood studs. Mark each stud center with a pencil, creating a clear grid of potential mounting points. For older homes, be prepared for irregular stud spacing or the presence of lath and plaster instead of drywall, which requires additional planning.
If your ideal seat location doesn’t align with studs, install a marine-grade plywood backing board between two adjacent studs. Cut the board to fit snugly between studs, then secure it with 3-inch corrosion-resistant screws driven through the board into each stud. This creates a solid mounting surface that distributes weight across multiple structural points, essential for safety in wet environments where wood strength can degrade over time.
Select Proper Mounting Hardware for Wet Environments
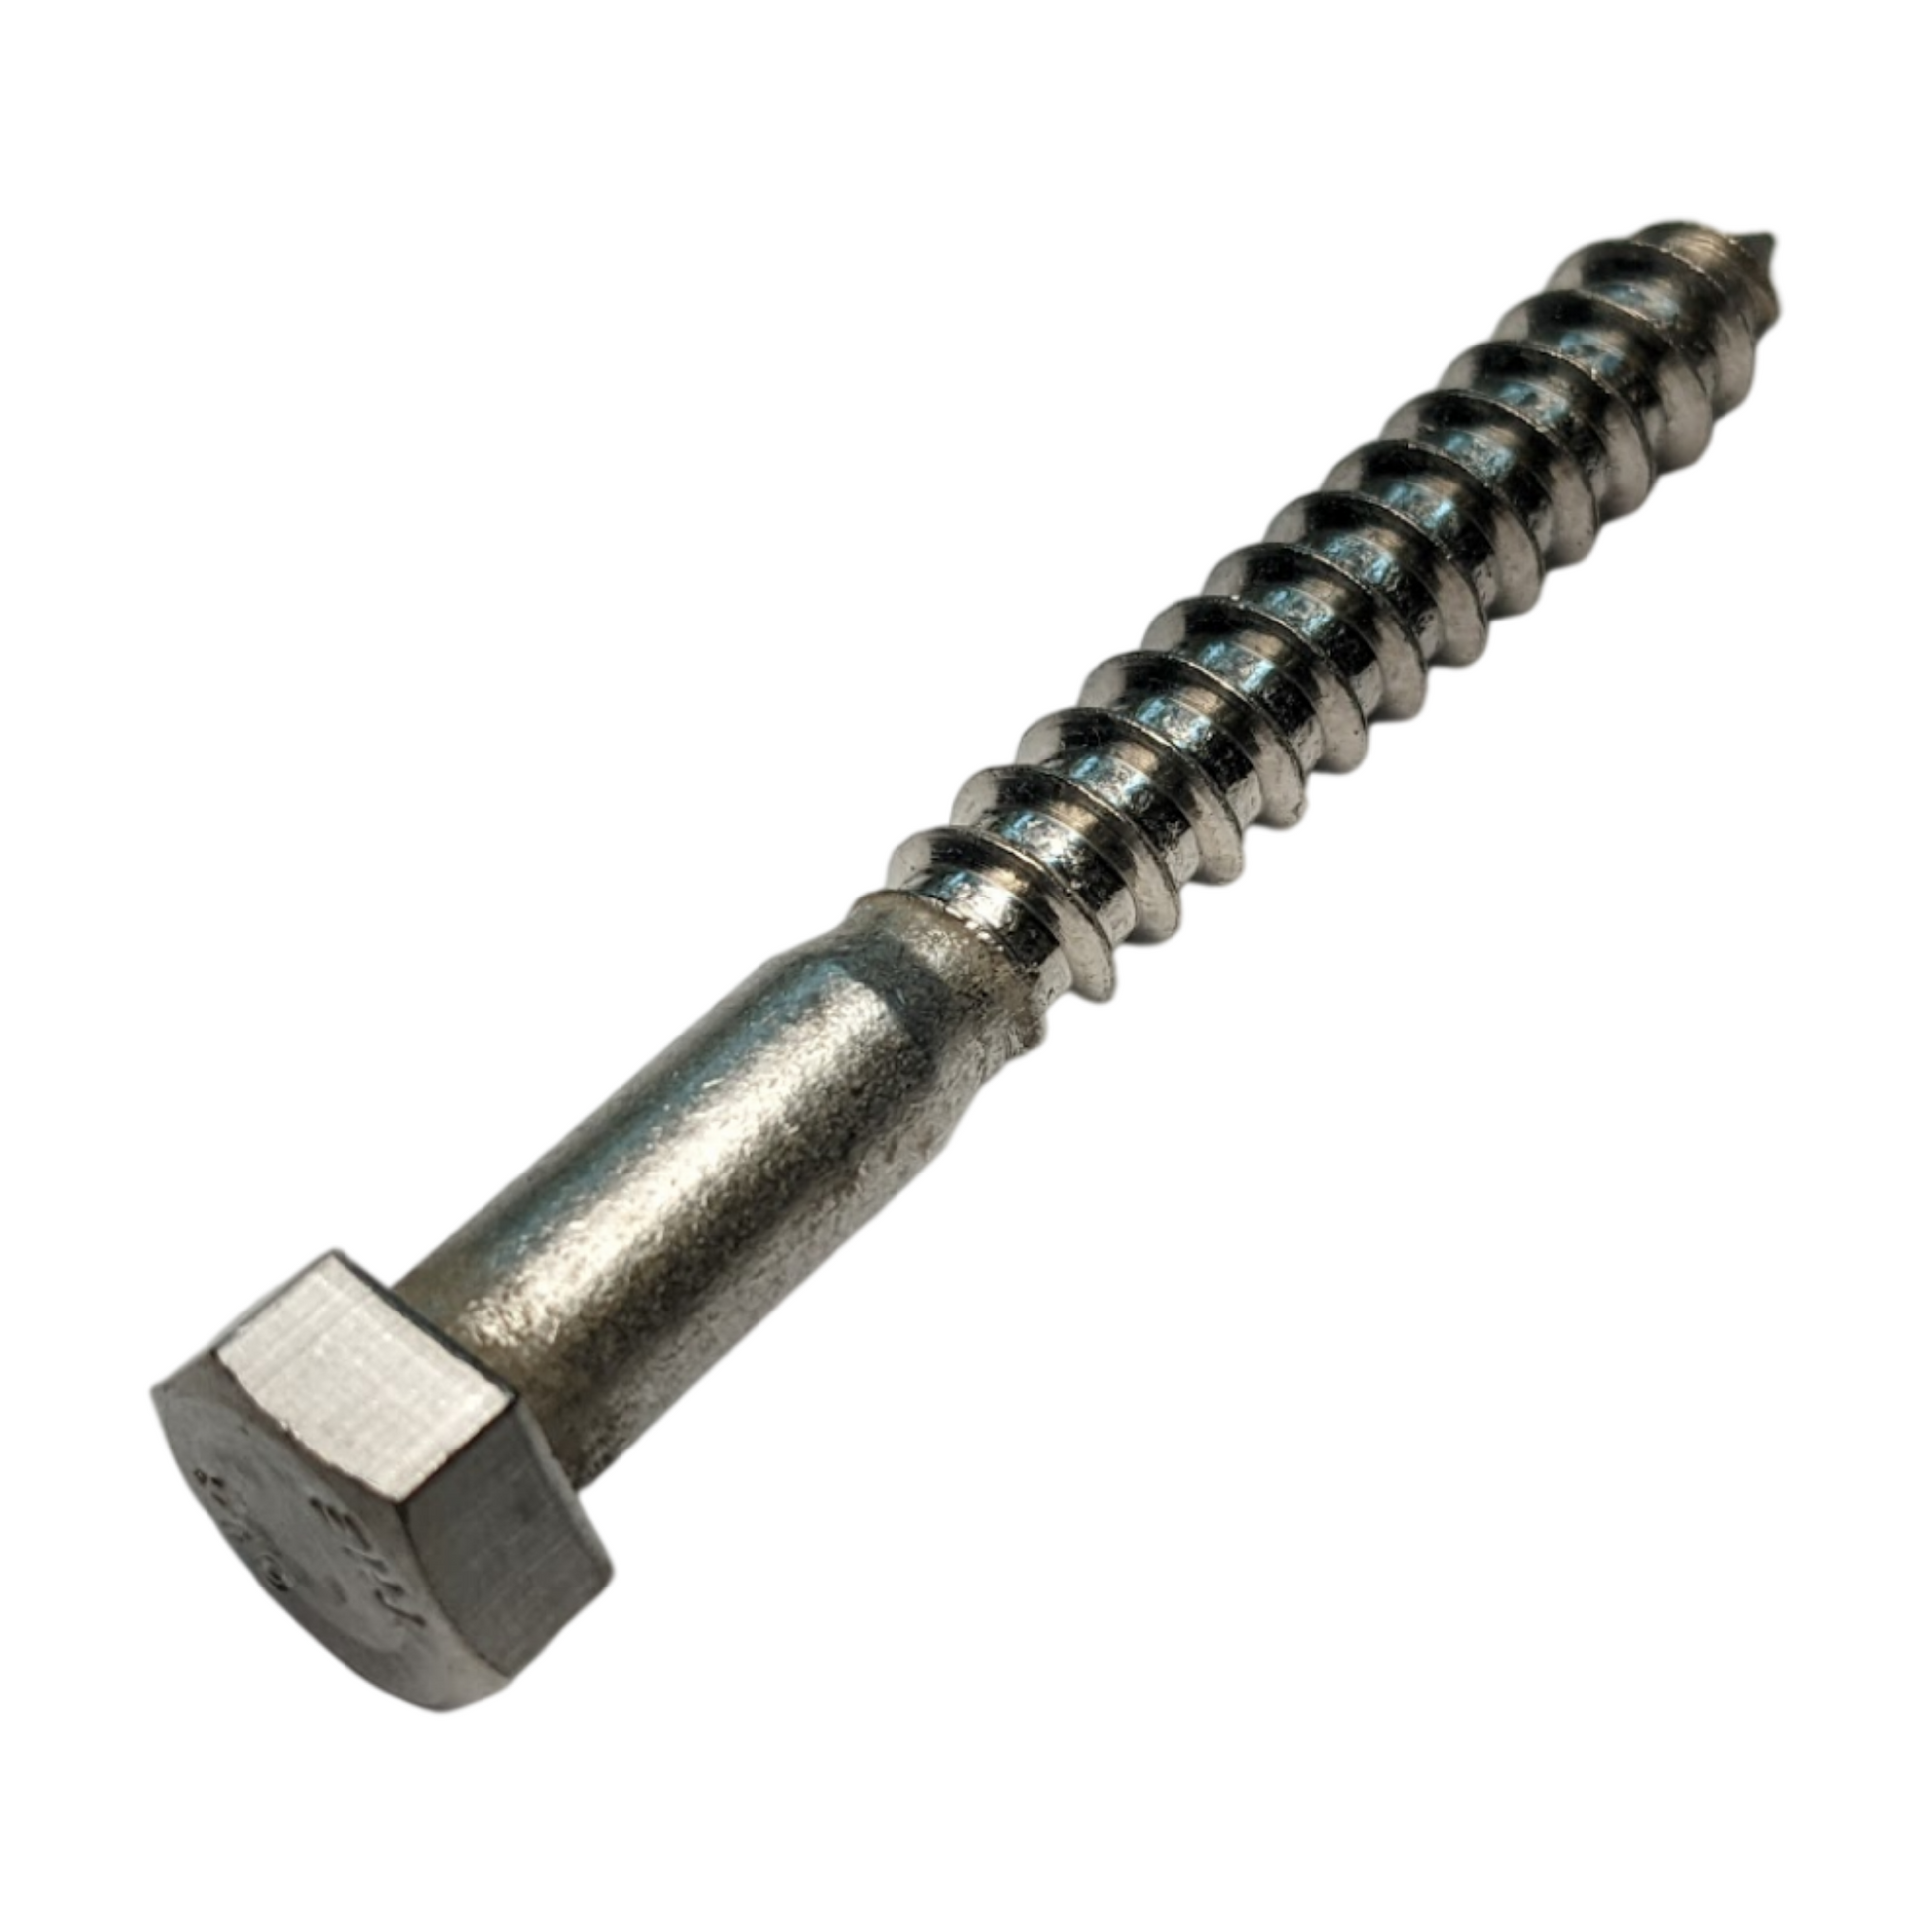
Choosing the right hardware makes the difference between a seat that lasts for decades versus one that fails prematurely. Standard drywall anchors won’t support the required weight in a constantly damp environment—they’ll gradually pull through or corrode. For direct stud mounting, use stainless steel lag screws with a minimum diameter of 1/4 inch and length of 2.5 inches, providing adequate penetration into the stud.
When mounting to a backing board, upgrade to 3-inch lag screws to ensure sufficient engagement with both the board and underlying studs. Always include rubber or nylon washers between the mounting bracket and wall surface—these create a watertight seal that prevents moisture infiltration behind the bracket where it can cause hidden rot. For the actual seat attachment to brackets, use marine-grade stainless steel bolts with lock nuts that resist vibration loosening.
Pro tip: Purchase hardware from a specialty bathroom fixture supplier rather than a general hardware store. Bathroom-specific mounting kits include corrosion-resistant finishes and properly engineered components designed specifically for wet environments, reducing your risk of premature failure.
Precisely Position Your Shower Seat for Optimal Functionality
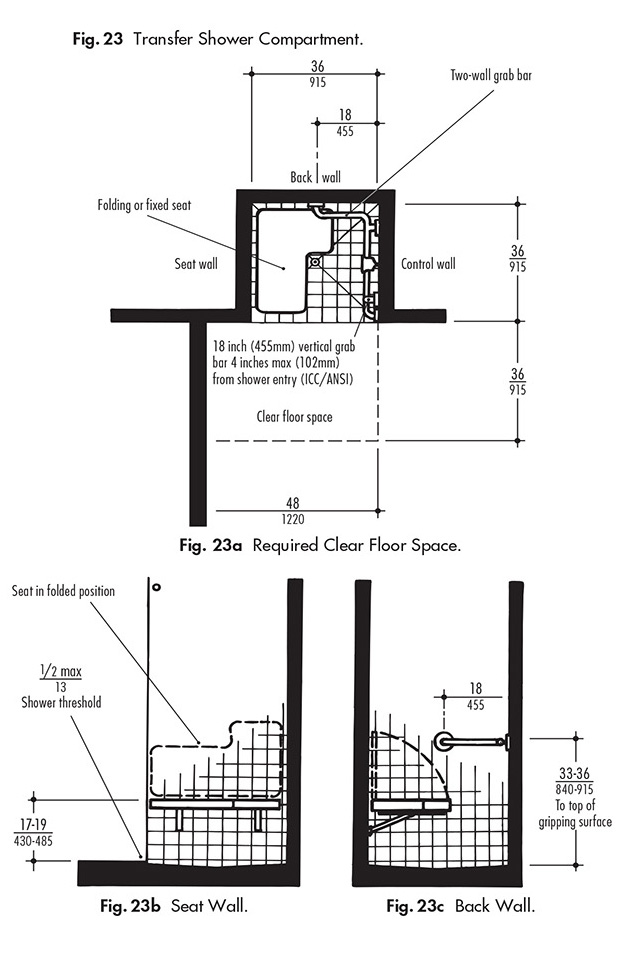
The ideal height for your wall-mounted shower seat depends on user needs but generally falls between 17-19 inches from the shower floor to the seat surface. Measure this height carefully at multiple points along the intended mounting line, then use a laser level to create a perfectly horizontal reference line across your wall. This line should remain perfectly level even if your shower floor slopes for drainage.
Position the seat away from direct water spray when possible to minimize constant exposure, but ensure it’s within easy reach of shower controls. For left-handed users, mount the seat on the right wall; for right-handed users, mount on the left. This placement allows users to maintain contact with the wall for stability while operating controls. If multiple users with different needs will share the shower, consider installing an adjustable-height model or positioning the seat at the compromise height of 18 inches.
For tiled walls, align your mounting points with grout lines whenever possible—this makes drilling cleaner and less likely to crack adjacent tiles. If you must drill through tile, mark your hole locations with painter’s tape first to prevent the drill bit from skating across the smooth surface.
Execute Flawless Installation on Tile or Fiberglass Surfaces
Installing a wall-mounted shower seat on tile requires specialized techniques to avoid cracks and damage. Start by placing a small piece of masking tape over each drill point, then mark your exact hole location with a fine-tip marker. Use a carbide-tipped masonry bit specifically designed for tile, beginning at the lowest possible drill speed with light, consistent pressure.
Drill through the tile glaze first using a 1/8-inch pilot bit, then switch to your final hole size. Apply water to the drilling area periodically to cool the bit and reduce cracking. Once through the tile, switch to a standard wood bit to drill into the stud behind. For fiberglass showers, use a backing plate inside the shower wall to prevent the material from tearing when screws are tightened.
When mounting on fiberglass, create a custom backing plate by cutting a piece of marine-grade plywood to fit inside the shower wall opposite your mounting location. Drill pilot holes through both the fiberglass and backing plate, then secure them together with long stainless steel bolts and rubber washers. This distributes the load across a larger area, preventing the fiberglass from flexing and eventually cracking under repeated stress.
Test and Verify Installation Safety Before First Use
Never assume your wall-mounted shower seat is safe to use immediately after installation—proper verification prevents serious accidents. Begin with a gradual load test: apply light pressure with your hand, then gradually increase to your full body weight while holding onto a separate support like the shower curtain rod or grab bar. The seat should show no movement, creaking, or deflection.
Next, test the seat’s stability from multiple angles. Apply downward force while simultaneously pushing outward (away from the wall) and sideways. Any movement indicates insufficient anchoring—remove the seat immediately and reinforce the mounting points. For fold-down models, test the locking mechanism repeatedly under load to ensure it won’t accidentally release when weight is applied.
Finally, conduct a moisture test by running the shower at full temperature and pressure for 15 minutes with the seat in both folded and unfolded positions. Check behind the mounting flange for any water seepage, which indicates inadequate sealing. Address any leaks immediately by reapplying silicone caulk around the mounting points before the first actual use.
Implement Maintenance Protocol for Long-Term Safety
Your wall-mounted shower seat requires regular maintenance to remain safe and functional. Establish a simple inspection routine: monthly for the first year, then quarterly thereafter. During each inspection, tighten any loose mounting hardware—you’ll typically find lag screws gradually loosening due to wood compression in the humid environment.
Clean the seat and mounting hardware with mild, non-abrasive cleaners—avoid vinegar-based products that can degrade stainless steel over time. For wood seats, apply teak oil or marine varnish annually to maintain water resistance. Lubricate folding mechanisms with silicone-based lubricant every six months to prevent sticking and corrosion.
Pay special attention to the caulk seal around mounting points. Replace any cracked or deteriorated caulk immediately to prevent water infiltration behind the wall. If you notice musty odors or discoloration around the mounting area, remove the seat completely to inspect for hidden mold or rot. Addressing these issues promptly extends your installation’s lifespan and maintains safety.
Installing a wall-mounted shower seat properly requires attention to structural details most DIYers overlook. By anchoring into proper structural supports, using marine-grade hardware, and verifying installation through rigorous testing, you create a safe seating solution that serves your needs for years. Remember that bathroom modifications involving structural elements often require permits and inspections in many jurisdictions—check your local building codes before starting. If you encounter rotted studs, non-standard wall construction, or other complications during installation, consult a licensed contractor rather than risking an unsafe installation. The few extra dollars spent on professional installation provide invaluable peace of mind when safety is at stake.

