
Nothing beats the convenience of having your own basketball hoop for impromptu shooting practice or weekend games with friends. Installing a wall mount basketball hoop creates a permanent, stable fixture that outperforms wobbly portable units and adds value to your property. This guide shows you exactly how to install a wall mount basketball hoop correctly the first time, avoiding common mistakes that lead to unsafe installations or premature equipment failure. Whether you’re mounting to concrete, brick, or wood-frame construction, you’ll learn the proven techniques professionals use to ensure your hoop withstands years of aggressive play.
Before you even purchase a wall mount basketball system, you must evaluate your mounting surface and available space. Many homeowners make the critical error of buying equipment first, only to discover their wall can’t properly support it. Proper installation requires matching your hoop to your wall’s structural capabilities—trying to force an incompatible setup leads to dangerous installations that could cause injury or property damage. This guide walks you through every critical step from surface assessment through final adjustments, ensuring your basketball hoop delivers professional-level performance right at home.
Verify Your Wall Can Handle Basketball Forces
Wall-mounted basketball hoops endure tremendous stress during normal play—far more than most homeowners realize. Standard vinyl siding, stucco, or hollow concrete blocks cannot safely support this force. Concrete walls, solid brick construction, and reinforced concrete block provide the most reliable mounting surfaces for permanent installations. When mounting to brick, inspect carefully for cracks or deterioration—loose bricks will fail catastrophically under playing stress.
Wood-frame walls require strategic mounting directly into structural studs spaced 16 inches apart. You’ll need to remove exterior siding or drill through it to access the framing behind. Professional installers often add a reinforced mounting board—a 3/4-inch pressure-treated plywood sheet or 2×12 lumber board bolted securely to multiple studs—creating a solid backing that distributes force evenly. Never mount directly to drywall or hollow surfaces; the resulting installation will be dangerous and short-lived.
Garage walls with concrete construction work exceptionally well when using proper concrete anchors and lag bolts rated for sports equipment loads. If your garage has wood-frame construction with siding, follow the stud-mounting approach above. Remember: the mounting surface must be structurally sound throughout the entire contact area with your hoop’s mounting plate.
Determine the Perfect Mounting Position

Your hoop’s location dramatically affects gameplay quality, safety, and equipment longevity. Position the backboard’s center exactly 10 feet from the ground for standard rim height, though you may adjust downward for youth players. Measure carefully from the playing surface to the rim’s center—not the backboard’s top edge—to ensure accuracy.
Consider the playing area in front of your hoop. A minimum 4-foot clearance behind the baseline allows safe landing after shots, while 6-8 feet provides ample space for aggressive layups. Ensure this zone has level ground without tripping hazards, and avoid mounting near fences, trees, or structures that could cause injury during play.
Sun exposure significantly impacts visibility and equipment durability. East or north-facing walls minimize glare during evening practice when sunlight creates visibility issues on the backboard. If south or west mounting is unavoidable, select a UV-resistant acrylic backboard that resists yellowing and degradation from sun exposure over time.
Gather Essential Installation Tools and Hardware
Having every tool and material ready before starting prevents frustrating mid-installation delays. While most wall mount basketball packages include mounting hardware, you’ll likely need additional items specific to your wall type.
For concrete or masonry walls: a hammer drill with masonry bits (1/2-inch diameter for standard anchors), concrete wedge anchors rated for sports equipment loads, a 4-foot level, socket and ratchet set, tape measure, and sturdy ladder. For wood-frame installations: a standard drill driver, 3-inch structural wood screws or 1/2-inch lag bolts, 3/4-inch pressure-treated plywood for mounting board, and silicone caulk for weatherproofing.
Pro Tip: Rent a rotary hammer for concrete installations—it creates cleaner anchor holes with less vibration than standard hammer drills, especially in dense concrete. This small investment prevents cracked concrete around anchor points that compromises structural integrity.
Prepare the Mounting Surface Properly
Thorough surface preparation prevents water infiltration and ensures secure mounting. Clean the area meticulously—remove dirt, debris, and loose material that could interfere with the mounting plate’s contact. For brick walls, pressure washing removes years of grime that prevents proper anchor seating.
Inspect for cracks, holes, or deterioration. Repair any damage before proceeding—small concrete cracks need epoxy repair compound, while damaged bricks should be replaced entirely. The mounting surface must be structurally sound throughout the contact area.
If mounting to wood-frame walls with siding, carefully cut away a section to access studs behind. Mark your mounting locations precisely, then use a circular saw to cut within your marked area. Keep cuts minimal while providing adequate access—some installers remove a larger section and install a decorative mounting board that covers the area for finished appearance.
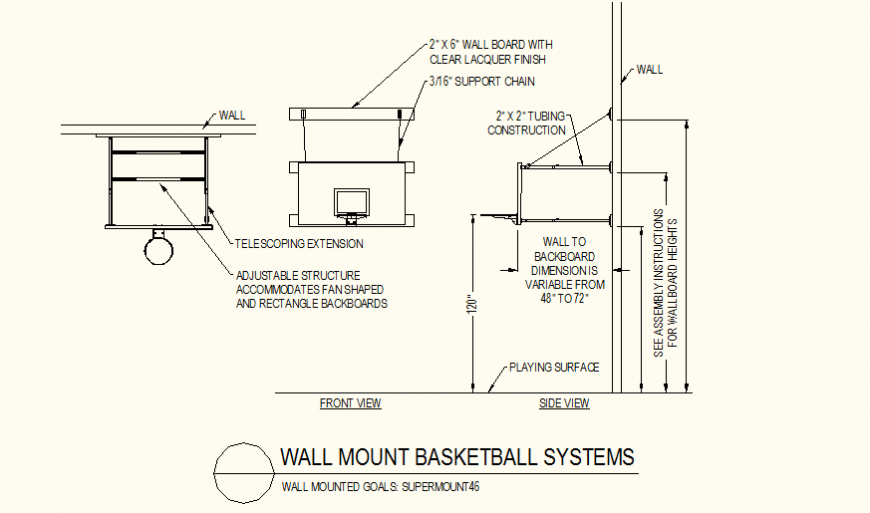
Install Reinforced Mounting Board for Wood Walls
For wood-frame installations, a mounting board distributes force across multiple studs. Cut your board to extend at least 6 inches beyond the hoop’s mounting plate. A 2×12 board provides excellent strength, though 3/4-inch pressure-treated plywood works for lighter hoops.
Position the board horizontally at your desired height, ensuring perfect level alignment before securing it. Use 3-inch structural wood screws or 1/2-inch lag bolts driven through the board into each stud. Span at least three studs (minimum 32 inches horizontally on standard 16-inch spacing) for adequate support.
For concrete or brick walls, mount directly to masonry using appropriate anchors, though a decorative backing board can create a uniform mounting surface. This combines structural security with aesthetic appeal, especially when matching your home’s exterior trim.
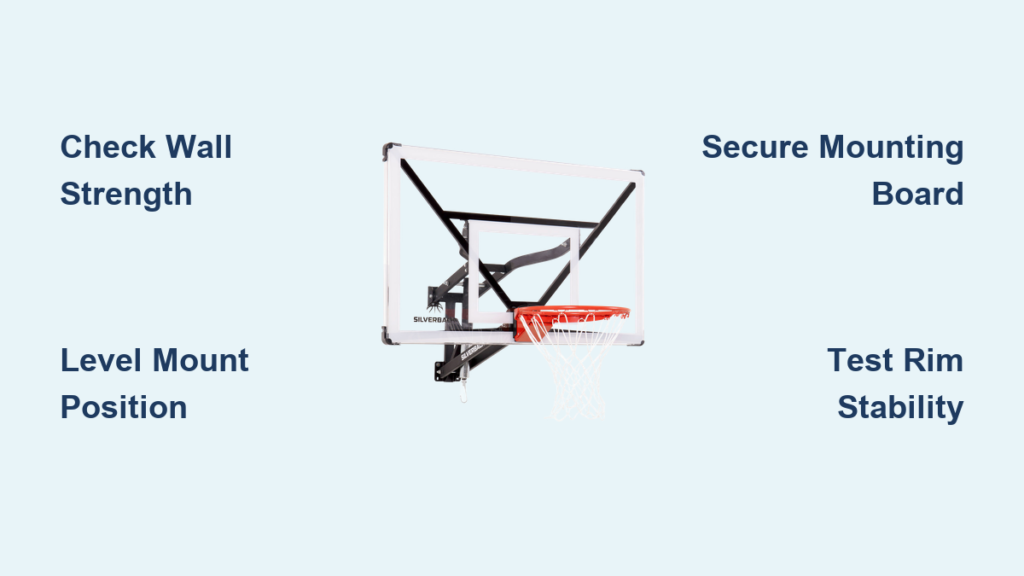
Secure the Backboard Mounting Bracket

Most wall mount systems feature a bracket that attaches to the wall, with the backboard assembly connecting to it. Position the bracket at your desired height, having a helper hold it while you verify perfect level alignment—critical for proper backboard function.
Mark mounting hole locations precisely, then drill pilot holes. For wood studs, use 1/8-inch pilot holes; for concrete, use hammer drill to create proper anchor holes. Secure the bracket with 1/2-inch lag bolts with washers (minimum 2-1/2 inches into studs) or properly torqued wedge anchors for concrete.
Warning: Never skip the level verification step—improperly aligned brackets cause backboard distortion that affects ball bounce and creates safety hazards during play.
Attach Backboard and Rim Assembly
With the bracket secured, mount the backboard according to manufacturer specifications. Most systems use vibration-dampening gaskets between backboard and bracket—these crucial components reduce stress on mounting hardware during play.
Tighten all bolts to specified torque—over-tightening cracks backboard mounting holes, while under-tightening allows dangerous movement. Install the rim next, ensuring proper positioning through reinforced backboard areas. Test breakaway mechanisms by pulling down firmly on the front of the rim—it should release smoothly and return to position.
If your system includes height adjustment, connect these mechanisms now and test operation through full range. Verify the rim maintains position at various heights without drifting—adjust as needed before final tightening.
Conduct Critical Safety Verification
Before allowing play, perform thorough verification of all connections. Visually inspect every bolt for proper installation and tightness. Check for stripped, bent, or damaged hardware—replace any questionable components immediately.
Perform physical stability test by applying moderate pressure in all directions on the backboard. It should show no movement at mounting points—any detectable movement indicates dangerous installation requiring immediate correction.
Test the rim’s breakaway mechanism multiple times. It should operate smoothly without sticking or grinding sounds. If issues persist, consult manufacturer documentation before use—never ignore rim mechanism problems.
Implement Essential Safety Practices
Establish clear safety rules before first use. Never allow hanging, swinging, or dunking on residential wall mount hoops—they’re designed for shooting practice, not body weight support. These actions cause catastrophic failures that create serious fall hazards.
Maintain 6-8 feet of clearance in front of the hoop, removing all vehicles and obstacles before play. Ensure the ground surface is level and dry to prevent slip hazards. Young children require adult supervision at all times, with rim heights adjusted appropriately for their size.
Document your safety rules visibly near the hoop and enforce them consistently. Proper safety practices extend equipment life and prevent injuries that could end your basketball enjoyment permanently.
Schedule Preventative Maintenance
Perform quarterly inspections of all mounting hardware, connections, and structural components. Check for loosening, corrosion, or fatigue—pay special attention to backboard mounting hardware and sun-exposed components that degrade faster.
Clean backboard and rim regularly with mild soap and water—avoid abrasives that scratch surfaces. Remove debris from around mounting hardware to prevent interference with moving parts. Retighten mounting hardware periodically as vibration from play gradually loosens bolts.
Create a maintenance log documenting each inspection and adjustments made. This record helps identify recurring issues before they become major problems, extending your hoop’s lifespan significantly.
Troubleshoot Common Installation Issues
Backboard vibration or rattling indicates loose mounting hardware—tighten bolts and check vibration-dampening gaskets. Rim height drift points to height adjustment mechanism issues—inspect for worn components or damaged cables.
Water infiltration around mounting plates causes rust and hardware failure. Apply silicone caulk during installation for weatherproofing. If you notice water stains or rust, remove the assembly, clean affected areas, apply fresh caulk, and replace corroded hardware immediately.
Pro Tip: Apply thread-locking compound to mounting bolts during installation—it prevents gradual loosening from vibration while still allowing future maintenance when needed.
A properly installed wall mount basketball hoop delivers years of reliable performance and safe enjoyment. By following these precise installation steps, conducting regular maintenance, and addressing issues promptly, your backyard becomes a dedicated practice space that enhances athletic development and family recreation for seasons to come. The time invested in proper installation pays dividends through countless hours of shooting drills, friendly competitions, and the satisfaction of knowing your equipment performs safely and reliably.

