
Mounting your TCL TV on the wall creates a sleek, modern entertainment setup while freeing up valuable floor space in your living room or bedroom. However, improper installation can lead to safety hazards, viewing discomfort, or even damage to your expensive television. The good news is that with the right preparation and careful execution, you can achieve professional-looking results without hiring a technician. This guide walks you through every critical step—from verifying compatibility standards to securing your TCL television safely on the wall—ensuring you avoid common pitfalls that cause crooked displays or unstable mounts. By following these specific instructions tailored to TCL models, you’ll create a stable installation that enhances your viewing experience while protecting your investment.
Verify Your TCL TV’s VESA Pattern Before Buying Mount
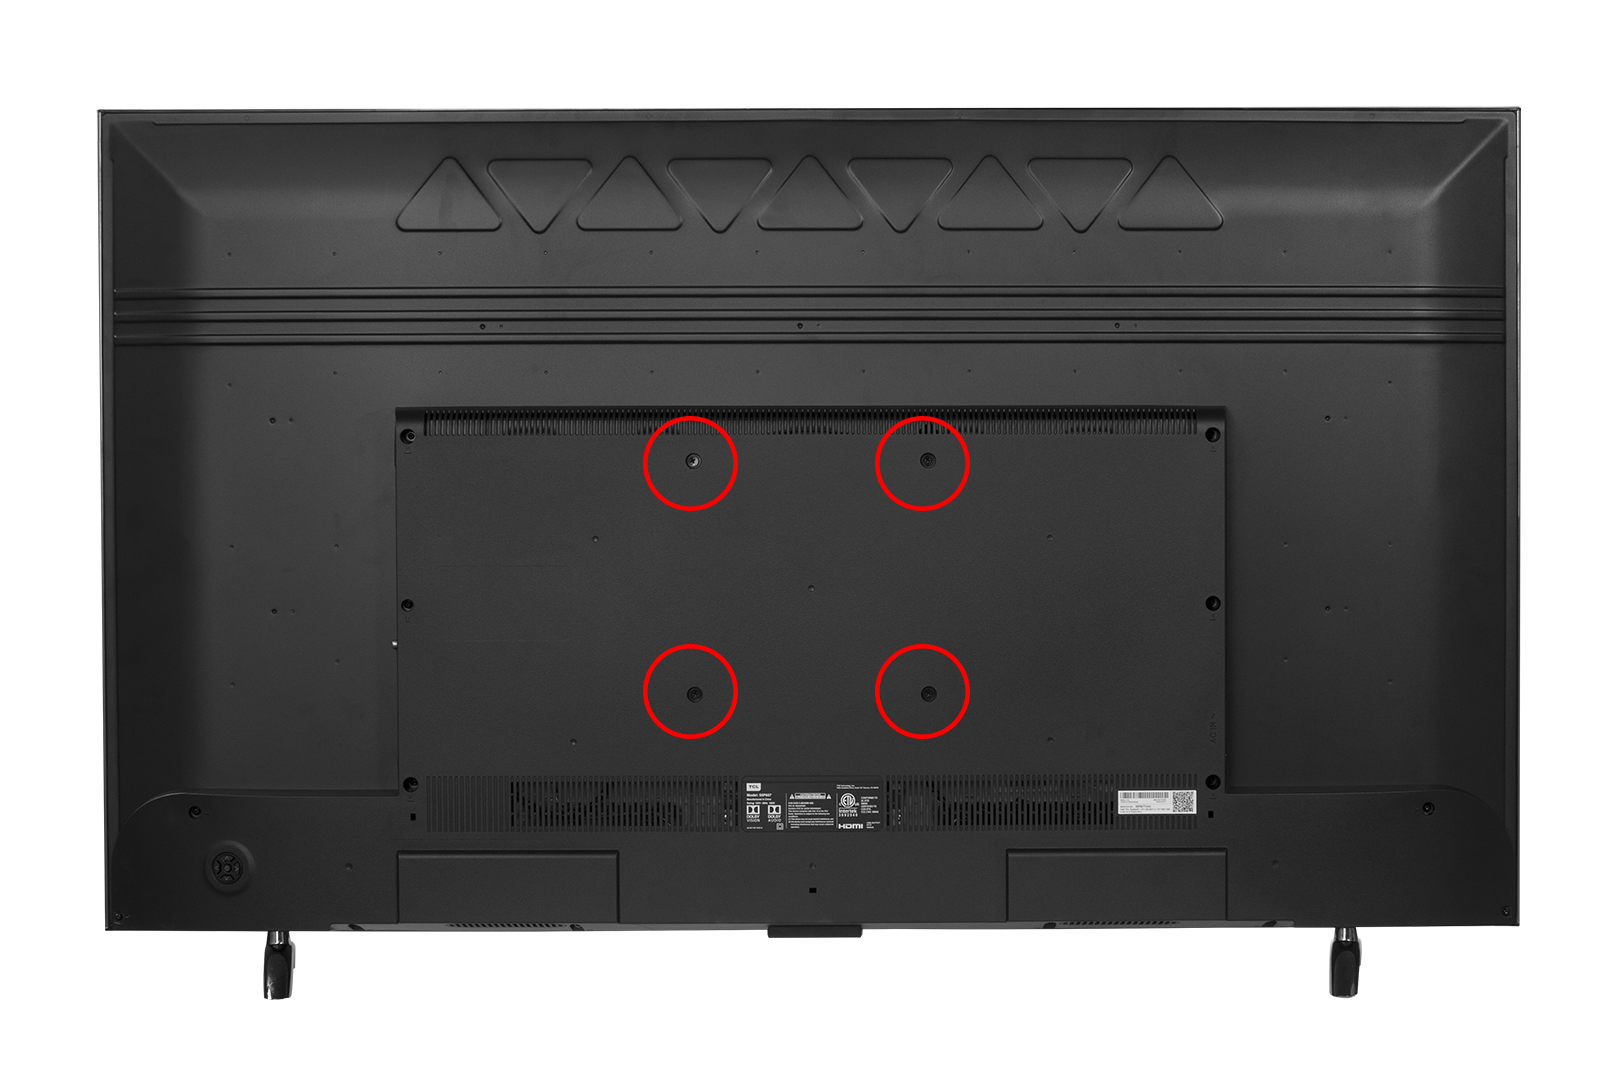
Don’t waste money on an incompatible wall mount by skipping this crucial step: checking your TCL TV’s VESA specifications. The VESA pattern (measured in millimeters like 200×200 or 400×400) determines the spacing between mounting holes on your TV’s back panel. Most TCL models follow standard VESA configurations, but some like the 65Q51K use a smaller pattern that initially appears to have only two mounting points.
How to Find Your Exact VESA Dimensions
Locate your specific VESA measurements by checking three places: your TV’s user manual, TCL’s official website product specifications, or by physically measuring the holes on your television’s back. For direct measurement, calculate both horizontal and vertical distances between the four mounting points—two larger holes near the top and two smaller ones below. Some TCL models hide the full four-hole pattern beneath accessories or stands, so remove any obstructions before measuring. Installing with mismatched VESA dimensions risks an unstable mount that could damage your TV or create a dangerous situation. If you can’t identify all four holes, consult TCL’s support resources for your exact model before purchasing any mounting hardware.
Assemble Your TCL Wall Mount Installation Toolkit

Having the right tools ready prevents frustration mid-installation and ensures professional results. The most critical item is a wall mount specifically rated for your TCL model’s weight and VESA pattern—not a generic mount that might seem compatible but lacks proper engineering.
Must-Have Tools Checklist
- Stud finder (essential for locating structural support behind drywall)
- Power drill with variable speed (cordless preferred for mobility)
- Level (laser or bubble—don’t trust visual alignment alone)
- Appropriate drill bits (slightly smaller than screw diameter)
- Mounting hardware (included with mount kit—verify compatibility)
- Second person (mounting alone risks TV damage and personal injury)
Skip the temptation to improvise with household tools. A cheap stud finder might miss critical framing members, while incorrect drill bits can strip screw holes in wooden studs. For cable management, gather zip ties or a wire-hiding kit now—dealing with tangled cords after mounting creates unnecessary complications.
Position Your TCL TV for Optimal Viewing Comfort
The perfect mounting location balances aesthetics with ergonomic viewing. Start by measuring your primary seating distance—TCL recommends viewing distance should be 1.5-2.5 times your screen’s diagonal size. For a 55-inch TV, that’s 6.5-11 feet from seating area.
Critical Placement Considerations
- Electrical access: Position within 3 feet of power outlets to avoid visible extension cords
- Viewing height: Center of screen should be at eye level when seated (typically 42″ from floor)
- Glare prevention: Avoid direct alignment with windows or bright light sources
- Stud alignment: Confirm at least two wall studs exist within your mount’s width
Use painter’s tape to outline your TV’s dimensions on the wall before drilling. Sit in your viewing position to verify the height feels natural—mounting too high causes neck strain during extended viewing sessions. Remember that drywall repairs become necessary if you relocate the mount later, so get this step right the first time.
Locate Wall Studs with Precision for Secure Mounting
Your TCL TV’s weight demands anchoring into structural wall studs—not just drywall. Most standard drywall can’t safely support more than 50 pounds, while even modest TCL TVs often exceed 30 pounds.
Professional Stud-Finding Technique
- Start at a known stud location (outlets or light switches typically sit on studs)
- Press stud finder flat against wall and activate
- Move slowly horizontally until device indicates stud edge
- Mark both edges with painter’s tape
- Measure 16″ or 24″ (standard stud spacing) to locate next stud
Confirm findings by tapping—the wall sounds solid over studs but hollow between them. For heavy TCL models over 55 inches, ensure your mount spans at least two studs. If your ideal location lacks adequate stud coverage, choose a different wall section rather than relying on questionable drywall anchors.
Drill Perfect Pilot Holes for Your TCL Mount
Creating properly sized pilot holes prevents wood splitting and ensures maximum screw grip in wall studs. Use a drill bit 1/16″ smaller than your mounting screw diameter—this allows threads to bite into the wood without cracking the stud.
Step-by-Step Hole Preparation
- Position mounting plate against wall with level perfectly horizontal
- Mark screw holes with pencil through bracket slots
- Double-check level alignment before drilling
- Drill pilot holes to exact screw depth (use tape on drill bit as depth guide)
- Clear debris with vacuum before inserting screws
Apply steady pressure without forcing the drill—let the bit do the work. Have your assistant hold the mounting plate steady during this process to prevent shifting. Incorrect hole depth causes either insufficient grip (too shallow) or potential damage to wall cavities (too deep).
Secure Wall Brackets to Studs Without Stripping
The wall bracket forms the foundation of your entire mounting system—improper installation here jeopardizes everything that follows. Position the bracket so mounting holes align with your pilot holes, then insert screws by hand first to ensure proper threading.
Critical Bracket Installation Tips
- Drive screws slowly with power drill on low torque setting
- Tighten until bracket feels solid against wall (no movement when pushed)
- Never overtighten—this strips wood fibers and compromises hold
- Recheck level after final tightening (wood compression can shift alignment)
- Verify bracket supports minimum 75 pounds per mounting point
For larger TCL models, consider adding a third mounting point in the center for extra stability. The bracket should withstand firm pressure from all directions—if it shifts even slightly, remove and reinstall with longer screws or into different stud locations.
Attach Mounting Hardware to Your TCL TV Correctly
TCL TVs use reinforced VESA holes specifically designed for wall mounting, but installation varies by model. Most feature four mounting points arranged in a square pattern, though some like the 65Q51K have a compressed configuration that initially appears to have only two holes.
Model-Specific Mounting Process
- Standard TCL models: Remove existing screws and replace with mount-provided hardware
- Compact VESA models: Use larger top screws with washers on bottom smaller holes
- Curved-back models: Verify bracket clearance before final tightening
Always position the mounting bracket toward the TV’s bottom rather than center—it provides better weight distribution. The bracket should sit flush against the TV back with no gaps. Hand-tighten all four screws before final tightening to ensure even pressure distribution across the mounting surface.
Lift and Secure Your TCL TV to the Wall Mount Safely
This step demands two people—one to lift the TV, another to guide alignment. Lift from the bottom edges with a firm grip on the frame (never the screen), keeping the TV close to your body.
Critical Mounting Sequence
- Angle TV slightly (15-20 degrees) to engage top mounting hooks first
- Gently lower into final position while guiding bottom mounting points
- Verify secure engagement by attempting to lift slightly from bottom
- Tighten all safety screws before releasing TV weight
- Final level check from multiple viewing positions
If using a full-motion mount, test tilt/swivel functions before cable management. The TV should move smoothly without wobbling—excessive play indicates loose mounting hardware that needs immediate attention.
Hide Wires Without Compromising Functionality
Effective cable management transforms a functional installation into a professional-looking setup. For TCL TVs with HDMI 2.1 ports requiring thicker cables, ensure your management solution accommodates cable thickness without pinching.
Wire Concealment Options Ranked
- In-wall installation: Most seamless but requires electrical knowledge
- Surface raceways: Paintable channels that mount directly to wall
- Cable sleeves: Fabric-wrapped bundles for quick concealment
- Strategic furniture placement: Console positioned below to hide cords
Leave 2-3 inches of slack in all cables to prevent tension when adjusting tilt mounts. For soundbars, use adhesive-backed cable clips to route audio connections along the TV’s bottom edge before they descend to the media console.
Prevent Installation Disasters with These Safety Checks
Before declaring your TCL wall mount complete, perform these critical safety verifications:
– Weight test: Apply 10 pounds of downward pressure at bottom edge
– Stability check: Gently shake TV side-to-side (no movement at mount points)
– Clearance verification: Ensure 3+ inches between wall and TV for ventilation
– Cable tension test: Verify cords don’t pull when adjusting mount
Never skip the second-person verification step—what looks secure from one angle may reveal instability from another perspective. If your TCL TV feels unstable after mounting, remove it immediately and recheck stud engagement before proceeding.

