
Installing your Cosmo wall mount range hood correctly transforms kitchen air quality by efficiently removing smoke, heat, and cooking odors. Whether you’re upgrading an old unit or installing your first range hood, proper setup ensures optimal performance and prevents common ventilation problems. This comprehensive guide walks you through every critical stage of installing your Cosmo wall mount range hood so you achieve professional results without costly mistakes.
Before you begin your installation journey, gather essential tools: power drill with bits, level, measuring tape, stud finder, screwdriver set, and appropriate wall anchors. Your Cosmo package should include mounting brackets, chimney pieces, and necessary hardware specific to your model. Having everything prepared prevents frustrating mid-installation stops and keeps your project moving smoothly toward completion.
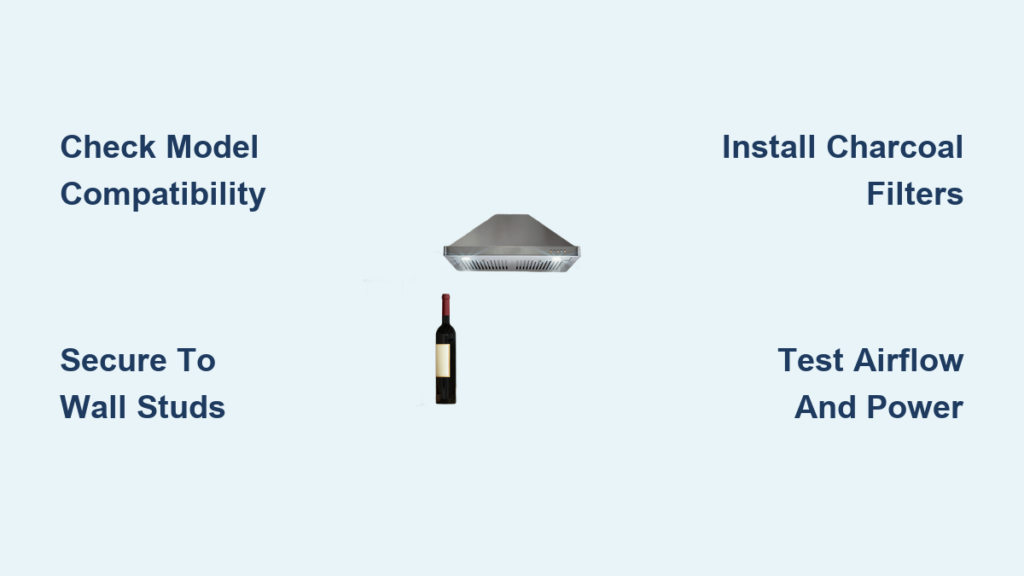
Verify Your Cosmo Model and Required Components
Your specific Cosmo model number determines which filters and installation parts you need, so identifying this first prevents compatibility issues that could derail your project.
Locate Critical Identification Information
Find your Cosmo range hood’s model and serial numbers before purchasing additional components—they’re typically stamped behind the filter compartment or on the mounting bracket plate. These identifiers determine which filter kits work with your unit, as different Cosmo models require specific filter designs. Using incompatible filters causes poor fitment and reduced ventilation efficiency.
Check that your installation kit contains all necessary parts: mounting bracket, chimney extension columns, ducting components (for ducted setups), and model-specific screws. For ductless operation, remember to purchase the CFK1-TM charcoal carbon filter kit separately, as it’s often sold independently despite being essential for proper recirculation.
Determine Your Ventilation Configuration
Your choice between ducted and ductless operation fundamentally shapes your installation process and determines which additional components you’ll need.
Install Ducted Configuration for Maximum Performance
A ducted Cosmo range hood vents cooking byproducts directly outdoors through properly installed ductwork, providing superior air removal compared to ductless models. This configuration requires access to an exterior wall or roof for duct termination and works best when you can create a short, straight duct run with minimal bends.
When installing ducted systems, use rigid or semi-rigid metal ducting instead of flexible plastic or foil options that restrict airflow and create fire hazards. Connect your duct run from the hood’s exhaust outlet to the exterior termination point, sealing all joints with high-temperature aluminum tape to prevent air leaks that reduce efficiency. For optimal performance, keep your duct run under 14 feet with no more than two 90-degree turns.
Set Up Ductless Configuration When Venting Outdoors Isn’t Possible
Ductless Cosmo range hoods filter and recirculate kitchen air after passing it through specialized charcoal filters—a perfect solution for apartments or kitchens without exterior access. This configuration requires proper charcoal filter installation to capture odors and particles before air returns to your kitchen space.
The CFK1-TM charcoal filter kit enables specific Cosmo models to operate ductlessly. These filters contain activated carbon that absorbs cooking odors and smoke particles after the initial grease filtration stage. Without correctly installed charcoal filters, your ductless hood cannot effectively clean kitchen air.
Secure the Mounting Bracket to Wall Studs
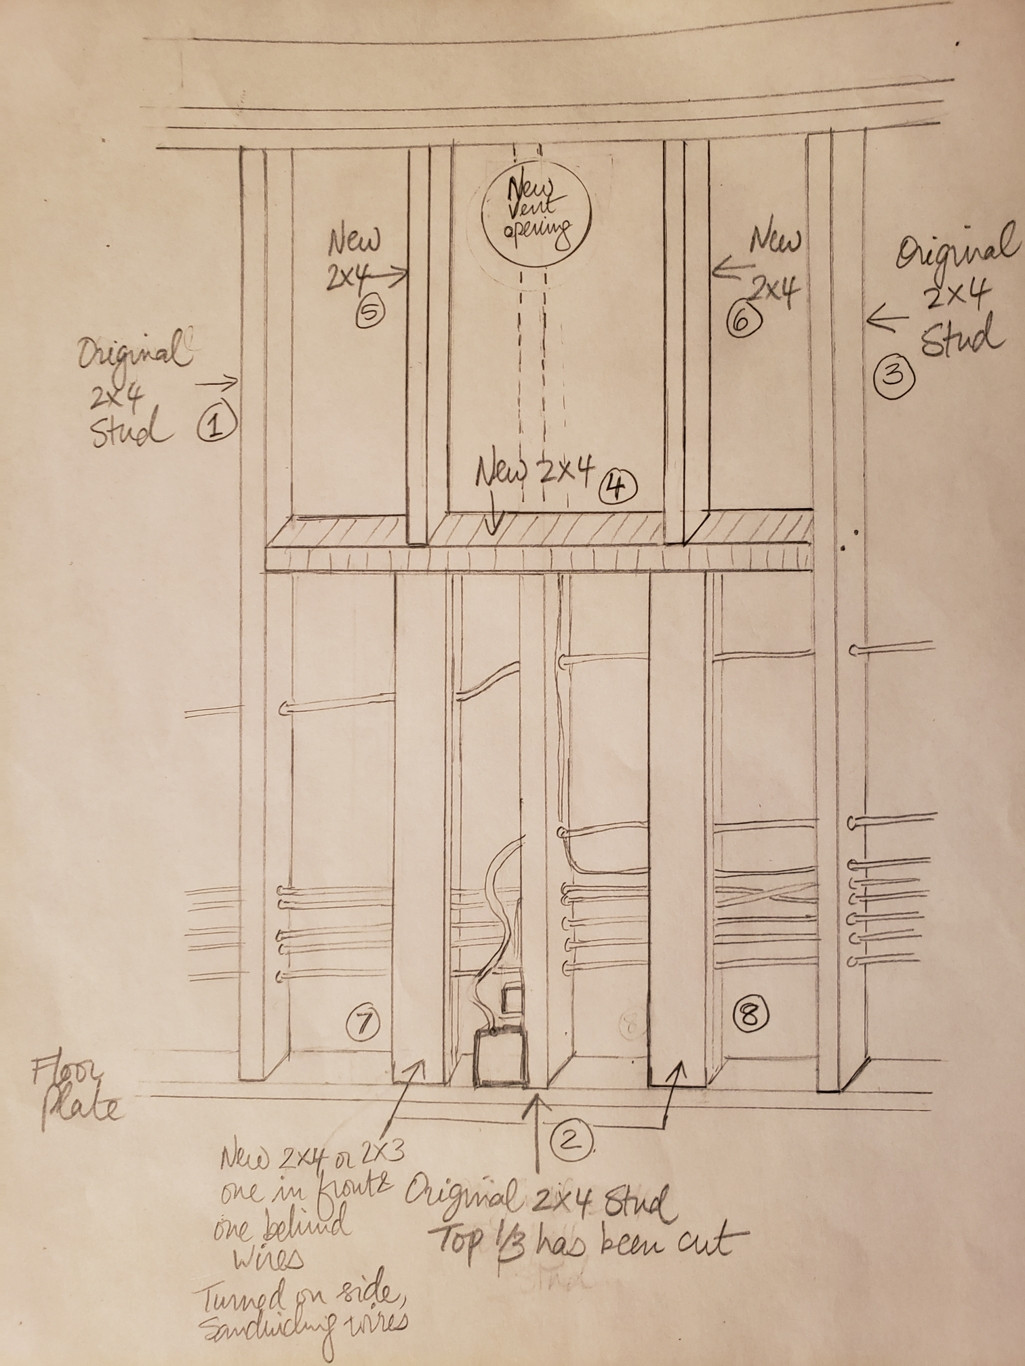
The mounting bracket bears your entire range hood’s weight, so proper installation here prevents dangerous failures and ensures years of reliable operation.
Position the provided template against your wall at the recommended height—typically 24-36 inches above your cooktop, though your model’s specifications take precedence. Use a level to ensure the template is perfectly horizontal, then mark your screw locations through the template holes. Critical safety note: The bracket must attach directly to wall studs whenever possible for adequate load-bearing capacity.
Drill appropriate pilot holes at your marked locations, then attach the mounting bracket using the provided screws. Tighten securely but avoid overtightening, which can strip screw holes. If stud alignment doesn’t match your template, use heavy-duty wall anchors rated for your hood’s weight (typically 50+ pounds). The bracket must be perfectly level and rock-solid—any instability here compromises your entire installation.
Mount Your Cosmo Range Hood Unit
With the bracket securely installed, it’s time to position your range hood—a step that often requires two people for safety and precision.
Carefully lift the range hood and engage it with the mounting bracket’s hooks or attachment points. Some models require partial screw engagement before final positioning, so consult your specific instructions. Once the hood is preliminary positioned, check that it’s level both front-to-back and side-to-side using your level.
Make micro-adjustments for perfect alignment, then fully tighten all mounting hardware according to manufacturer specifications. For dual-motor units or larger models, having a second person hold the hood prevents dangerous situations and ensures accurate placement. Double-check that the hood remains stable without shifting or wobbling before proceeding.
Complete Chimney and Ductwork Connections
The chimney sections create your range hood’s finished appearance while housing the exhaust pathway for removed air.
Extend the inner and outer chimney columns to your ceiling height, ensuring proper alignment and symmetry. Secure chimney sections using any provided set screws or locking mechanisms to prevent movement during operation. For ducted installations, connect your metal ductwork from the hood’s exhaust outlet to your exterior termination point.
Maintain downward or horizontal duct routing that allows gravity to assist airflow rather than fighting against it. Each duct connection should overlap by at least one inch and be sealed with high-temperature aluminum tape. Avoid this common mistake: Compressing ductwork or creating sharp bends that significantly restrict airflow and reduce ventilation effectiveness.
Connect Electrical Components Safely
Electrical connection requirements vary by model, with some Cosmo units requiring hardwiring and others featuring plug-in convenience.
Locate the electrical connection point, typically found at the top or back of the unit. Before making any connections, turn off power at the circuit breaker and verify it’s off using a voltage tester on the hood’s wiring points. For hardwired installations, connect the hood’s wires to a junction box following local electrical codes—match black wires to hot connections, white to neutral, and green/bare to ground. For plug-in models, confirm your outlet is accessible and properly rated before finalizing installation.
Install CFK1-TM Charcoal Filters for Ductless Operation
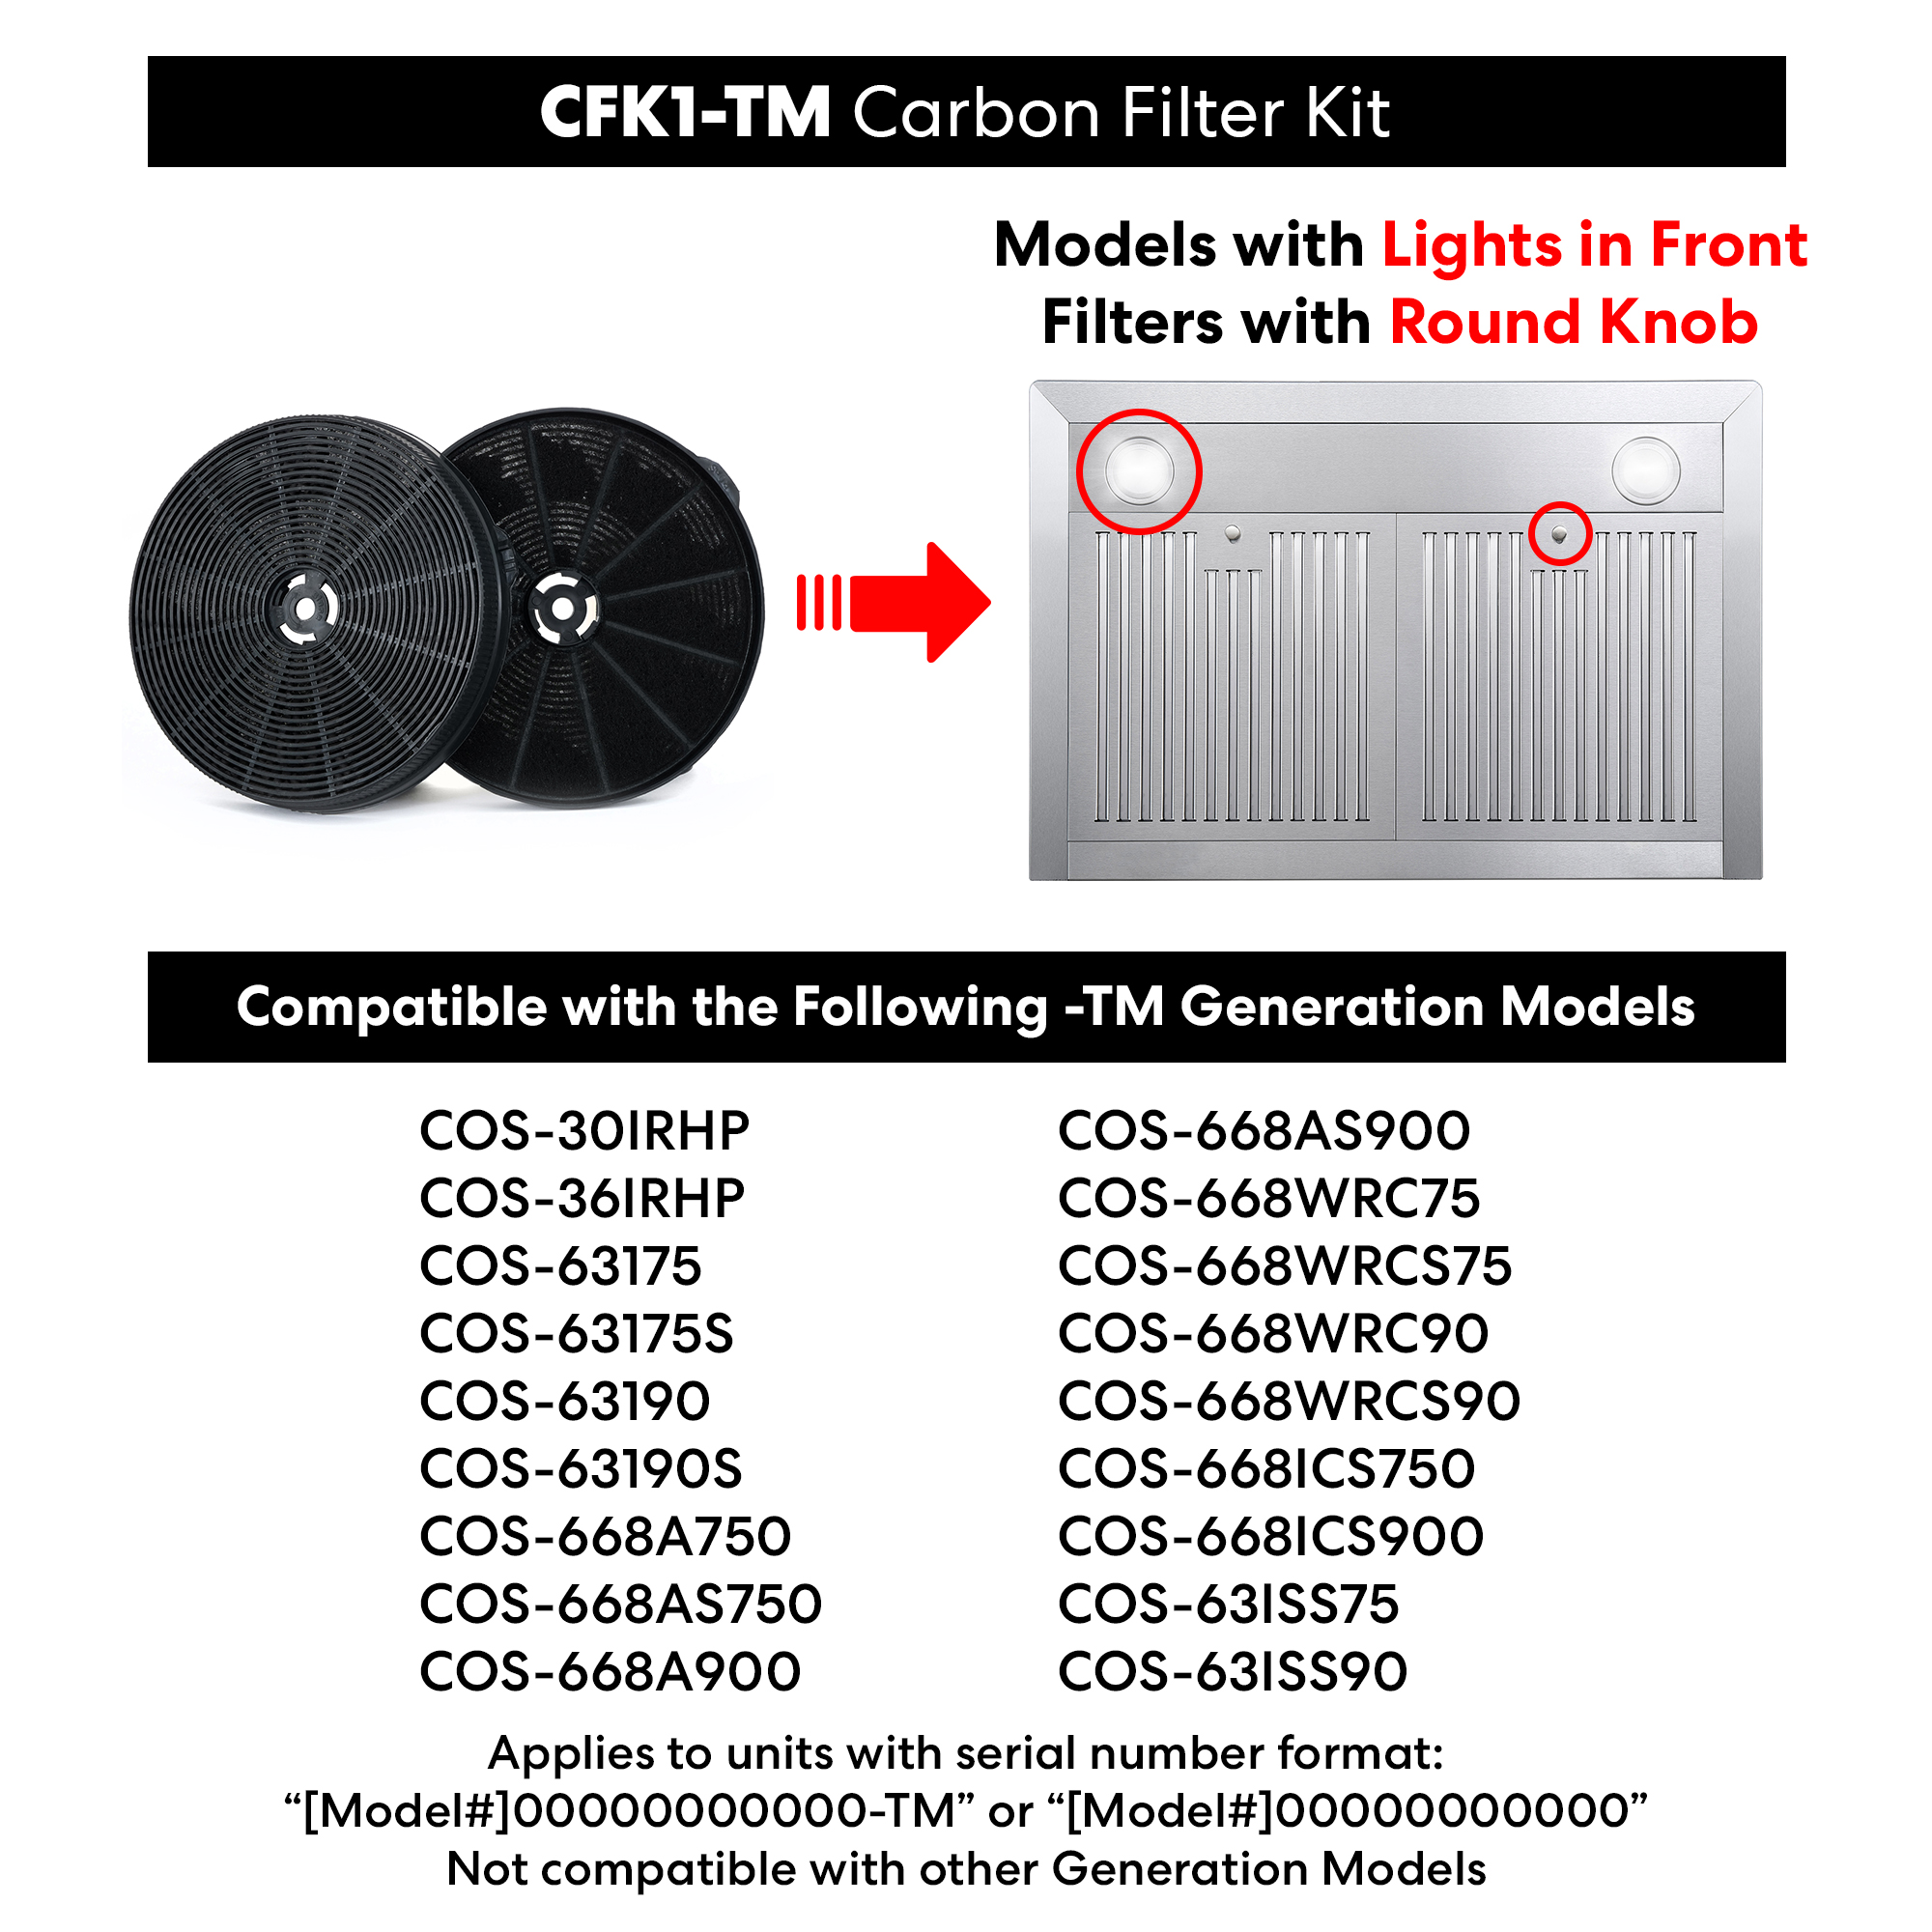
Ductless Cosmo range hoods require proper charcoal filter installation to enable effective air recirculation and odor removal.
Follow This Filter Installation Sequence
Remove the ARC-FLOW Baffle Filters by sliding them out or releasing retention clips depending on your model. These primary grease-capturing filters must be removed to access the motor housing where charcoal filters install. With baffle filters removed, locate the filter mounting positions on either side of the motor housing.
Take your CFK1-TM charcoal filter and align its mounting tabs with the corresponding slots. Gently twist the filter clockwise until it locks securely—you should feel or hear a distinct click confirming proper seating. Repeat for the opposite side, ensuring both filters are installed with correct orientation as indicated by any markings.
Once both charcoal filters are locked in place, reinstall the ARC-FLOW Baffle Filters in their original positions. Verify full engagement of any retention mechanisms—the baffle filters handle initial grease capture while charcoal filters remove odors and finer particles.
Critical Ductless Installation Requirements
For wall-mounted units operating ductlessly, the chimney vent holes must remain fully open and visible after installation. These vents allow filtered air to exit the hood and return to your kitchen. Blocking these openings significantly reduces performance and can cause dangerous motor overheating.
Ensure the chimney section’s exhaust pathway remains unobstructed by debris or packaging materials. Some models include removable plugs in the chimney section that must be taken out to enable proper airflow—verify these passages are clear before testing.
Test Your Installation Before Regular Use
Comprehensive testing prevents future problems by verifying all components work correctly before you rely on your range hood daily.
Restore power at the circuit breaker and remove any protective packaging from hood surfaces. Test all speed settings on the control panel, listening for smooth motor operation without unusual grinding or excessive vibration. Verify lighting functions correctly at all settings.
For ducted installations, check that you can feel strong airflow at the exterior termination point. Ductless configurations should produce visible, substantial airflow from the chimney vents at all speed settings. Address any weak airflow, unusual noises, or non-functioning components immediately before regular use.
Maintain Your Cosmo Range Hood for Longevity
Regular filter maintenance keeps your Cosmo wall mount range hood performing effectively throughout its lifespan.
The ARC-FLOW Baffle Filters require monthly removal and cleaning using warm water with mild detergent or dishwasher cleaning. Allow filters to dry completely before reinstalling—wet filters reduce grease capture efficiency. The CFK1-TM charcoal filters require complete replacement every 3-6 months as activated carbon becomes saturated and loses effectiveness. Monitor your hood’s odor removal performance as your primary indicator of filter saturation.
By following these installation steps and maintenance practices, your Cosmo wall mount range hood will provide reliable kitchen ventilation for years to come. Proper installation ensures you maximize your investment while protecting your kitchen air quality during every cooking session.

