
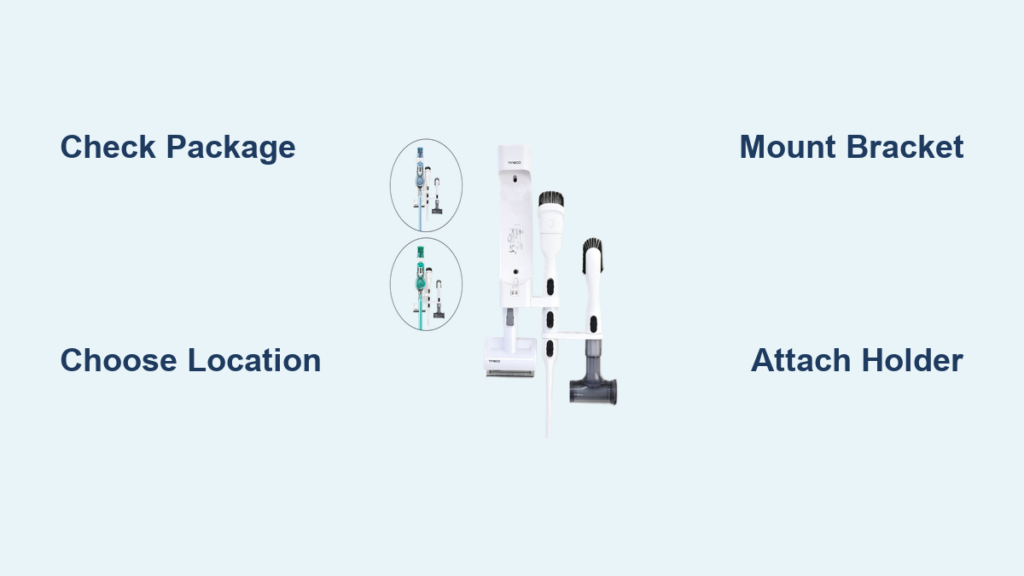
Tired of tripping over your cordless vacuum cleaner or struggling to find all your attachments? Installing a Tineco wall mount transforms your cleaning routine by freeing up valuable floor space and keeping all your vacuum components organized and within reach. The Tineco PURE ONE S12, S11, X, A11, and A10 series vacuums all benefit from this simple wall-mounted storage solution, which secures your vacuum and attachments against the wall instead of leaving them to clutter your floor or lean awkwardly in a closet. With the included mounting hardware and a few basic tools, most homeowners can complete this installation in under 30 minutes without professional assistance. This guide walks you through everything you need to know about how to install Tineco wall mount systems correctly and securely.
Before you begin mounting, take time to gather your tools and review the package contents. Understanding what comes in the box and assessing your wall surface ensures a smooth installation process from start to finish. A properly installed wall mount provides stable, long-term storage that keeps your vacuum ready for action whenever messes appear.
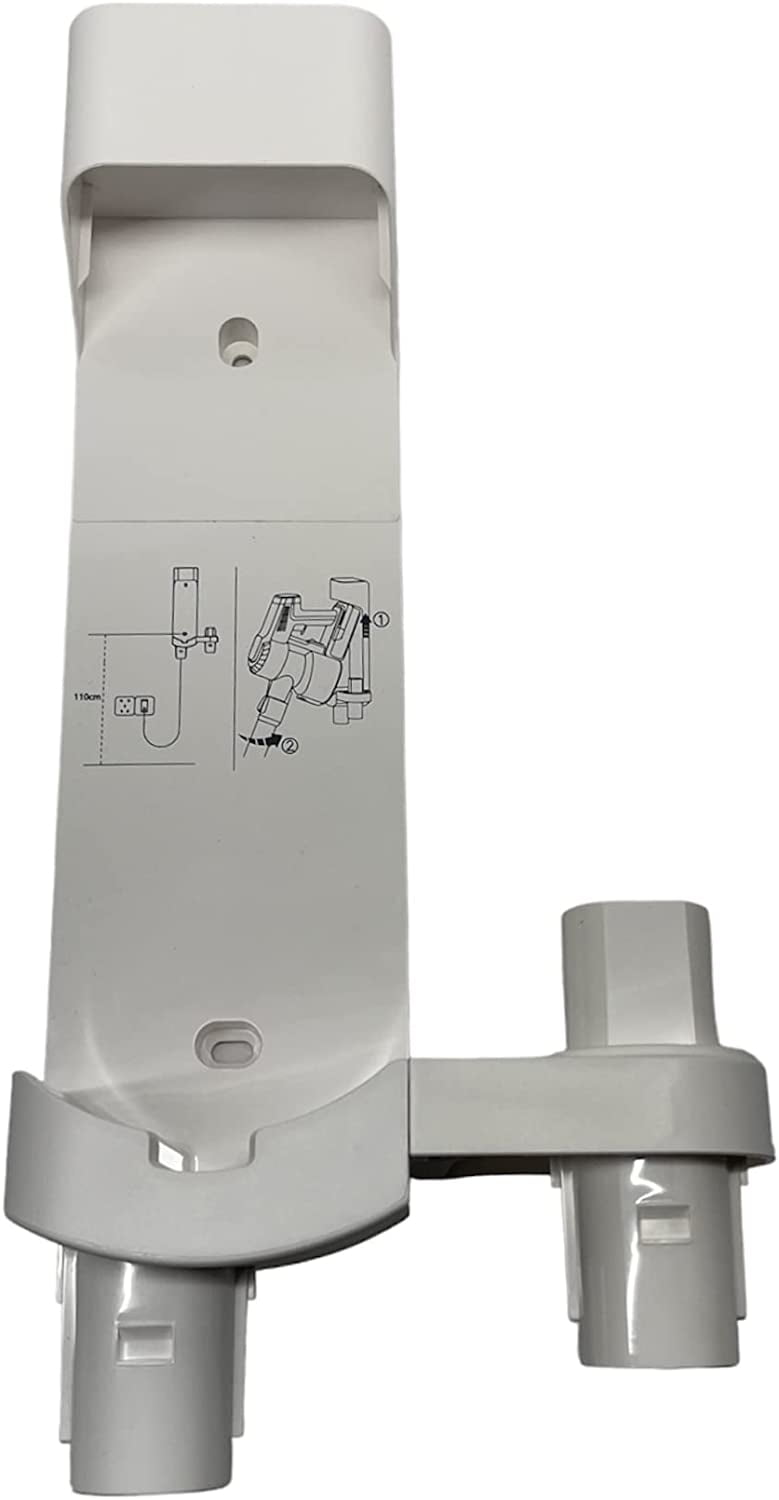
Verify Your Tineco Wall Mount Package Contents
Before installing your Tineco wall mount, verify that all components are present and in good condition. The package should include the wall mount accessory holder itself, a mounting bracket that serves as the primary connection point, two mounting screws for securing the bracket to your wall, and two wall anchors designed for hollow wall applications. Having all pieces on hand prevents mid-installation trips to the hardware store and ensures you can complete the project in one session.
The wall anchors included with your Tineco wall mount are essential for creating a secure hold in drywall, plaster, or hollow wall configurations. These anchors distribute the weight of your vacuum and its attachments across a larger area of the wall material, preventing the mounting screws from pulling out over time. If you’re mounting into solid wood studs, you may not need the anchors, but keeping them as backup hardware is wise for future adjustments or relocations.
Inspect each component for damage before proceeding. Check the mounting bracket for bent tabs or warped metal, and ensure the wall mount holder clicks securely onto the bracket when test-fitted. Damaged components compromise the security of your installation and may require replacement before continuing.
Select the Perfect Wall Mounting Location
Selecting the right location for your Tineco wall mount significantly impacts both functionality and aesthetics. The ideal spot provides comfortable access to all vacuum components while keeping the unit stable and secure against the wall. Consider mounting height carefully—the holder should sit at a height that allows the primary user to easily remove and return the vacuum without straining, typically chest to shoulder height for most adults.
Evaluate your wall surface before selecting a final placement. The included wall anchors work well for most hollow wall installations, including standard drywall and plaster surfaces. However, if you have the option to mount directly into wood wall studs, you’ll achieve maximum holding strength and eliminate concerns about anchor pull-out under the weight of a fully loaded vacuum. Use a stud finder to locate studs in your chosen wall area, and mark their positions with painter’s tape for easy reference during mounting.
Avoid mounting near heat sources, direct sunlight, or areas with excessive moisture. While the wall mount itself tolerates normal household humidity, prolonged exposure to damp conditions may affect both the mount’s hardware and your vacuum’s performance over time. Also consider traffic patterns in the room—mounting in a high-traffic area increases the risk of accidental bumps that could eventually loosen the installation or damage stored attachments.
Gather Essential Installation Tools
Prepare your installation area by gathering the necessary tools before starting. You’ll need a pencil for marking drill positions, a tape measure for accurate spacing, a level to ensure plumb alignment, a drill with appropriate bits for your wall type, and a screwdriver for driving the mounting screws. Having these tools ready keeps the how to install Tineco wall mount process efficient and prevents frustrating mid-project interruptions.
Clean your wall surface with a dry cloth to remove dust, cobwebs, or debris that could interfere with your markings or drilling accuracy. If you’re mounting on painted drywall, ensure the paint is fully cured before drilling—fresh paint may not hold anchors securely. For textured walls, you may need to lightly sand the mounting area to create a flat surface for bracket contact.
Mark your drill positions using the mounting bracket as a template. Hold the bracket against the wall at your chosen location, using your level to ensure it’s perfectly horizontal, then trace the screw holes with your pencil. Double-check these marks before drilling—adjusting position after drilling holes is significantly more difficult than making corrections before you begin.
Securely Mount the Tineco Bracket

Drill pilot holes at your marked positions using a bit slightly smaller than your wall anchors or mounting screws. For anchor installations, drill holes sized to accommodate the anchors snugly—typically 1/4 inch or 6mm for the anchors included with Tineco wall mounts. If mounting into studs, drill pilot holes sized appropriately for the screw threads to prevent wood splitting while ensuring solid engagement.
Insert wall anchors flush with the wall surface for hollow wall installations. Tap anchors gently with a hammer until they’re seated below the wall surface, creating a solid base for screw engagement. For stud mounting, skip the anchors entirely and proceed directly to screw installation, as the wood stud provides superior holding strength without anchor support.
Drive the mounting screws through the bracket’s screw holes and into your anchors or studs. Tighten screws firmly but avoid over-tightening, which can strip anchors or warp the bracket. The bracket should sit flush against the wall with no visible gaps or wobble when tested. Give the bracket a firm hand press to verify stability before proceeding—the bracket must not flex or shift under pressure.
Attach and Test the Wall Mount Holder
With the mounting bracket securely in place, attach the wall mount accessory holder according to your model’s design. Most Tineco wall mounts feature a hook-and-slot or clip-on mechanism where the holder slides onto the bracket and locks into place. Align the holder’s mounting points with the bracket’s corresponding features, then apply gentle downward pressure until you hear or feel the click of secure engagement.
Test the attachment by gently pulling down on the holder to confirm it won’t release accidentally. The holder should feel solid and stable, with no vertical play or side-to-side movement. If your holder doesn’t click securely, check for obstructions or alignment issues before attempting again—a misaligned installation compromises both stability and ease of use.
Once secured, organize your vacuum components in their designated positions. Each Tineco PURE ONE model has specific storage locations for the main unit, extension tubes, floor heads, and attachments. Placing everything in its proper spot ensures balanced weight distribution and makes your vacuum easier to grab and use during cleaning sessions.
Troubleshoot Common Tineco Mounting Problems
If your mounted holder feels loose despite following installation steps, the most likely cause is insufficient screw engagement. Remove the holder from the bracket, tighten mounting screws further, and test bracket stability before reattaching. For anchor installations, stripped or improperly sized anchors often cause loosening—removing old anchors and installing fresh ones usually resolves this issue.
The bracket not sitting flush against the wall typically indicates an uneven mounting surface or misaligned screw holes. Check for paint bulges, wallpaper edges, or wall texture interfering with bracket contact. In some cases, using thin washers behind bracket mounting points creates necessary clearance for flush seating.
When the wall mount holder doesn’t click securely onto the bracket, inspect both components for damage or debris. Bent bracket tabs or holder mounting points prevent proper engagement and may require component replacement. Clean any dust or debris from connection points, and ensure the holder’s orientation matches the bracket’s design—some mounts only engage in one specific direction.
Maintain Your Installed Tineco Wall Mount
Periodic maintenance keeps your Tineco wall mount performing reliably for years. Every few months, check mounting screw tightness and re-tighten if any loosening is detected. Vibration from vacuum use and normal household movement can gradually loosen fasteners, and proactive checking prevents catastrophic failures that drop your vacuum.
Keep mounting surfaces clean and free of dust accumulation that can interfere with holder engagement. A quick wipe with a dry cloth every few weeks maintains proper contact between bracket and holder. Also periodically check wall anchor condition, particularly in homes with humidity fluctuations or settling walls that stress anchor installations.
Inspect wall mount components for signs of wear, damage, or corrosion at least annually. Plastic components can become brittle over time with UV exposure, and metal components may corrode in damp environments. Replacing worn components before they fail prevents unexpected vacuum drops and potential damage to your vacuum or flooring.
Final Installation Verification Steps
After completing the how to install Tineco wall mount process, perform a thorough stability check before loading the mount with your vacuum and accessories. Gently push and pull on the mounted holder from various angles to confirm no movement at the bracket connection points. Any detected wobble or flex requires investigation—loose screws, misaligned brackets, or improperly seated anchors are common culprits.
Load your vacuum onto the mount and observe the bracket’s performance under actual use conditions. The mount should support the vacuum’s full weight without tilting, sagging, or pulling away from the wall. Pay particular attention to how the mount handles the extension tubes and floor heads, as these long components create leverage forces that stress mounting points differently than the main unit alone.
Test the removal and return process several times to ensure the holder releases and reattaches smoothly. Frequent use requires easy operation, so if you’re fighting to remove or replace components, recheck your alignment and bracket security. A properly installed mount becomes invisible in daily use—something you grab without thinking, not struggle with each time.
Installing a Tineco wall mount for your PURE ONE vacuum series provides immediate organization benefits and long-term convenience. The included hardware, straightforward design, and compatibility with multiple Tineco models make this a practical storage upgrade for any home. By selecting an appropriate location, properly preparing your wall, and following secure mounting procedures, you create a stable storage solution that keeps your vacuum ready for action while freeing up valuable floor space. Take time to verify your installation’s stability after completion, and schedule periodic maintenance checks to ensure years of reliable service from your wall-mounted cleaning station. With this knowledge of how to install Tineco wall mount systems correctly, you’ll enjoy a cleaner, more organized home with your vacuum always ready when you need it.

