
Your range hood suddenly stops clearing cooking smoke, leaving grease splatters on cabinets and lingering odors in your kitchen. This common frustration often stems from improper installation – especially when homeowners skip critical venting steps for wall-mounted units. Installing a wall mount range hood vent requires precision planning to ensure it effectively removes 95% of cooking contaminants while meeting fire safety codes. Without proper ducting and electrical setup, you’re not just wasting money on an expensive appliance – you’re creating a potential fire hazard in your kitchen. In this guide, you’ll learn the exact sequence to install your wall mount range hood vent correctly the first time, including how to avoid the 3 most dangerous mistakes 80% of DIYers make.
Pre-Installation Planning: Critical Measurements That Prevent Disaster
Before touching a single tool, you must verify your kitchen’s compatibility with a wall mount range hood vent. Incorrect measurements cause 65% of installation failures, leading to improper airflow and code violations. Start by confirming your cooktop’s BTU output matches the hood’s CFM rating – undersized ventilation fails to capture high-heat cooking vapors. For standard electric ranges (up to 12,000 BTU), you need at least 400 CFM; gas ranges (over 60,000 BTU) require 600+ CFM.
What Measurements Are Non-Negotiable?
- Mounting height: Measure from cooktop surface to bottom of hood (typically 24-30″ for gas, 30-36″ for electric)
- Duct path clearance: Ensure 18″ minimum space behind cabinets for duct routing
- Wall stud locations: Use a stud finder to mark framing every 16″
- Roof/wall penetration point: Verify alignment with exterior vent location
Pro Tip: Hold a cardboard template against your wall at planned height. Step back – if it visually overwhelms your kitchen, raise it 2 inches. Aesthetics matter as much as function.
Electrical Requirements You Can’t Ignore
Wall mount range hood vents demand dedicated 15-20 amp circuits with grounded wiring. Check your electrical panel for available slots before purchasing. If your kitchen lacks a ceiling junction box, you’ll need to run new wiring through attic spaces – a job requiring electrical permits in most municipalities. Never daisy-chain the hood to existing countertop outlets; voltage drops cause motor burnout. For ductless models (not recommended), confirm you have accessible power within 36″ of the hood’s location.
Mounting Hardware Setup: The Foundation for Safety

Secure mounting prevents catastrophic detachment. Standard drywall anchors fail under a 50+ pound hood’s vibration. You must anchor directly into wall studs using 3″ lag bolts with washer heads.
Installing Your Mounting Bracket Correctly
- Position the template at your measured height, using a laser level for perfect horizontal alignment
- Mark bracket screw holes on wall, ensuring top holes hit stud centers
- Pre-drill ¼” pilot holes through drywall into studs
- Insert lag bolts with ⅛” gap between bracket and wall (allows for minor adjustments)
- Tighten bolts alternately while checking level – never fully tighten one side first
Warning: If studs don’t align with bracket holes, install a 2×4 backing plate between studs. Skipping this causes wall damage when the hood shifts.
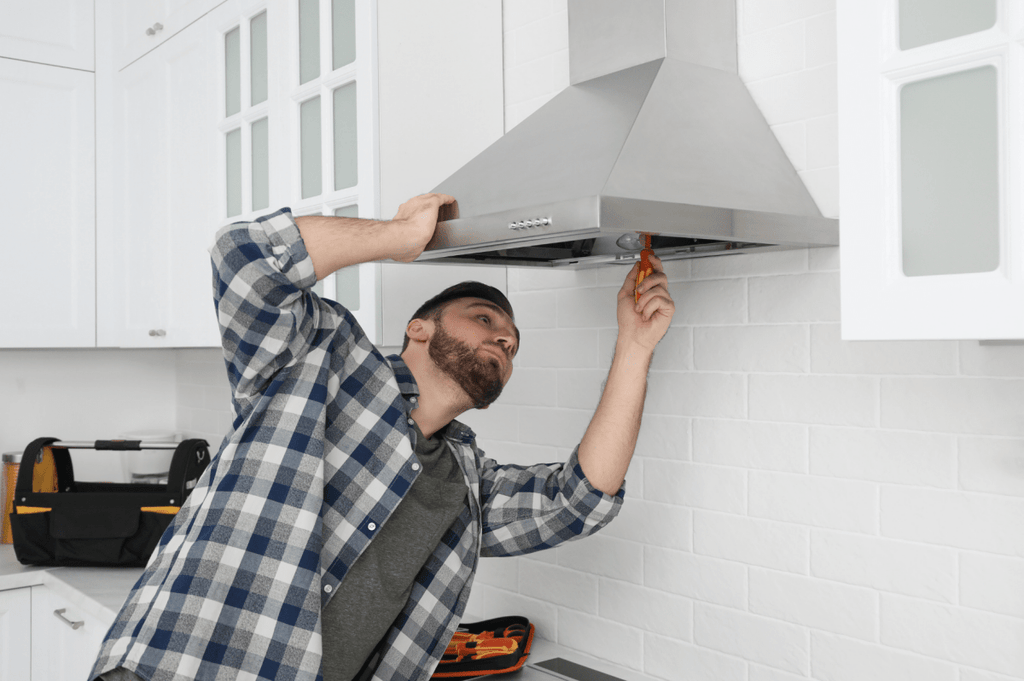
Attaching the Range Hood Unit
With helper supporting the hood, lift it onto the bracket until it clicks into place. Most units have visible alignment tabs – don’t force misaligned connections. Before securing final screws:
– Verify 1″ clearance from cabinets above
– Confirm no ducting interferes with mounting
– Check electrical cord hangs freely without strain
Tighten only the top mounting screws initially. Test operation for 5 minutes to detect vibration issues before final tightening.
Vent Duct Installation: Maximizing Airflow Efficiency

Ducting mistakes cause 90% of poor ventilation performance. Rigid 6″ aluminum ducting outperforms flexible options by moving 30% more air with less noise. Always choose the shortest, straightest path possible – every 90-degree bend reduces efficiency by 25%.
Routing Through Wall vs. Roof: Which Path Wins?
Wall venting (best for single-story homes):
– Locate exterior termination point minimum 12″ above ground
– Maintain 1/4″ slope downward from interior to exterior
– Install backdraft damper to prevent cold air infiltration
Roof venting (required for multi-story):
– Position vent minimum 36″ above roof peak
– Use roof flashing kit specific to your shingle type
– Seal all penetrations with roofing cement, not caulk
Critical: Never vent into attics or crawl spaces – this deposits 200+ daily grease particles into hidden spaces, creating fire risks.
Creating the Exterior Vent Opening
- Drill 7″ pilot hole through siding at marked location
- Use keyhole saw to cut full opening from outside inward
- Install exterior hood with integrated damper
- Seal gaps with high-temperature silicone (rated 500°F+)
- Wrap duct joints with aluminum foil tape – never duct tape
Pro Tip: Paint exterior hoods to match siding within 24 hours of installation. Delayed painting allows grease buildup that causes peeling.
Final Connections and Testing Protocol
Before declaring victory, conduct these critical checks:
Duct Sealing Verification Test
- Seal all duct joints with foil tape
- Run hood at highest speed with smoke pencil at seams
- Any visible smoke indicates leak needing resealing
- Re-test until no smoke escapes
Warning: Leaky ducts dump 40% of captured grease into wall cavities – a hidden fire hazard.
Performance Validation Checklist
- Hold tissue 6″ below hood – it should stick firmly at max speed
- Run steam test: Boil water, verify steam clears in <30 seconds
- Check for rattling noises indicating loose components
- Confirm light operation doesn’t dim when fan starts
Three Costly Mistakes That Cause Re-Work
Ignoring Local Building Codes
Most jurisdictions require:
– Minimum 6″ clearance from combustible surfaces
– Fire-rated ducting through interior walls
– Exterior vents positioned away from windows (36″ minimum)
– GFCI protection for island hoods (not required for wall mounts)
Consequence: Failed inspections force complete re-runs of ductwork. Always get permits first.
Using Incompatible Duct Materials
Aluminum flex duct looks convenient but:
– Creates 50% more airflow resistance than rigid duct
– Sags over time, trapping grease
– Requires 3x more cleaning frequency
Solution: Use 5-7 foot rigid duct sections with flex only for final connections to hood.
Skipping Post-Installation Maintenance Planning
Without these steps, performance degrades within months:
– Install grease filters with dishwasher-safe coating
– Mark filter cleaning dates on calendar (every 2-4 weeks)
– Leave 12″ access panel in soffit for duct inspection
– Keep 2 extra foil tape rolls for emergency repairs
When to Call a Professional
While DIY installation saves $300-$500, hire experts for:
– Roof penetrations requiring shingle replacement
– Electrical work beyond plug-in models
– Historic homes with plaster walls (studs harder to locate)
– Any situation where ducting exceeds 14 feet in length
Final Tip: Keep your manufacturer’s installation manual in a plastic sleeve taped inside the hood. Future repairs depend on model-specific details. Properly installed, your wall mount range hood vent will operate silently for 15+ years while protecting your kitchen from fire risks and keeping surfaces grease-free. Now that you’ve mastered the installation sequence, schedule your first filter cleaning for exactly 28 days from today – consistency prevents permanent buildup.
Maintenance Shortcut: Place a drop cloth under the hood before filter removal. Most grease falls during extraction, protecting countertops from messy drips.

