
Installing a trellis on brick transforms bland exterior walls into vibrant vertical gardens that provide privacy, shade, and visual interest to your outdoor space. Unlike mounting on wood surfaces where screws naturally grip the material, brick requires specialized techniques to ensure your trellis remains firmly attached through seasons of plant growth and weather exposure. Brick’s density and composition demand the right tools, proper anchors, and careful installation methods to prevent damage to your wall and create a secure foundation for climbing plants. This guide reveals the professional approach to mounting a trellis on brick that withstands years of use, from selecting the perfect anchors to waterproofing your installation against moisture damage.
Many homeowners attempt trellis installation only to face frustrating failures later—loose anchors, cracked brick, or worst of all, a collapsing structure that damages both wall and plants. The critical difference between success and failure lies in understanding brick’s unique properties and using techniques specifically designed for masonry surfaces. When done correctly, your trellis will support mature climbing plants through wind, rain, and seasonal changes while preserving your brick wall’s integrity. Follow these steps precisely to create an installation that looks professional and performs reliably for years.
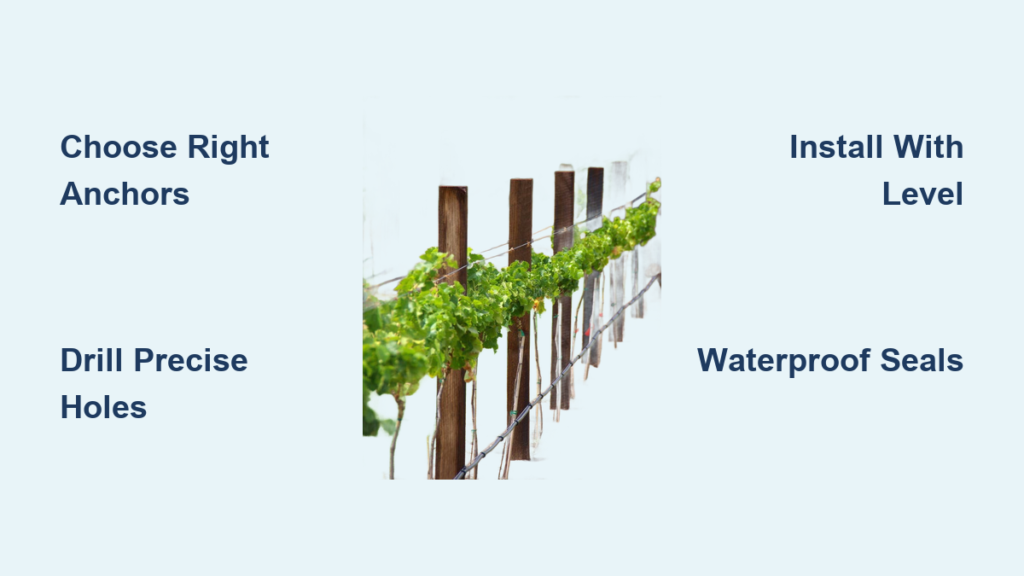
Choose the Right Anchors for Brick Stability

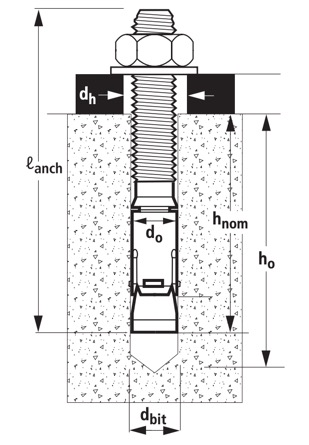
Selecting proper anchors makes or breaks your trellis installation on brick. Standard wall plugs designed for drywall or plaster fail completely in brick because they rely on material compression that brick won’t provide. Instead, sleeve anchors or expansion anchors create mechanical grip within the drilled hole, expanding against the brick walls as you tighten the central screw. For most residential applications, 3/16-inch to 1/4-inch diameter sleeve anchors provide sufficient holding power for typical trellis weights.
Match Anchor Size to Your Trellis Weight
The weight your trellis will eventually support determines the anchor specifications you need. Lightweight metal trellises with annual vines require smaller anchors (3/16-inch), while substantial wooden trellises supporting mature wisteria or climbing roses demand 1/4-inch or larger anchors. As a rule of thumb, each anchor should support at least twice the expected load—so if your fully planted trellis weighs 20 pounds, each anchor point should handle 40 pounds minimum.
Avoid Common Anchor Mistakes
Homeowners frequently make these critical errors when selecting anchors for brick:
– Using anchors designed for mortar joints (brick itself provides 3-5x more holding power)
– Choosing anchors too small for the anticipated plant weight
– Installing anchors in deteriorating or soft brick without reinforcement
– Skipping rubber washers that prevent water infiltration around screw heads
Prepare Your Brick Wall for Professional Results
Before drilling a single hole, inspect your brick wall thoroughly to identify potential challenges. Solid clay bricks from the last 50 years typically handle anchors well, but older, softer bricks may require larger anchors or additional mounting points. Check for brick veneer—a thin brick layer over wood framing—which requires different techniques than full-depth brick construction. A simple test: tap the wall with a screwdriver handle; solid brick produces a sharp “ping” sound while veneer creates a duller tone.
Essential Pre-Installation Checks
- Mortar condition: Crumbling mortar indicates potential wall instability requiring professional assessment
- Brick hardness: Harder bricks need slower drilling speeds to prevent bit overheating
- Wall composition: Verify whether you’re working with solid brick or brick veneer
- Obstructions: Check for wiring, pipes, or other hidden elements behind the wall surface
Drill Precise Pilot Holes Without Damaging Brick
Drilling into brick requires the right equipment and technique to avoid cracking or chipping. A hammer drill operating in hammer mode delivers the percussive action needed to penetrate brick efficiently without excessive force. Use a masonry bit sized exactly to match your anchor diameter—using a 1/4-inch anchor requires a 1/4-inch masonry bit. The resource document emphasizes using the correct bit size for anchors to ensure proper anchor expansion and grip within the hole.
Master the Drilling Technique
Hold the drill perpendicular to the wall surface and apply steady, moderate pressure—let the hammer action do the work rather than forcing the bit forward. Drilling at an angle creates misaligned holes that prevent proper anchor seating. Drill to a depth approximately 1/4 inch deeper than your anchor length to allow space for brick dust accumulation. Use a depth gauge on your drill or wrap masking tape around the bit at the desired depth as a visual reference.
Install Anchors with Proper Depth and Alignment
With pilot holes complete, cleaning them thoroughly becomes critical before inserting anchors. Blow compressed air into each hole or use a small wire brush to remove loose debris that would prevent anchors from seating fully. Insert sleeve anchors through your trellis mounting holes (or brackets) into the pilot holes, tapping gently with a hammer only if necessary to seat them flush with the brick surface.
Achieve Maximum Holding Power
Tighten each anchor gradually using the appropriate wrench size, stopping when you feel significant resistance. Over-tightening risks cracking the brick or stripping the anchor’s grip. Test each anchor by applying moderate pressure with your hand—properly installed anchors shouldn’t spin or move. If an anchor feels loose, remove it, drill a slightly larger hole, and install the next size up anchor rather than risking failure later.
Mount Your Trellis with Professional Precision
For installations larger than 3×3 feet, enlist a helper to position the trellis while you secure it. Hold the trellis against the wall with anchors protruding through mounting holes, then hand-tighten washers and nuts to temporarily secure it. Before final tightening, verify perfect levelness using a long spirit level—check both horizontally and vertically to ensure the trellis sits perfectly square against the wall.
Secure Mounting Sequence That Prevents Warping
Tighten fasteners in a diagonal pattern rather than sequentially around the perimeter. Start with top-left, then bottom-right, then top-right, then bottom-left, working inward toward the center. This sequence distributes tension evenly across the trellis structure, preventing the bowing or warping that occurs when one side bears full tension before the opposite side. After initial tightening, recheck levelness and make minor adjustments before final tightening.
Waterproof Your Installation Against Moisture Damage

Water infiltration represents the hidden threat that undermines many otherwise successful trellis installations. Install rubber or silicone washers beneath each screw head to create a watertight seal that prevents moisture from following the screw shaft into the brick. Apply exterior-grade silicone sealant around the perimeter where the trellis meets the brick wall, filling any gaps that could allow water to penetrate behind the mounting surface.
Advanced Waterproofing Techniques
For maximum protection in rainy climates or on north-facing walls:
– Create a 1/2-inch gap between trellis and wall using plastic spacers
– Install a small drip edge above the trellis to divert water away from the mounting surface
– Apply masonry water repellent to the brick surrounding the installation area
– Use stainless steel hardware exclusively to prevent rust stains from corroding fasteners
Maintain Your Trellis Installation for Long-Term Success
Even perfect installations require annual maintenance to remain secure. Schedule inspections each spring before the growing season begins, checking for:
– Loose fasteners that need retightening
– Cracks in brick surrounding anchor points
– Rust or corrosion on mounting hardware
– Excessive plant weight concentrated in specific areas
Address Problems Before They Worsen
Tighten any loose fasteners immediately—delaying allows movement that widens anchor holes and reduces holding power. If you notice brick spalling (surface crumbling) around anchors, remove the trellis and install larger anchors in new locations nearby. When pruning plants, redistribute weight evenly across the trellis structure to prevent concentrated stress on specific anchor points.
A properly mounted trellis on brick delivers years of gardening enjoyment while enhancing your home’s curb appeal. By selecting the right anchors, drilling precise holes, and implementing professional waterproofing techniques, you create an installation that withstands the combined forces of plant growth and weather exposure. Remember that brick demands respect—rushing the installation process leads to failures that damage both your wall and your gardening investment. Take time to follow each step carefully, and your vertical garden will thrive against its brick backdrop for seasons to come. For ongoing success, incorporate annual maintenance into your gardening routine, addressing minor issues before they become major problems that require complete reinstallation.

