
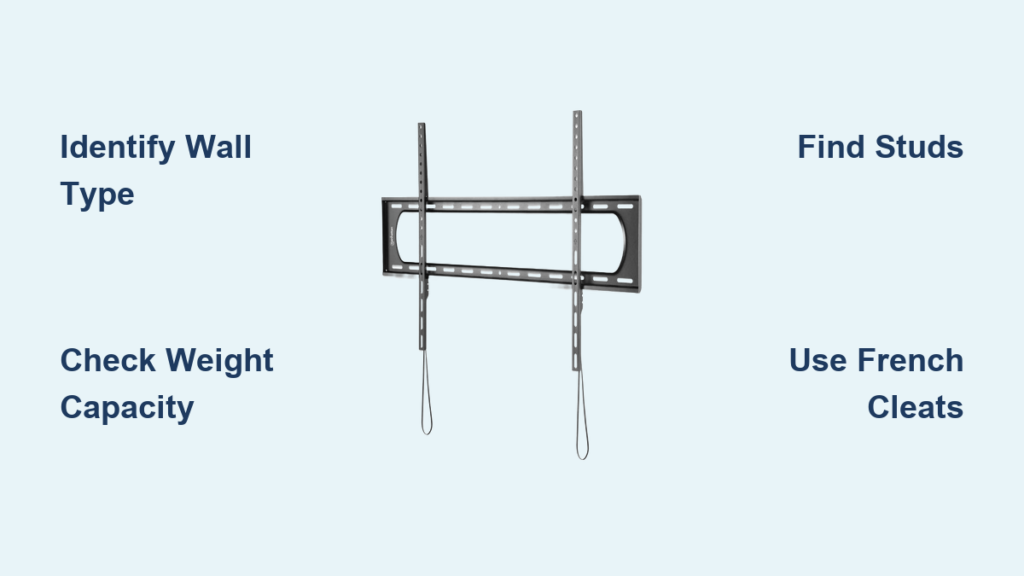
Mounting heavy items on a wall requires more than just a hammer and nails—you need strategic planning to avoid dangerous failures that damage walls or cause injury. Imagine proudly hanging that antique mirror only to hear a crash as it plummets to the floor, shattering on impact. This common scenario happens daily to homeowners who underestimate the complexity of secure wall mounting. The good news is that with the right approach, you can confidently hang mirrors, doors, shelves, or artwork weighing 50+ pounds without risking damage or safety hazards. This guide reveals exactly how to mount heavy items on a wall safely, covering everything from identifying your wall type to selecting hardware that won’t fail over time. By following these proven techniques, you’ll transform frustrating mounting projects into successful installations that last for years.
Identify Your Wall Type Before Drilling
Before purchasing a single anchor or screw, determine your wall composition—this step prevents 90% of mounting failures. Most homes built after the 1950s feature drywall, while older properties typically have plaster walls requiring different hardware solutions. The pushpin test provides instant results: gently press a pushpin into an inconspicuous wall area. If it slides in easily with minimal resistance, you have drywall. Plaster walls resist penetration, requiring noticeable force to insert the pin.
Why Wall Type Matters for Heavy Mounting
Drywall consists of a gypsum core sandwiched between paper layers, creating a deceptively fragile surface that needs specialized anchors for heavy loads. Plaster walls, though harder to penetrate, are more brittle and prone to cracking if you use standard drywall anchors. Never assume compatibility—always check product specifications to confirm whether hardware is designed for your specific wall type. Using plaster-rated anchors in drywall (or vice versa) creates weak points that compromise your entire installation.
Critical Mistake to Avoid
Many DIYers skip this identification step, resulting in anchors pulling through drywall or plaster crumbling around installation points. This seemingly minor oversight leads to damaged walls, wasted hardware, and potentially dangerous situations when heavy items detach unexpectedly.
Calculate Exact Weight to Select Proper Hardware

Guessing your item’s weight leads to catastrophic mounting failures—always determine the precise measurement before selecting hardware. Weigh smaller items using the bathroom scale method: step on the scale alone, then hold the item while weighing yourself again, and subtract the first number from the second. For larger items like antique doors or heavy mirrors, check manufacturer specifications or search online using the brand and model number.
Weight Rating Safety Margin
Hardware must support significantly more than your item’s actual weight. If your mirror weighs 45 pounds, select anchors rated for at least 75 pounds—never operate at maximum capacity. Dynamic forces from daily use, door slamming vibrations, or accidental bumps create additional stress that pushes hardware beyond static weight limits. Underestimating this factor causes anchors to gradually loosen over time until they fail completely.
Secure Heavy Items Directly to Wall Studs

When mounting heavy items on a wall, connecting to structural studs provides the most reliable support available. These vertical supports, typically spaced 16 inches apart (sometimes 24 inches), consist of 2×4 wood boards or steel framing in newer constructions. A single 2-inch screw driven into a wood stud safely supports up to 100 pounds—far exceeding what any anchor system can handle.
Locate Studs with Precision
Use an electronic stud finder to identify stud locations, verifying results by drilling a small pilot hole—you should feel solid resistance rather than hollow drywall. For wider items spanning multiple studs, apply painter’s tape horizontally across the wall at mounting height and mark stud positions with a pencil. This visual guide prevents misalignment during installation while keeping walls unmarked during planning.
Steel Stud Warning
Homes with steel framing require specialized fasteners—standard wood screws won’t grip adequately. If your stud finder indicates metal studs, purchase steel-specific anchors designed to bite into metal framing without stripping.
Install Heavy-Duty Drywall Anchors When Studs Don’t Align
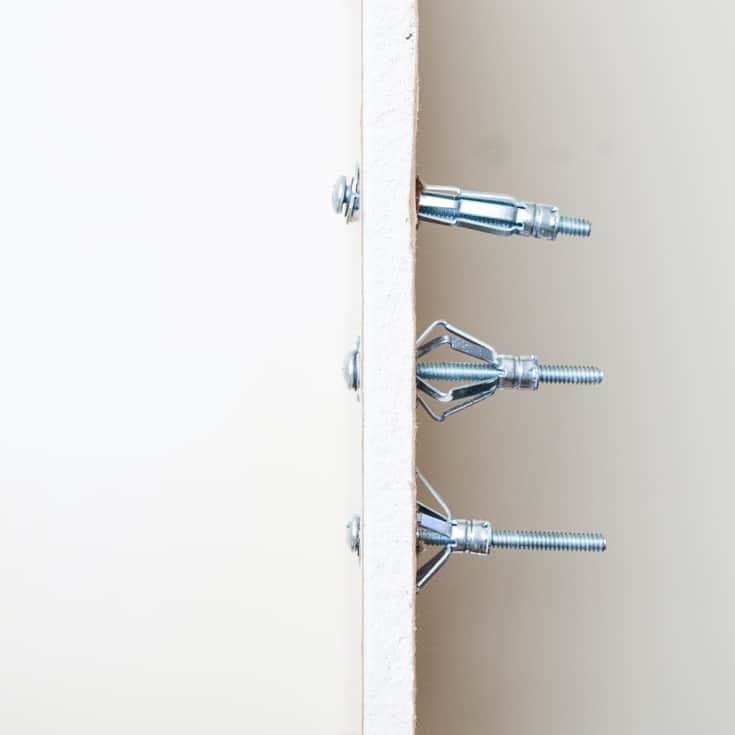
When mounting heavy items on a wall without convenient stud access, heavy-duty anchors distribute weight across a wider area to prevent pull-through failures. Molly bolts represent the strongest option for substantial loads, with large variants supporting up to 50 pounds. Their metal construction expands behind the wall surface when tightened, creating a secure hold that withstands significant weight.
Anchor Selection Guidelines
- Molly bolts: Best for 25-50 pound items requiring removability
- Plastic anchors: Suitable for 10-25 pound items where cost matters
- No-stud hooks: Support up to 200 pounds by distributing load across drywall
Always select anchors rated for at least 50% more than your item’s actual weight. Using anchors at maximum capacity leads to gradual loosening and eventual failure, especially for items experiencing regular movement or vibration.
Use French Cleats for Maximum Weight Capacity
For the heaviest items—mirrors exceeding 50 pounds, antique doors, or large windows—french cleats provide unmatched security through their interlocking design. These beveled mounting systems consist of two matching pieces that slide together, creating a mechanical lock that prevents separation under load.
Cleat Sizing for Different Weights
- 30-inch cleats: Support up to 300 pounds (ideal for large mirrors)
- 48-inch heavy cleats: Handle up to 100 pounds (perfect for medium-heavy artwork)
- 90-inch cleats: Rated for 750 pounds (necessary for doors or cabinets)
Aluminum cleats offer significant advantages over wood versions, providing greater strength while maintaining a thinner profile that keeps items flush against the wall. The installation process involves securing one cleat half to the wall (using stud mounting or heavy anchors) and the other half to your item’s back, then simply sliding them together—a technique that allows one person to safely hang extremely heavy objects.
Choose Specialized Hardware for Specific Applications
Different heavy items require tailored mounting solutions beyond basic anchors and cleats. Mega sawtooth hangers support up to 250 pounds for large mirrors and frames when paired with appropriate screws. Strap hangers distribute weight across multiple points using extended D-rings, making them ideal for ornate antique frames and 3D sculptures up to 200 pounds.
Furniture Safety Solutions
Anti-tip kits serve dual purposes by securely mounting heavy furniture while preventing dangerous tip-overs. These systems include steel wire and brackets rated up to 400 pounds, with child-safety features like locking pins that require deliberate force to disengage. Always install these kits according to manufacturer specifications—typically requiring attachment to both the furniture and wall studs for maximum security.
Apply Adhesive Strips Correctly for Temporary Mounting
When mounting heavy items on a wall isn’t an option due to rental restrictions, properly applied adhesive strips provide surprising holding power. Command strips work effectively for items up to 16 pounds when installed correctly—this critical step separates successful installations from frequent failures.
Proven Application Technique
Clean both wall and item surfaces with rubbing alcohol before application. Press each strip firmly for a full 30 seconds (not the recommended 10 seconds on packaging) to ensure maximum adhesion. For whiteboards or frequently handled items, reinforce corners with multiple strips and allow 24 hours for full bond development before use. Renters have successfully mounted lightweight shelves this way for over 18 months without damage.
Implement No-Hole Solutions for Strict Rental Situations
When even minimal wall damage violates your lease agreement, tension pole systems create freestanding support between floor and ceiling. These extendable poles support boards or flat items when arranged strategically, though they require solid surfaces (no drop ceilings or tile floors). For slightly more permanent solutions, Ook-style picture hooks use superfine steel nails leaving only pinhole marks easily covered with touch-up paint—they support up to 100 pounds while minimizing visible damage.
Temporary Display Alternatives
For truly no-contact mounting, consider easel-style displays that prop heavy items against the wall without any attachment. While not suitable for all situations, these provide damage-free alternatives for displaying artwork, mirrors, or decorative panels in rental properties where wall modifications are prohibited.
Follow Critical Installation Best Practices
Screws consistently outperform nails for wall mounting due to superior holding power and removability. Always use the shortest screw possible to avoid penetrating hidden electrical wires or plumbing—1-1/4 inch screws typically provide adequate drywall support without excessive penetration. When drilling pilot holes, hang a plastic bag secured with painter’s tape below your work area to catch debris, preventing drywall dust from scattering throughout your room.
Layout Planning Technique
Create paper templates of your items and tape them to the wall before making any holes. This visual planning step allows you to verify spacing, alignment, and overall appearance before committing to permanent installations—saving you from costly mistakes and unnecessary hole repairs. Always use a level during installation; even slightly crooked mounts become visually distracting over time and require additional correction work later.
Maintain Mounted Items to Prevent Future Failures
Regular maintenance checks prevent unexpected failures caused by wall settling, temperature changes, or vibration from daily use. Every six months, gently tug on mounted items to verify secure attachment and tighten any loose screws. Items mounted with french cleats benefit from easy inspection—the interlocking design allows safe removal without stressing the mounting system.
For renters preparing to move out, items mounted with monkey hooks or Ook-style nails leave minimal damage easily repaired with standard spackling compound. Photograph your wall before installation to remember exact hole locations for comprehensive repair. By matching your item’s weight and intended use with appropriate hardware, understanding your wall type, and following these professional installation techniques, you’ll successfully mount heavy items on any wall surface with confidence and security.

