
You’ve decided it’s time to remove that wall-mounted shower seat, but the thought of damaging your pristine tiles or struggling with corroded hardware has you hesitating. This common bathroom fixture removal challenge affects thousands of homeowners each year, especially when dealing with seats installed a decade or more ago. The good news is that with the right approach, you can successfully remove your wall-mounted shower seat without chipping tiles, cracking walls, or leaving behind stubborn hardware that complicates future installations. This guide reveals the exact process professional contractors use to remove even the most stubborn shower seats, including specialized techniques for dealing with corroded fasteners, hidden retention pins, and problematic mounting brackets.
The key to successful removal lies in understanding the specific mounting system your seat uses and having the right tools before you begin. Most removal disasters happen when homeowners rush in with only a screwdriver, only to discover hidden pins, corroded brackets, or damaged screw heads that require specialized extraction methods. By following the systematic approach outlined here, you’ll navigate each potential obstacle with confidence, preserving your bathroom surfaces and setting the stage for either a clean wall finish or seamless installation of a replacement seat.
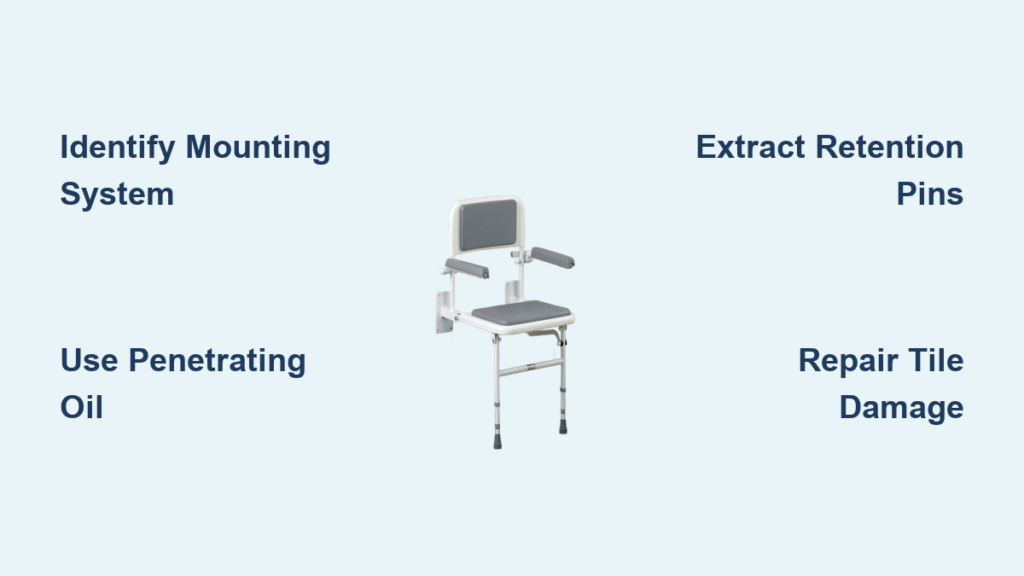
Identify Your Shower Seat Mounting System Before Starting
Before grabbing any tools, spend 5-10 minutes examining your shower seat installation to identify the specific mounting mechanism. Most wall-mounted shower seats use a two-part system with a hidden mounting plate secured to wall studs and a visible seat that attaches to this plate. The visible screws you see typically only secure decorative covers or secondary components—the primary mounting hardware remains concealed once installed.
Remove any chrome or plastic end caps by gently prying with a flathead screwdriver wrapped in tape to prevent scratching. These caps often hide steel retention pins that secure the seat arms to the mounting brackets. These pins may appear as hollow tubes with threaded interiors, though years of soap scum and corrosion can make them nearly invisible. Take multiple photos from different angles before proceeding—these images will serve as crucial references when reassembling or troubleshooting unexpected complications.
Pay special attention to whether your seat uses a friction-fit design where pins slide horizontally into brackets or a threaded system where pins screw into place. Friction-fit pins become nearly impossible to remove after years of compression and moisture exposure, while threaded pins often allow for more straightforward extraction if you can access the threads.
Essential Tools Checklist for Successful Shower Seat Removal
Gather these specific tools before starting to avoid mid-project delays and prevent damage to your bathroom surfaces:
- Complete screwdriver set (Phillips #1-3, flathead, Torx T15-T30)
- Hammer and nail pry bar (for pin extraction)
- Penetrating oil (WD-40 Specialist Penetrant or PB Blaster)
- Locking pliers (Vise-Grips) and adjustable wrenches
- Rotary tool (Dremel) with cutting and grinding attachments
- Four-inch angle grinder with metal-cutting discs (for stubborn seats)
- Shop vacuum with wet/dry capability
- Construction adhesive and 16-gauge metal backing plate (8″x24″)
Attempting removal without the proper tools risks stripping screw heads, cracking tiles, or leaving behind embedded hardware. The most common mistake is starting with only basic screwdrivers, only to discover you need penetrating oil for corroded pins or a rotary tool for damaged fasteners. If you encounter stripped screw heads, you’ll need either a screw extractor kit or the ability to create a new driver groove with your Dremel.
Remove Visible Screws Without Stripping Heads
Begin by applying penetrating oil to all visible screw heads and allowing it to work for 15-20 minutes. Corrosion often locks screws in place, and forcing them immediately risks stripping the heads. Work each screw in a back-and-forth motion while applying gentle pressure to break the corrosion seal before turning counterclockwise.
What to Do When Screw Heads Strip
If a screw head becomes stripped, try these proven techniques:
- Alternative driver approach: Test slightly different sized drivers—sometimes a #2 Phillips works better than a #3 on damaged heads
- Pliers grip method: Position locking pliers as close to the screw base as possible and turn while maintaining downward pressure
- Groove creation: Use your rotary tool to cut a new flathead slot across the damaged screw head
- Extraction screw method: Drill a small pilot hole and insert a left-handed extraction screw
For severely corroded screws, apply additional penetrating oil and wait several hours or overnight before attempting removal again. Patience here prevents costly damage to your wall structure.
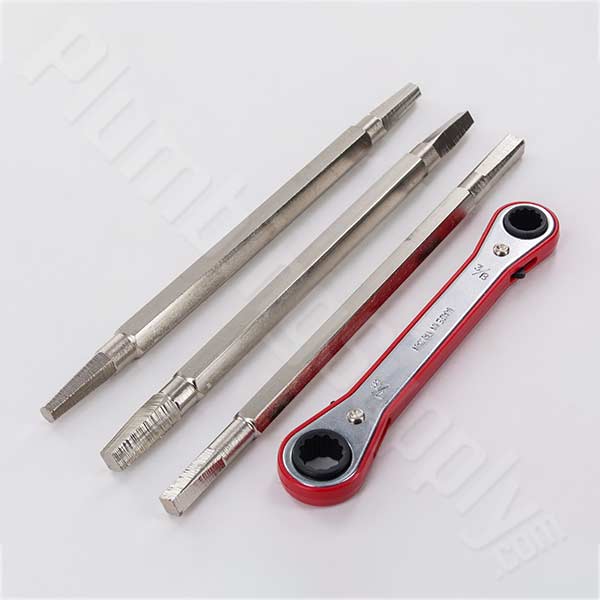
Extract Seized Retention Pins Using Professional Techniques
Most homeowners struggle with hidden retention pins that secure the seat arms to mounting brackets. These steel pins become nearly impossible to remove after years of moisture exposure and corrosion. The professional extraction technique requires:
- Select a #12 x 1-1/4″ hex head self-tapping screw
- Carefully thread it into the hollow end of the pin (if accessible)
- Position a flat pry bar against the screw head
- Strike the pry bar with a hammer to create outward force
Why This Pin Extraction Technique Works
This method converts linear hammer force into rotational movement through leverage. The extraction screw provides purchase where direct hammering would damage the pin, while the pry bar multiplies your force. Apply penetrating oil to the pin interface before starting and work the pin gradually—multiple hammer strikes are usually required.
If plastic covers block access to the pin ends, use your rotary tool to cut horizontally across the cover at pin level. This sacrifices the cover but provides direct access for oil application and hammer strikes. Once pins begin moving, continue working them outward until they can be grasped with pliers and fully removed.
Repair Tile Damage After Shower Seat Removal

Tile damage often reveals pre-existing problems that weren’t visible with the seat in place. Improper screw placement causes screws to bear against tile edges rather than wall studs, creating stress points that eventually crack the tile. When tiles crack during removal:
Tile Damage Assessment Guide
- Surface chips: Fill with matching epoxy if in visible areas
- Hairline cracks: Monitor for expansion but may not require immediate repair
- Structural cracks: Replace tile before installing new seat
- Enlarged screw holes: Drill slightly larger to find solid substrate
For severely damaged mounting areas, install a 16-gauge metal backing plate (8″x24″) adhered to the tile surface with construction adhesive. Drill this plate with matching hole patterns for your new seat to distribute load across multiple points, reducing stress on individual tiles.
Install Replacement Seat to Prevent Future Removal Issues
When selecting a replacement shower seat, prioritize models with features that simplify future maintenance:
- Threaded retention pins instead of friction-fit designs
- Weep holes at bracket bottom to prevent water accumulation
- Larger screw heads that resist pull-through
- Models like Mira fold-up seats known for reliable mounting systems
Apply bathroom-grade silicone caulk around mounting bracket edges during installation, but leave weep holes completely unobstructed—this critical step prevents water accumulation behind the fixture that causes corrosion. For maximum protection, seal around screw heads on the bracket’s backside before mounting.
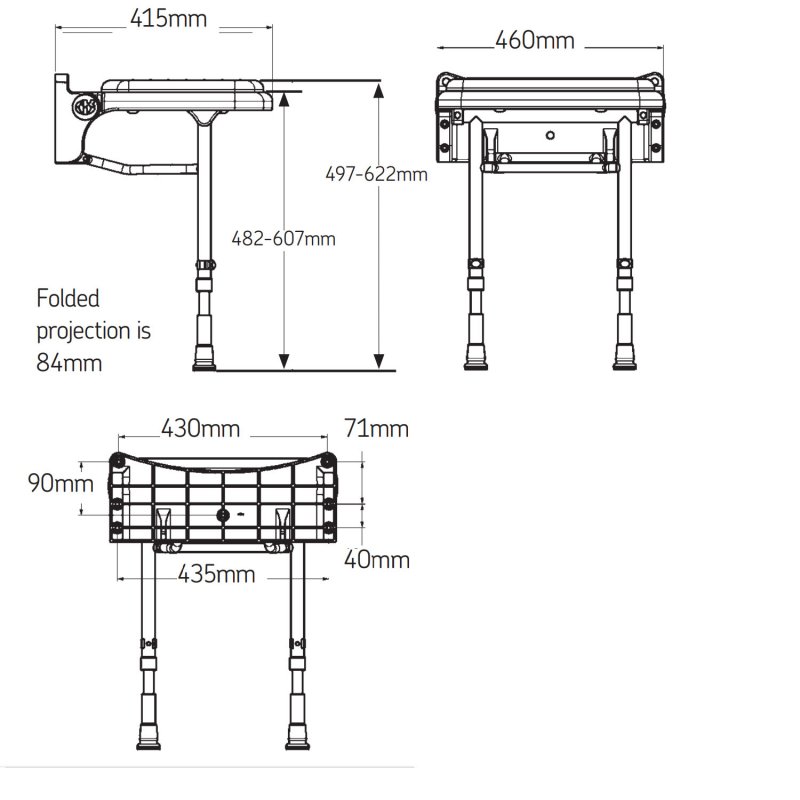
Measure existing hole patterns against new seat specifications before purchase. When patterns differ, the backing plate method allows adapting new seat patterns to existing wall conditions while providing additional reinforcement.
Prevent Future Removal Nightmares with Simple Maintenance
Establish this annual maintenance routine to prevent the corrosion and damage that complicates future removal:
- Remove cover plates to inspect retention pins for corrosion
- Clean accumulated soap scum and debris behind the seat
- Apply penetrating oil to accessible fasteners
- Check for seat movement or loosening during regular use
Tighten any loose fasteners immediately and investigate the cause of sudden movement—this often indicates water intrusion or structural issues requiring attention. Early detection of mounting problems allows repair before severe damage occurs, ensuring that the next removal proceeds smoothly without the complications that arise from neglected fixtures.
By following these precise techniques, you’ll successfully remove your wall-mounted shower seat while preserving your bathroom surfaces. Whether you’re preparing for a bathroom renovation or simply replacing an outdated fixture, this method ensures a clean removal that leaves your walls ready for whatever comes next—without the tile damage or frustration that plagues most DIY removal attempts.

