
Transforming your well-worn skateboard into striking wall art has become a popular way for skaters to preserve boards that carry personal significance while showcasing their passion. Whether you’ve got a single deck from your first setup, a collection of limited edition graphics, or a complete skateboard that conquered your local park, proper mounting techniques turn functional equipment into conversation-starting artwork. The process requires thoughtful planning, appropriate hardware selection, and attention to environmental factors that affect wooden decks over time. This guide walks through every approach—from simple DIY methods to museum-quality floating displays—so you can choose the solution that matches your space, skills, and the value of what you’re mounting.
Essential Tools for Wall Mounting
Before selecting a mounting method, gather the basic tools that handle most skateboard wall display projects. You’ll need your skateboard (deck-only or complete configuration), wall anchors and screws sized appropriately for your wall type, measuring tape, a pencil for marking, a level to ensure proper alignment, a drill for creating pilot holes, and a screwdriver for final installation. Most household toolkits contain these items already, making the project accessible without specialized equipment purchases.
For advanced display systems like the SnapDisplay, the process requires only a drill and screwdriver, with installation taking roughly 30 seconds once you’ve identified the mounting locations. The EasyFix hanging system simplifies things further, needing only a hammer to install the small hook component. Quality mounting hardware—such as surgical-quality acrylic combined with aircraft-grade steel in premium systems—justifies its cost through durability and the professional appearance it creates. When mounting complete skateboards rather than decks alone, factor in the additional weight of trucks and wheels, which requires more robust anchoring solutions and typically two mounting points instead of one.
Floating Mount System Installation
Floating mount systems represent the premium approach to skateboard wall display, creating that distinctive museum-quality aesthetic where boards appear suspended off the wall surface rather than lying flat against it. These systems combine surgical-quality acrylic with aircraft-grade steel components, engineered to provide precise fit while minimizing wall impact and maximizing visual impact. The floating effect draws attention to the deck’s graphics and design while keeping mounting hardware virtually invisible.
Installation begins with identifying appropriate mounting locations, either wall studs or positions for new anchors based on the system’s requirements. Install the mounting hardware ensuring level alignment across multiple mounting points—this step determines whether your final display looks professional or amateurish. For deck-only mounting, the system provides precise fit that creates the signature floating appearance. When mounting complete skateboards, the process requires removing inner truck hardware, pressing display bolts through the complete assembly (deck, riser, trucks), and securing with 8/32″ lock nuts instead of standard t-nuts for enhanced security. The result is a board that seems to float suspended off your wall, drawing admiring glances from anyone who enters the room.
Simple Hanging Strap Methods
The EasyFix hanging system offers the simplest and cleanest approach to mounting a skateboard on the wall, producing a nearly invisible presentation that comes included with certain display editions. This system operates through a two-step process: first, hammer a small hook into your wall at the designated height; second, attach a transparent nylon strap that slides the deck into place. The strap virtually disappears once the board is mounted, leaving your skateboard graphics as the clear focal point.
This approach suits beginners who want minimal wall damage and quick installation without specialized tools beyond a hammer. The transparent nylon strap accommodates the weight of most decks while remaining practically invisible from normal viewing distances. For those on a budget or renting spaces where extensive wall modifications aren’t permitted, the EasyFix system provides an effective compromise between aesthetics and practicality. The simplicity also means you can easily remove the board if you need to reconfigure your space or take it to a new location.
Direct Screw Mounting Steps

Direct screw mounting provides the most straightforward approach to wall mounting, requiring minimal specialized equipment while delivering reliable results. Begin by selecting an appropriate wall location that is visible, accessible, and structurally suitable for supporting your skateboard’s weight. Gather your hardware and tools, then decide whether to remove trucks and wheels—though keeping them attached provides more complete visual impact and immediately communicates “skateboard” to viewers.
Lay the skateboard flat on the ground and use your pencil to mark mounting hole positions on the wall, ensuring the nose faces upward in standard orientation. Use your level to verify that marks are even and properly aligned before proceeding. Drill pilot holes appropriate to your wall type (drywall requires anchors rated for the skateboard’s weight, concrete needs masonry anchors, wood studs offer the most secure mounting), then install your chosen anchors. Align the skateboard with your marks and insert screws through the deck’s existing mounting holes into the anchors, tightening securely without over-tightening to prevent cracking the wood. Double-check level and security, making any necessary adjustments. This method works particularly well for decks with existing mounting hardware you want to utilize, though the screws will be visible unless you select matching finishes.
Positioning Your Skateboard Display
Selecting the right wall space determines how effectively your mounted skateboard functions as décor. The location should be prominent and visible while ensuring the wall structure can support the weight—consider whether you’re mounting a lightweight deck or a complete skateboard with trucks and wheels attached. Avoid areas near moisture sources like bathrooms, where humidity extremes can damage the wood over time, and steer clear of direct sunlight, which fades graphics and artwork through UV exposure.
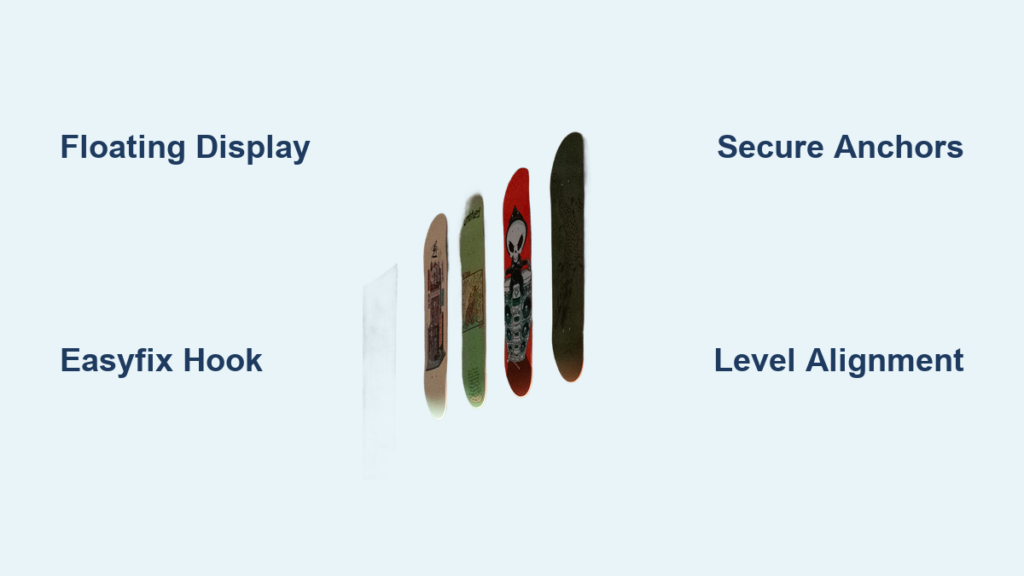
When displaying multiple decks in a polyptych arrangement, spacing between mounting points becomes critical for visual harmony. The recommended spacing between mounting hardware is 21 centimeters (about 8.27 inches) apart, with all holes aligned and perfectly level. A professional tip that applies across all mounting methods: lay everything out on your floor first before making any holes in the wall. This preliminary layout helps you visualize spacing, alignment, and overall composition before committing to permanent modifications. For EasyFix hangers specifically, nails should be positioned 15 centimeters (5.9 inches) higher than SnapDisplay mounting points to achieve proper alignment. Vertical orientation (nose facing up) remains the standard display position, though horizontal display requires two mounting units—one near the nose and another near the tail—to provide balanced support across the deck’s length.
Wall Type and Environmental Factors

Different wall types demand different anchoring approaches, and matching your hardware to your wall structure prevents display failures down the line. Drywall installations require anchors rated for your skateboard’s weight, with consideration given to whether you’re displaying a deck-only or complete configuration. Concrete walls need specialized masonry anchors and appropriate drilling techniques, while wood stud locations provide the most secure mounting points when you can locate them behind your drywall.
Environmental protection matters enormously for wooden skateboard decks, which respond to conditions much like valuable artwork. Direct sunlight should be avoided entirely—UV rays progressively fade colors and graphics, diminishing your display’s visual impact over months and years. Humidity extremes cause wood to expand and contract, potentially cracking decks or separating layers, making bathrooms and basements unsuitable locations. Temperature fluctuations stress the wood’s integrity, so stable interior environments work best. Treating your skateboard display with the same environmental considerations you’d give a painting or photograph ensures your wall mount remains attractive for years without damaging the underlying deck.
Display Complete Skateboards Properly

Mounting complete skateboards rather than bare decks introduces additional considerations around weight distribution and hardware requirements. Complete configurations weigh significantly more than decks alone, requiring two display units rather than one to adequately support the added mass of trucks, wheels, and hardware. The mounting process involves removing inner truck hardware, pressing display bolts through the complete assembly (deck, risers, trucks), and using lock nuts specifically recommended for enhanced security under the increased weight.
Standard t-nuts may loosen over time under the stress of a complete skateboard’s weight, making 8/32″ lock nuts the preferred choice for durable installations. When installing, ensure both mounting units are level with each other—the board’s appearance depends on this alignment, and an crooked display undermines the entire presentation. The floating mount system handles complete skateboards with the same elegant results as deck-only mounting, but the additional hardware requirements and weight capacity should factor into your planning and budget. For those wanting to display their complete setup exactly as it rolled out of the workshop, proper support isn’t optional—it’s essential for both aesthetics and safety.
Maintain Your Wall Display
Skateboard wall displays require minimal ongoing maintenance when properly installed, but periodic attention ensures your display stays secure and attractive over time. Every few months, check that mounting hardware remains tight and secure, particularly for complete skateboard displays where additional weight places continuous stress on mounting points. Environmental monitoring should confirm conditions remain stable—no increase in humidity, no new direct sunlight through changed window treatments, no temperature fluctuations from nearby HVAC vents or appliances.
Gentle cleaning with a soft cloth maintains your deck’s appearance without risking damage from water or detergents, which can harm wood, graphics, and any protective coatings. For enclosed displays or shadow boxes, occasional interior dusting prevents accumulation that diminishes visual presentation over time. Quality mounting systems are designed for long-term durability, with premium options backed by lifetime warranties covering defects and normal use wear. Regular inspection of mounting points, particularly in high-traffic areas or locations subject to vibration, helps identify potential issues before they become problems requiring major repair.
Transforming functional skateboards into lasting wall art celebrates both the cultural significance of skateboarding and the personal memories embodied in your boards. By choosing appropriate mounting hardware, preparing your wall properly, and maintaining the display over time, your mounted skateboard becomes a permanent feature that sparks conversation and preserves your skating history for years to come.

