
You’ve decided to replace that outdated wall mounted medicine cabinet, but before you start wrenching screws, understand that improper removal can leave your bathroom walls looking like Swiss cheese. Nearly 70% of DIYers attempting this project accidentally create larger holes than necessary, requiring extensive drywall repair. Whether you’re upgrading to a modern LED-lit cabinet or preparing for a complete bathroom renovation, knowing exactly how to remove a wall mounted medicine cabinet properly prevents costly mistakes and saves hours of wall repair work. This guide reveals the precise steps professionals use to extract these stubborn fixtures while preserving your wall integrity.
The hidden challenge with removing wall mounted medicine cabinets lies in their diverse mounting systems—some use visible screws, others rely on hidden clips, and many older models feature adhesive bonding that resists standard removal techniques. Rushing into this project without identifying your specific cabinet’s mounting method often results in cracked drywall, stripped screw heads, or even injury from a suddenly falling cabinet. Taking just 20 minutes to assess your situation and gather the right tools transforms this potentially destructive task into a controlled operation with minimal wall damage.
Essential Tools for Safe Medicine Cabinet Removal

Having the right equipment before starting prevents mid-project frustration and protects your bathroom surfaces. For most standard wall mounted medicine cabinets, gather these specific tools: a cordless drill with a screwdriver attachment and various bits (including a #2 Phillips and flathead), a 6-inch pry bar wrapped in painter’s tape, and a flexible putty knife for delicate separation work. A stud finder with depth detection helps locate mounting points behind the cabinet frame, while a flashlight with adjustable beam illuminates hidden fasteners.
Don’t overlook these specialized items that make the difference between clean removal and wall damage: a magnetic parts tray to catch falling screws, a utility knife with fresh blades for cutting paint bonds, and two thicknesses of cardboard (1/8-inch and 1/4-inch) to protect wall surfaces during prying. For cabinets with electrical components, include a non-contact voltage tester and wire nuts in your kit—never assume the power is off without testing. Keep a shop vacuum nearby to immediately collect drywall dust, preventing it from spreading throughout your bathroom.
Clear and Secure Your Bathroom Workspace
Before touching any tools, completely clear the sink area and surrounding zones of all items—this includes toiletries, towels, and anything within a 3-foot radius of the cabinet. Place a thick drop cloth on the floor, extending at least 2 feet beyond the cabinet’s footprint, then lay a piece of 1/4-inch plywood over it to protect against falling debris and provide stable footing for your ladder.
Verify electrical safety by turning off the bathroom circuit at your main panel, not just the wall switch. Test all potential power sources with your voltage tester—even if your cabinet lacks lights, some models contain wiring for adjacent fixtures. If your cabinet has plumbing connections for built-in dispensers, shut off the water supply and disconnect lines before beginning removal. Position your ladder at a 75-degree angle against a stable surface, never resting it against the cabinet itself, and ensure it extends three rungs above your working height for safe access.
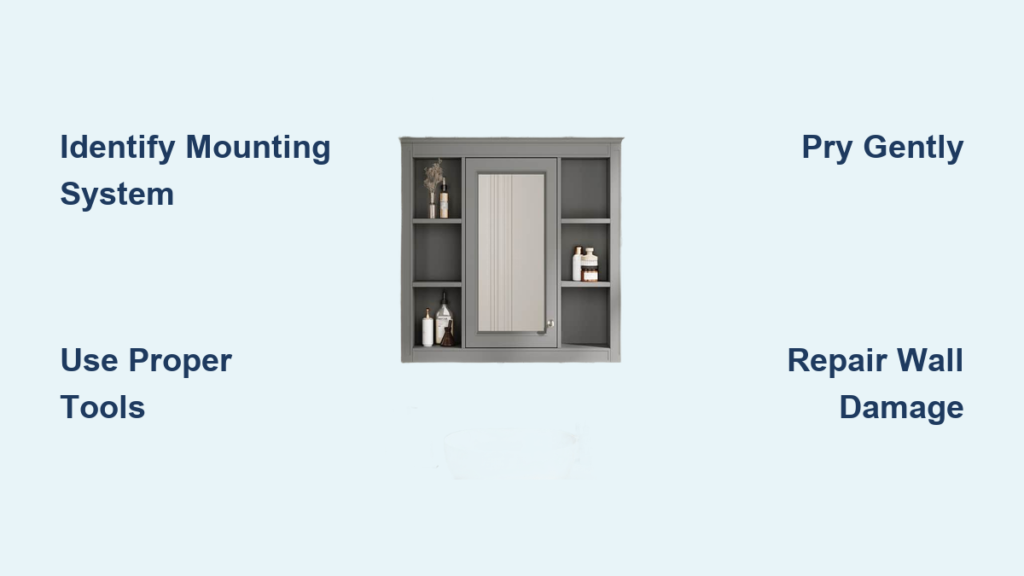
Identify Your Cabinet’s Mounting System Before Removing Screws
Most failed removal attempts happen because DIYers start unscrewing without understanding how the cabinet actually attaches to the wall. Open the cabinet doors fully and inspect the interior frame edges with your flashlight—many cabinets hide mounting screws behind decorative trim pieces that pop off with gentle pressure from a flathead screwdriver. Run your fingers along the top and bottom cabinet edges, feeling for small indentations that indicate concealed screw locations beneath paint or finish.
For recessed medicine cabinets, look for small access holes along the bottom interior edge—these often lead to mounting screws securing the cabinet to a metal rail system. Surface-mounted cabinets typically feature visible screws at the top corners where the frame meets the wall, but some models use side-mounted fasteners disguised as decorative elements. If you see no obvious screws, your cabinet likely uses a clip system—press firmly along the bottom edge while observing the top for movement that reveals hidden attachment points. Never remove any screws until you’ve positively identified all mounting locations.
What to Do When Screws Are Completely Hidden
Some modern medicine cabinets feature completely concealed mounting systems that require specific release techniques. For clip-mounted units, insert your putty knife at the bottom corner and gently pry outward while simultaneously pressing upward on the cabinet body—this releases the spring-loaded clips securing it to the wall. Cabinets with magnetic mounting systems require sliding the entire unit downward before pulling forward, as the magnets release from their tracks in this specific sequence.
When dealing with older cabinets installed with construction adhesive, look for hairline cracks around the perimeter that indicate where the adhesive bond has weakened over time. Apply heat from a hair dryer along these cracks for 30 seconds to soften the adhesive before attempting separation—this reduces the force needed and prevents large chunks of drywall from coming loose. For particularly stubborn adhesive bonds, carefully insert a utility knife along the seam and slice through the paint layer that often forms an additional seal between cabinet and wall.
Execute the Removal Without Wall Damage
With all mounting points identified, begin by loosening (not fully removing) any accessible screws one-quarter turn at a time in a star pattern—this prevents the cabinet from becoming uneven and binding against the wall. For cabinets secured with clips, place your pry bar between the bottom cabinet edge and wall, protected by 1/8-inch cardboard, and apply steady, even pressure while a helper supports the cabinet’s weight from below.
When encountering stripped screw heads, try these proven techniques before resorting to drill extraction: place a wide rubber band between the screwdriver tip and screw head for extra grip, or use a screw extractor bit designed specifically for stripped fasteners. For screws that spin but won’t release, the anchor has likely failed—insert a narrow putty knife behind the screw head and apply outward pressure while turning to break the anchor free from the wall.
Handling Stubborn Cabinets That Won’t Budge
If your medicine cabinet resists movement despite all fasteners being removed, it’s likely bonded by decades of paint and caulk. Run a utility knife around the entire perimeter, applying firm pressure to cut through all layers of sealant. Work in 6-inch sections, then insert your flexible putty knife into the cut and gently twist to create separation. Move systematically around the cabinet, increasing pressure gradually—never apply force to just one area, as this concentrates stress and causes drywall damage.
For cabinets mounted directly to studs with no visible fasteners, locate the stud positions with your stud finder and determine where screws likely penetrate the cabinet frame. Drill pilot holes through the cabinet back (in inconspicuous areas) to access these hidden screws, being careful not to damage any plumbing or electrical elements behind the wall. Insert an appropriately sized screwdriver through these pilot holes to release the mounting screws before attempting full removal.
Repair Wall Imperfections Left by Cabinet Removal

After successful removal, address the mounting holes and any damage using this professional repair sequence: first remove all remaining anchors and debris with needle-nose pliers, then clean the area with a damp cloth to remove dust. For standard screw holes, apply spackling compound with a 1.5-inch putty knife, pressing firmly to ensure complete filling. Allow to dry completely (usually 2-4 hours), then sand lightly with 120-grit sandpaper before applying a second thin coat.
When dealing with larger holes from wall anchors or damaged drywall, cut a piece of mesh drywall tape slightly larger than the hole and press it into place with joint compound. Apply compound over the tape in thin layers, feathering the edges outward to create a seamless transition with the surrounding wall. Allow each layer to dry completely before applying the next—typically two coats suffice for most medicine cabinet removal damage. For recessed cabinets, you may need to install backing strips between studs before patching to provide support for the new drywall patch.
Final Wall Preparation for Painting or New Installation
Before painting, prime the repaired area with a high-quality drywall primer-sealer to prevent flashing (where repairs show through paint). Apply with a small foam roller for even coverage, extending slightly beyond the repair onto undamaged wall surface. Allow primer to dry completely—usually 1-2 hours—then lightly sand with 220-grit sandpaper to ensure a smooth transition.
When matching existing paint, test your color on a small, inconspicuous area first—bathroom lighting often makes colors appear different than in natural light. Apply paint in thin, even coats using a high-quality synthetic brush for edges and a small roller for larger areas. For best results, extend painting at least 6 inches beyond the repair zone to create an invisible transition. If planning to install a new cabinet, wait at least 24 hours after final painting before mounting to ensure complete curing and prevent adhesion issues.
Removing a wall mounted medicine cabinet successfully hinges on understanding your specific mounting system before applying force. By methodically identifying fasteners, using proper prying techniques, and addressing wall damage immediately, you’ll transform what many consider a destructive process into a controlled operation with minimal repair work. The real victory comes when you’re ready to install your new fixture—smooth, undamaged walls provide the perfect foundation for your next bathroom upgrade without costly drywall repairs slowing your progress. Remember that patience during removal pays dividends in both immediate results and future renovation flexibility.

